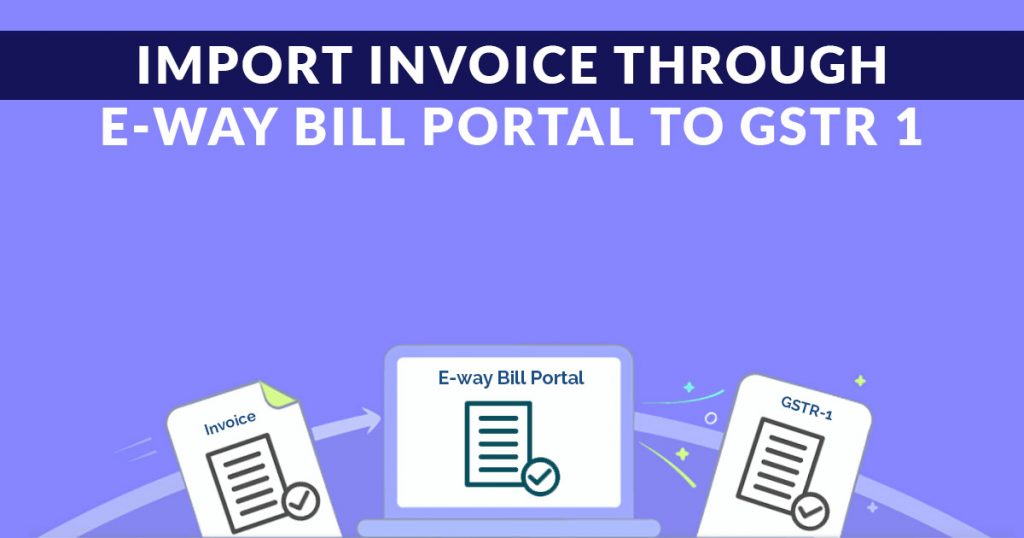
A taxpayer has to go through a string of formalities while filing a return but for his convenience government has introduced GST portal. This giant portal is a saviour, as all the forms related to the e-filling of GST are available here which facilitates a taxpayer to conveniently file the return using a single platform. One such option is elaborated in the write-up which facilitates the taxpayers to import the sale invoices generated from the e-way bill portal to prepare GSTR 1.
Taxpayers can utilize the feature which allows integration of the e-way bill management portal on to ewaybill.gst.gov.in and the GST Portal on gst.gov.in.
Need to Import Invoice Data from e-Way Bill Portal to GSTR-1
The traditional method was that the database of sales invoices was first uploaded on the e-way bill site and then once again was entered on GST portal at the time of filing GSTR 1 form. To rescue the case of double entering the same database and to save time and efforts, a feature is added to on the GSTR 1 filing dashboard “Import EWB data” for three tiles. The feature will even minimize the probability of making errors.
Details Required to Import e-way Bill Portal Data:
Below is the summary of the details a taxpayer needs to import to fill in the grids of GSTR-1:
- Tile A – Meant for business to business invoices. 4A,4B,4C,6B,6C B2B Invoices. Used for the transaction of goods or services between two GST registered persons.
- Tile B – Meant for the large invoices of transactions in between Business to Consumer. The consumer is either dealing outside the state or the value of the sale is Rs. 2,50,000. 5A,5B- B2C (Large) Invoices.
- Tile C – Meant for the HSN wise invoices. 12- A summary of HSN wise invoice details of outward supplies.
Extracting the Data from the e-Way Bill Site is Now Easy and Needs Just 2 Steps:
- For less than 50 invoices One can import the details directly to GSTR 1.
- For 50 invoices or more – One has to convert the data into a CSV format (a spreadsheet), then arrange the information and import on GSTR 1.
How to Import the e-Way Bill Invoices to GSTR 1 Form on GST Portal:
Step 1: Login with valid credentials on the GST Portal ➢ Go to GSTR 1 ➢ Go to “Returns Dashboard”.

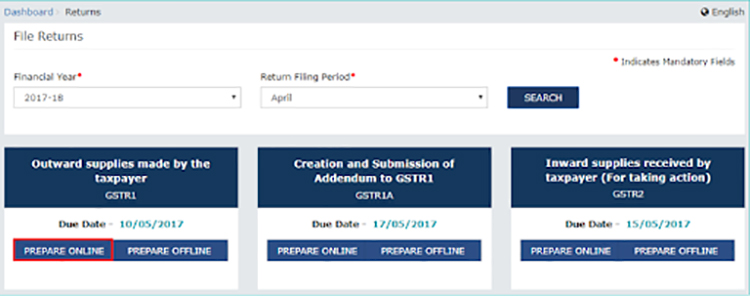
After landing on the ‘Returns Dashboard’, you need to fill the form asking for a month and financial year of the return period. Fill in the details and then click on ‘PREPARE ONLINE’
Read also: All About GST E-Invoice Generation System on Portal with Applicability
Step 2: Tile A, B and C will be visible on the screen. Choose the one in which you want to import the details of the invoices from the e-way bill site

Please Note: An invoice can be uploaded multiple times but the if you re-enter the already existing invoice, you will get a notification asking to replace the previous invoice. And if you click ‘Yes’, the existing invoice will be replaced with the new one.
Read also: How to Generate E-way Bill Via Online or SMS?
Step 3: Finally you need to upload the invoice data into your selected tile A, B or C and continue to file GSTR 1. Import B2B invoices in Tile A, B2CL invoices into Tile B and HSN wise details of the invoices in Tile C.
Step-wise Guidance to Import Three Types of E-Way Bill invoices in Form GSTR – 1
- To import B2B invoices in Form GSTR 1
- To import B2CL invoices in Form GSTR 1
- To import HSN wise summary of invoices in Form GSTR 1
To import B2B invoices in Form GSTR – 1
- All the three tiles will be visible in front of you on the screen. Go to Tile A i.e. “4A, 4B, 4C, 6B, 6C – B2B Invoices” and click on ‘IMPORT EWB DATA’ tab.
- You will land on the page asking you the number of invoices you have to import. If the number is less than 50 then you can directly import the invoices.
3.1. (IF) the number of invoices is less than 50, you must follow the sub-steps:
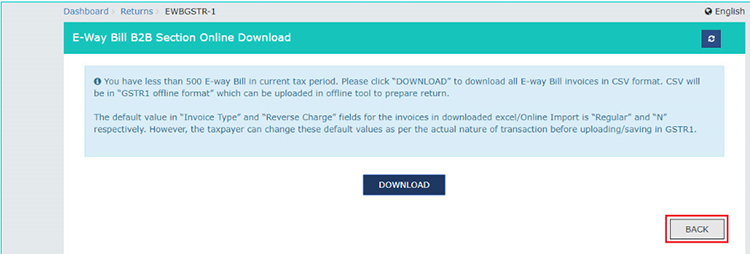
- Tick mark the ‘Select All’ option to select all the invoices you want to import ➢ click on the ‘Download’ tab to convert the invoices in .csv format.
- Click on ‘IMPORT’ tab to import the CSV file.
- A notification will appear on the screen informing that the selected invoices will overwrite the current GSTR 1 data. By clicking ‘OK’ you will confirm and proceed further.
- There will be a pop-up having a confirmation message. Close the box and proceed.
- A few moments later, the import history table will flash on the screen and below the window, the status will turn to “Processed”.
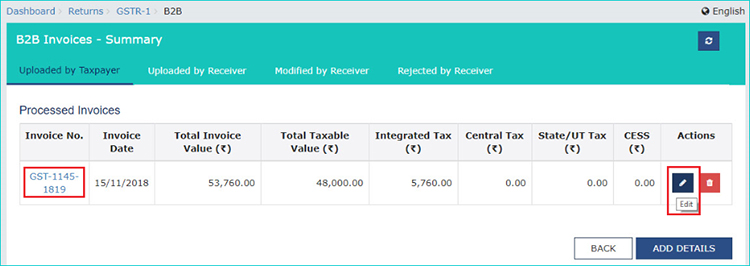
- You can now see the details of the imported invoices on the Tile A (B2B) same as following.
- Go through all the details visible under Tile A, in case of any alterations click on the hyperlink provided and edit the details, confirm the details and move ahead to the next level to file GSTR-1.
3.2. (IF) The number of invoices is more than 50 but less than 500, you must follow the below sub-steps:
- Tickmark the ‘Select All’ option to select all the invoices you want to import ➢ click on the ‘Download’ tab to convert the invoices in CSV format.
- Open the CSV file and cross-check all the details before importing the file to Form GSTR-1. An excel file can also be updated by using an ‘Offline Utility’.
- Further, follow the steps for uploading the excel file as mentioned in the last.
3.3. (IF) The number of invoices is more than 500, you must follow the below sub-steps:
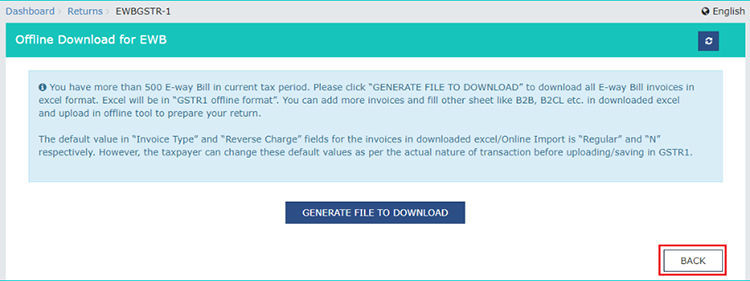
- Click on the tab ‘Generate File to Download’
- You will see a notification asking you to wait for 20 mins.
- 20 mins later, a link will be there for you to download the file in the zipped folder.
- You need to download the Zipped Folder and extract the file in excel format.
- Open the excel file having all the B2B invoice details. Then cross-check the details to avoid any errors. You can even make corrections in the excel file (if needed)
- Further, follow the steps for uploading the excel file as mentioned in the last.
To import B2CL invoices in Form GSTR – 1
- Heading towards Tile B “5A, 5B – B2C (Large) Invoices” meant for B2CL invoices. Click on the ‘Import EWB Data’ tab visible underneath.
- You will land on the page asking you the number of invoices you have to import. If the number is less than 50 then you can directly import the invoices. (refer to step 3.1 of B2B invoices)
3.1. If the number of invoices is more than 50 but less than 500:
- Click on ‘Download’ to get the file converted into CSV format.
- Cross-check all the details and edit in the excel file (if needed).
- Further, follow the steps for uploading the excel file as mentioned in the last.
3.2. If the number of invoices is more than 500:
- Click on the tab ‘Generate File to Download’
- You will see a notification asking you to wait for 20 mins.
- 20 mins later, a link will be there for you to download the file in the zipped folder.
- You need to download the Zipped Folder and extract the file in excel format.
- Open the excel file having all the B2B invoice details. Then cross-check the details to avoid any errors. You can even make corrections in the excel file (if needed)
- Further, follow the steps for uploading the excel file as mentioned in the last.
To import HSN wise summary of invoices in Form GSTR – 1

- Heading towards Tile C “12 – HSN-wise-summary of outward supplies”. Meant for HSN wise summary of invoices.
- Click on the ‘Import EWB Data’ tab visible underneath.
3.1. If the number of invoices is less than 50, the following page will flash on the screen
- Click on the ‘download’ tab visible in the bottom of the table to extract the file in .cvs format.
- Cross-check the details in the downloaded excel file.
- Further, follow the steps for uploading the excel file as mentioned in the last.
3.2 If the number of invoices is more than 50 but less than 500:
- Click on the ‘download’ tab visible in the bottom of the table to extract the HSN file in .cvs format.
- Cross-check the details in the downloaded excel file.
- Further, follow the steps for uploading the excel file as mentioned in the last.
3.3 If the number of invoices is more than 500:
- Click on the tab ‘Generate File to Download’
- You will see a notification asking you to wait for 20 mins.
- 20 mins later, a link will be there for you to download the file in the zipped folder.
- You need to download the Zipped Folder and extract the file in excel format.
- Open the excel file having all the B2B invoice details. Then cross-check the details to avoid any errors. You can even make corrections in the excel file (if needed)
- Further, follow the steps for uploading the excel file as mentioned in the last.
Step-wise Guidance to Import the Downloaded Excel Worksheet to GSTR-1

As mentioned above, downloading is required when the invoice database contains more than 50 entries. Option for importing the database directly to the Form GSTR-1 is not available in such cases.
Below are the ways by which you can import the ‘downloaded excel file’ to its destination i.e. Form GSTR-1 Below are the ways by which you can import the ‘downloaded excel file’ to its destination i.e. Form GSTR-1:
There are two ways to do so:
First: Importing the excel spreadsheet via ‘Offline Utility’ tool
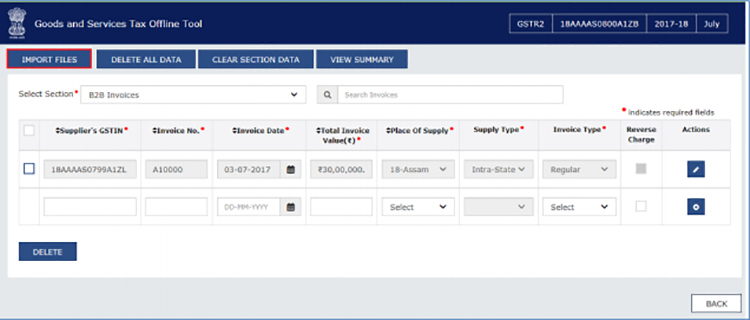
- Import the excel file and convert it in the format (as shown in the image below).
- Click on the ‘Import Files’ option visible on the returns offline tool.
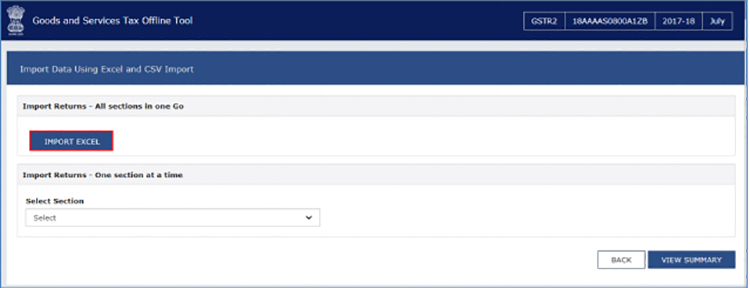
- Click on ‘Import Excel’ option to browse and select the file.
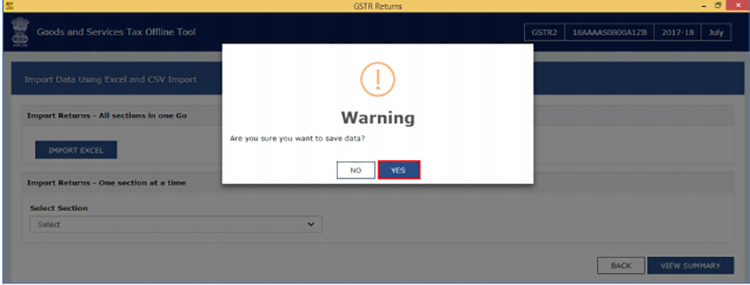
- To move ahead click on Yes option. You will receive a notification informing you that your import is successful.
- Go to the ‘Back’ option .to view all the invoices entered in the table. The reference image is given below. Uploaded data can be re-edited from here using edit options as shown below.
Second: Copy and Paste the database from excel spreadsheet:
- Convert the downloaded excel spreadsheet in the mentioned return format and copy-paste the headings along with the data from the spreadsheet.
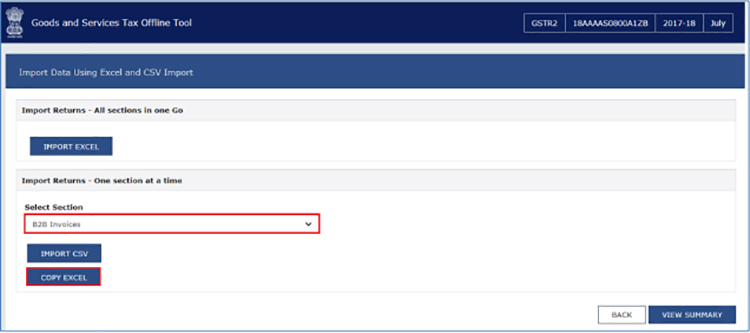
- Click on the ‘Import Files’ option visible on the returns offline tool and then press copy excel.
- You will receive a notification informing you that your import is successful. The excel will get uploaded on the screen.
Guidelines to Upload Missing Invoices
Online – The process for online uploading of missing invoices is the same as uploading the fresh ones to GSTR-1.
Offline – You can use either of the three options. Firstly, you can import the missing invoices in the valid format. Secondly, you can prepare the excel file in the valid format and lastly, invoice data can be imported from .csv format and a file can be created in JSON.


