The MCA LLP 5 form serves as a vital compliance requirement mandated by the Limited Liability Partnership (LLP) Act of 2008. This form is essential for officially documenting any changes to the name of an LLP, ensuring that such modifications are legally and appropriately recorded.
By submitting the Limited Liability Partnership Form 5, LLPs not only enhance the transparency and accuracy of their official records but also protect the interests of all stakeholders involved.
The LLP 5 form must be submitted within 30 days, along with the required details, including the current name and LLP Identification Number (LLPIN), the proposed new name, a copy of the resolution for the name change, and information regarding any penalties or liabilities, if applicable.
Here, we have published a post describing the LLP 5 filing process using Gen Complaw software.
Steps to File MCA LLP 5 Form By Gen CompLaw Software
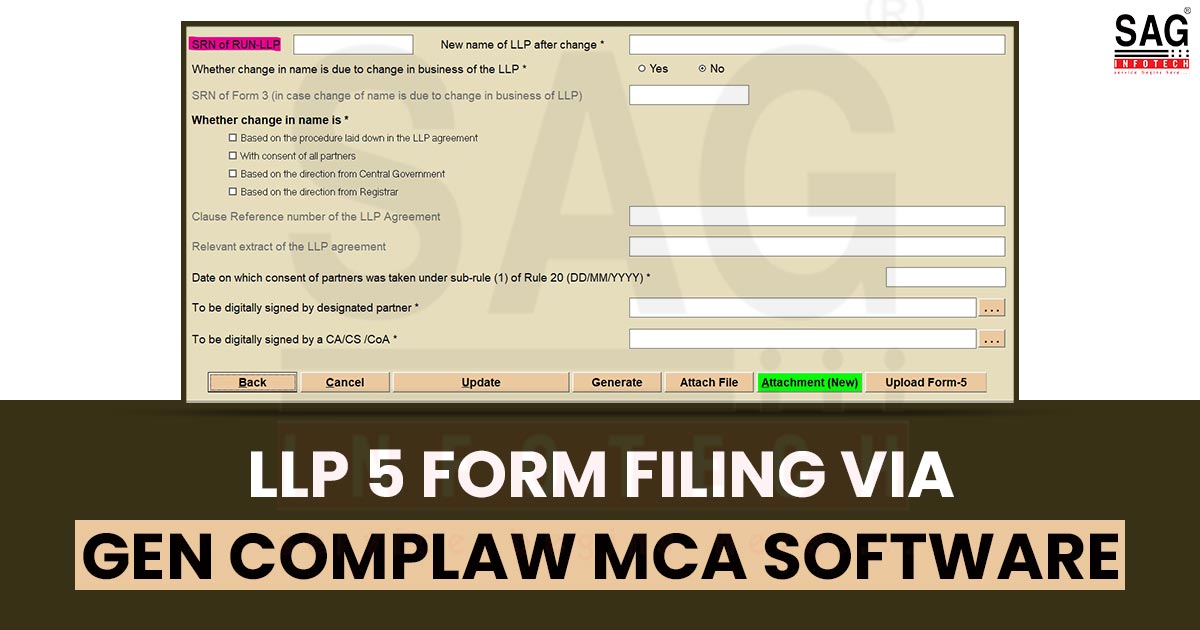
Step 1. First, install the ‘Gen Complaw software’ and move the cursor to the ‘LLP option’.
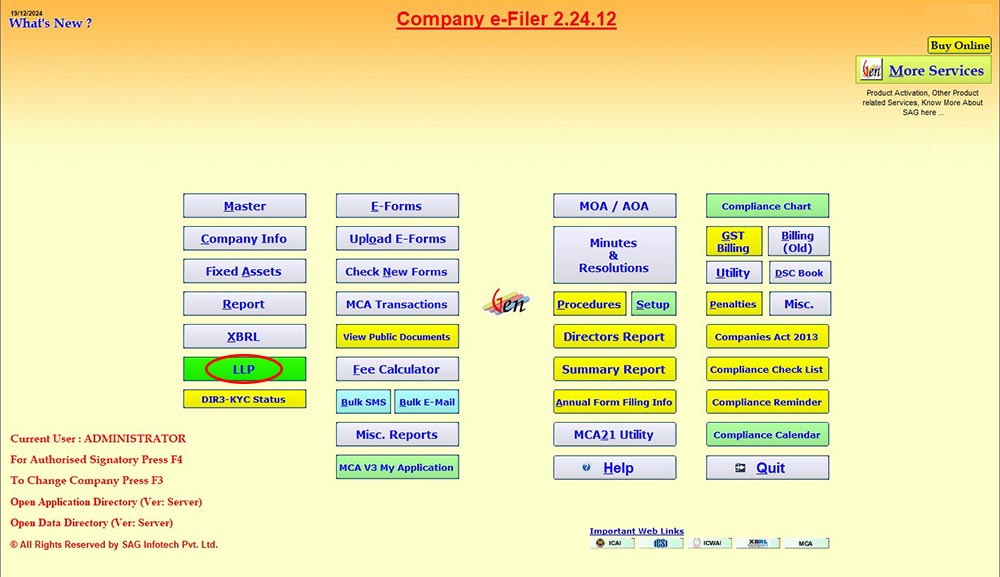
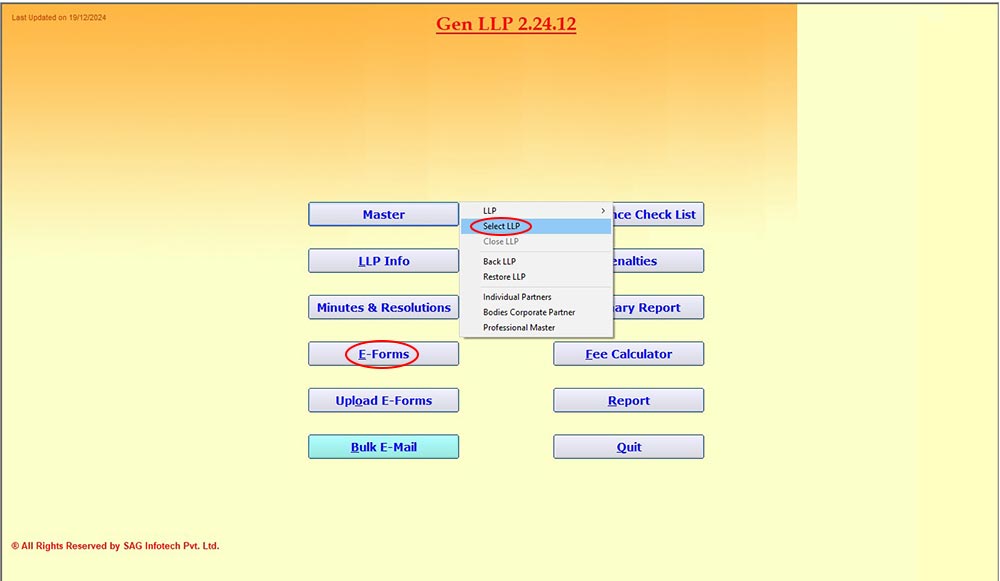
Step 2. After clicking on the LLP, move the cursor to Master > Select LLP > then Company.
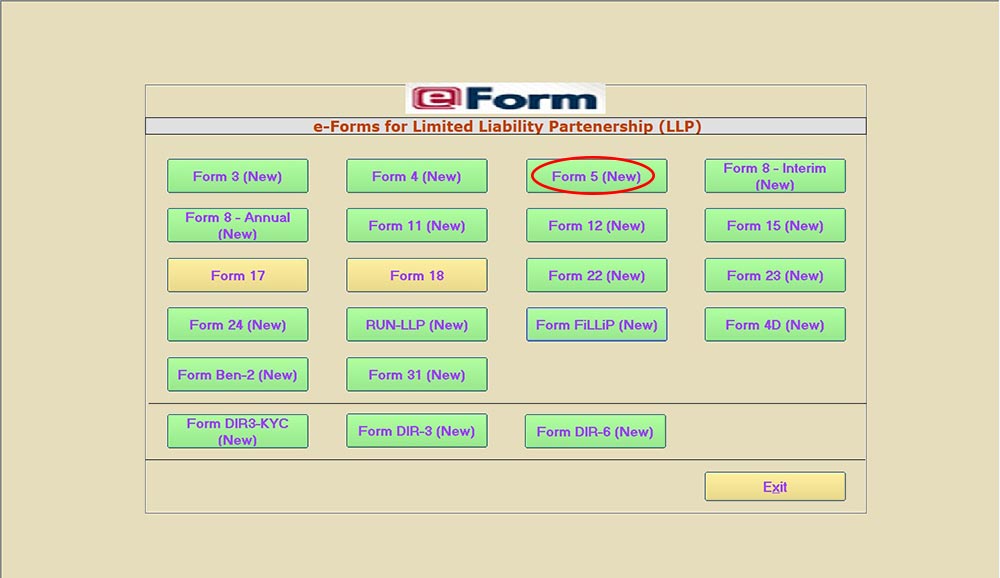
Step 3. After selecting the company, move the cursor to E-forms and select LLP 5 for filing.
Step 4. Enter a valid and approved SRN of the RUN-LLP form, whereby the new name of the LLP is approved.
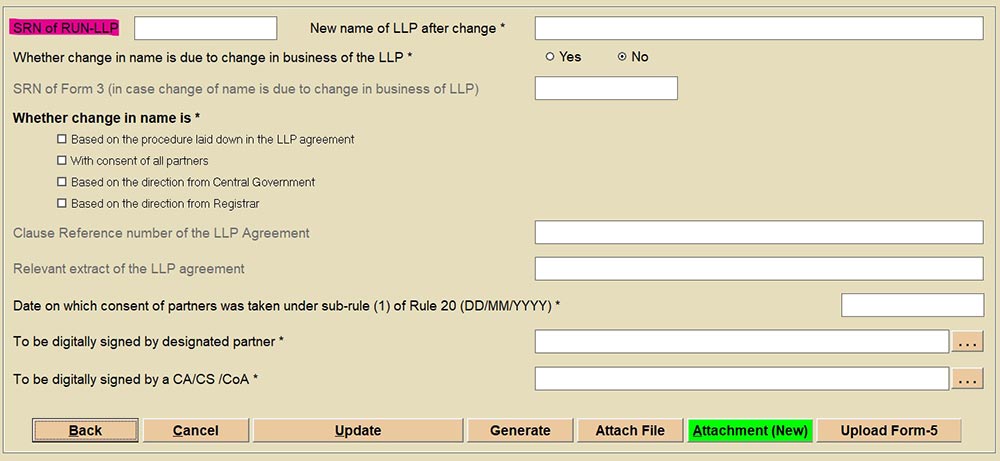
Step 5. Enter the new name of the LLP, which was approved in RUN-LLP.
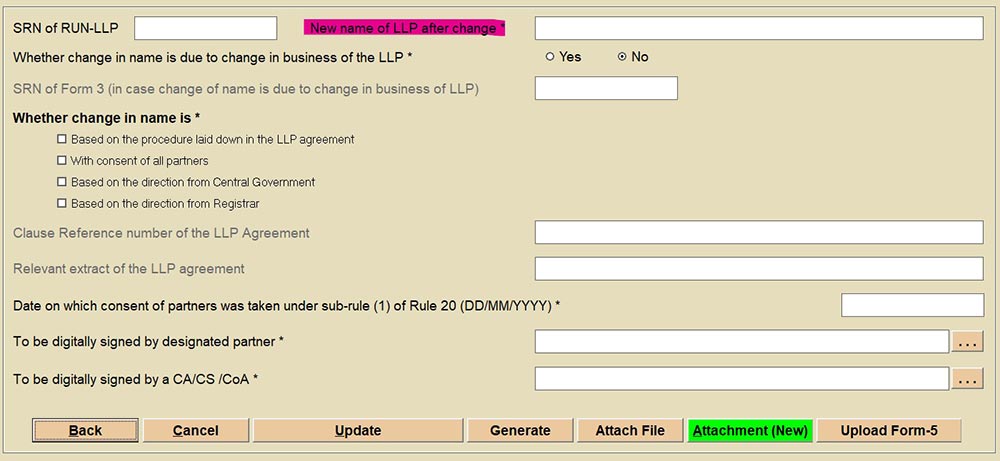
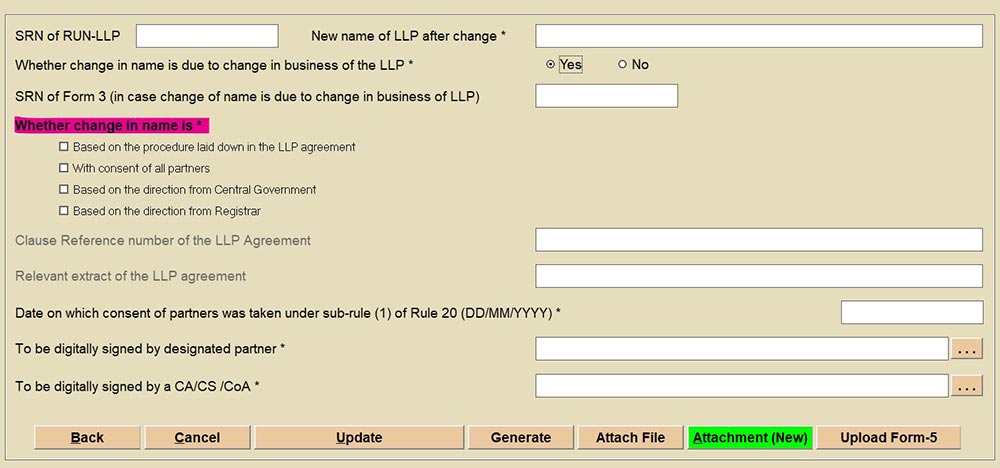
Step 6. If Yes is selected in “Whether the name change is due to a change in the business of LLP”, then the user must enter the SRN (Service Request Number) of Form 3, and if No is selected, then the option will be disabled.

Step 7. Select the purpose of the name change.
Step 8. Kindly note that the options: “Clause Reference Number & Relevant extract of LLP agreement” will be enabled only when the checkbox “Based on the procedure laid down in the LLP agreement” is marked.
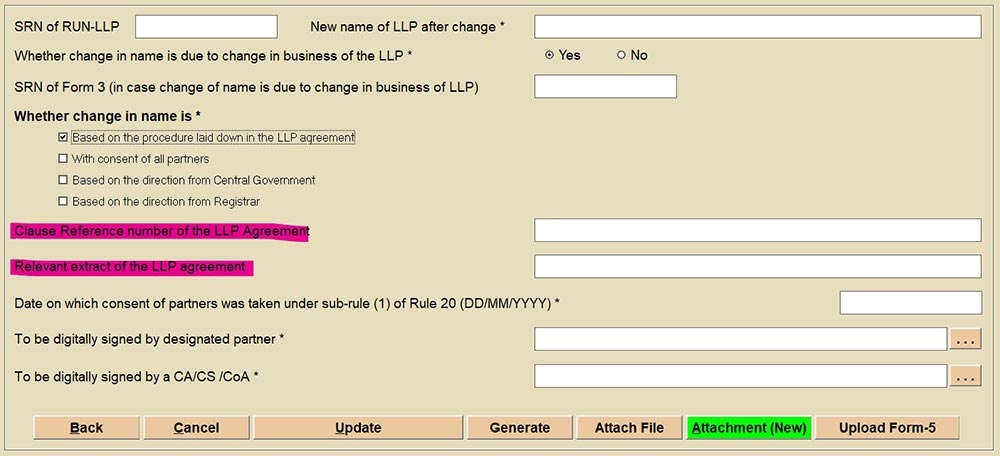
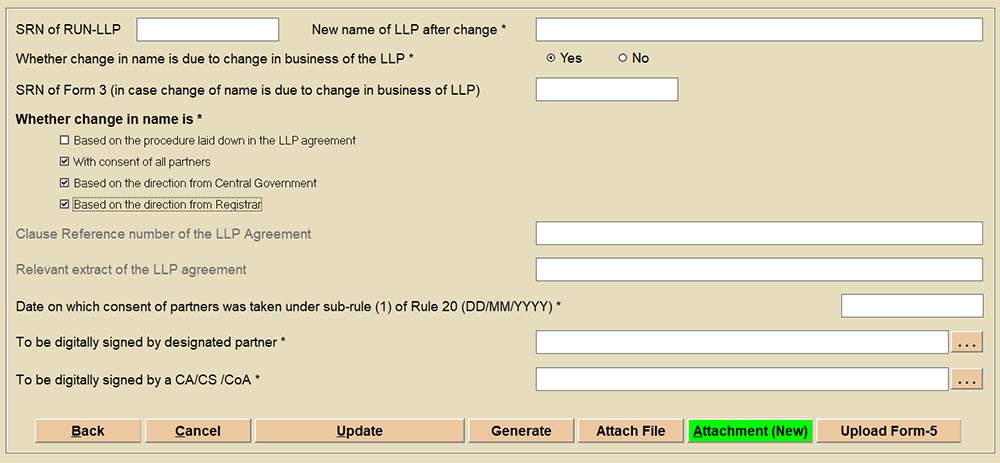
Step 9. In case other checkmarks are selected, the above-specified options will be disabled.
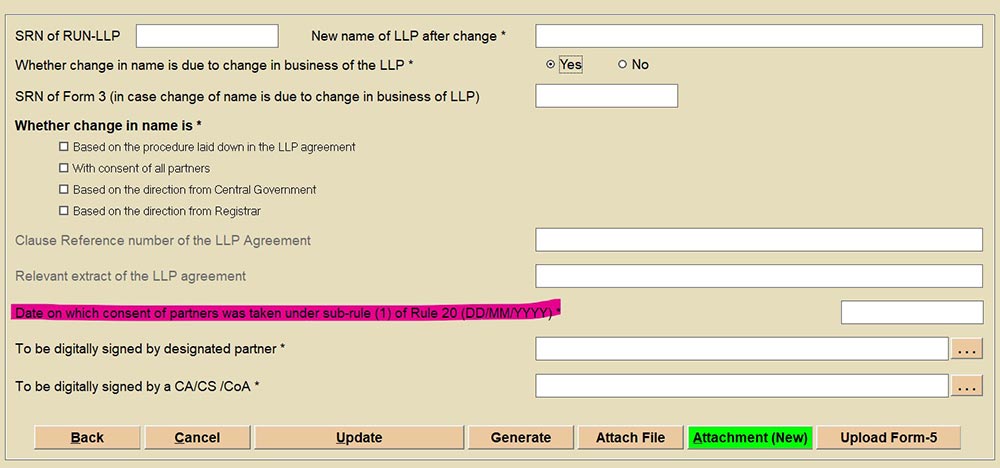
Step 10. Kindly enter the date of the consent of the partners.
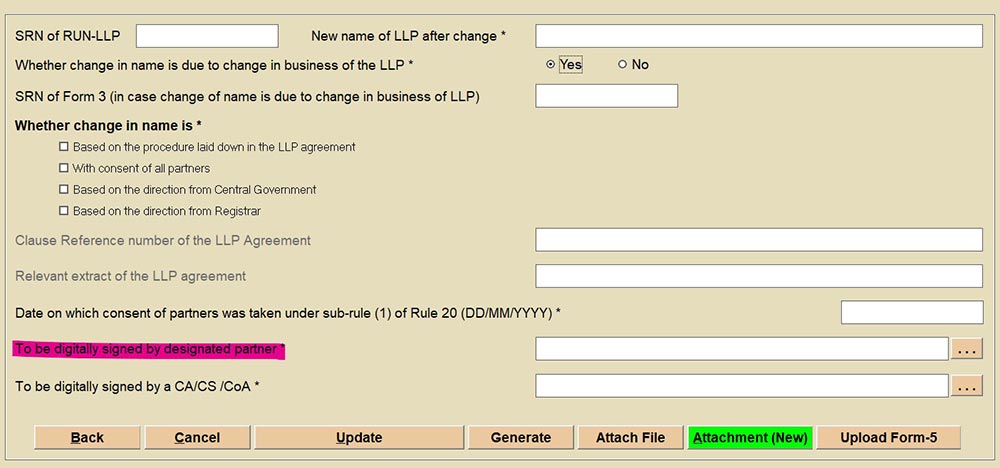
Step 11. Select a designated partner authorized to sign the form and have a valid DSC (Digital Signature Certificate). (Kindly appoint the designated partner in the 3 dot option/ Home page; LLP Info; Partners, if no name is coming in the list.)
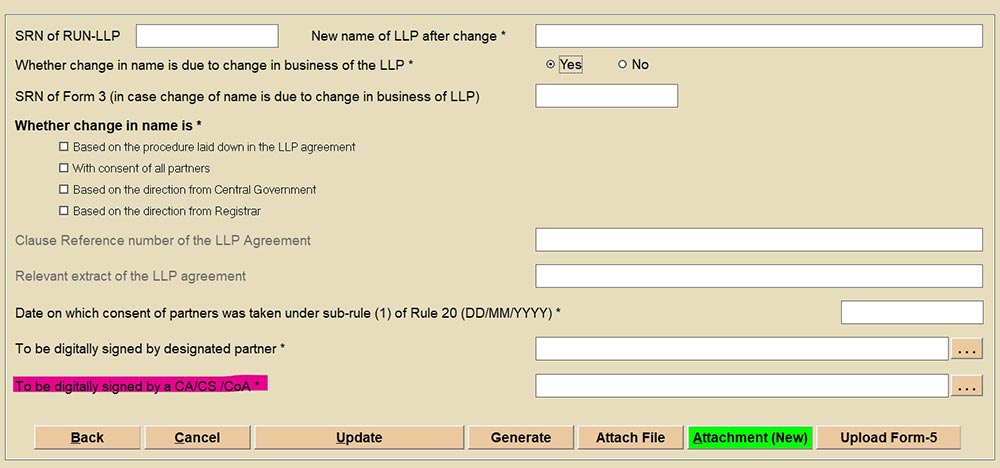
Step 12. Select a professional authorized to sign the form and have a valid DSC. (Kindly appoint the professional in the 3 dot option/ Home page; LLP Info; Professionals, if no name is coming in the list.)
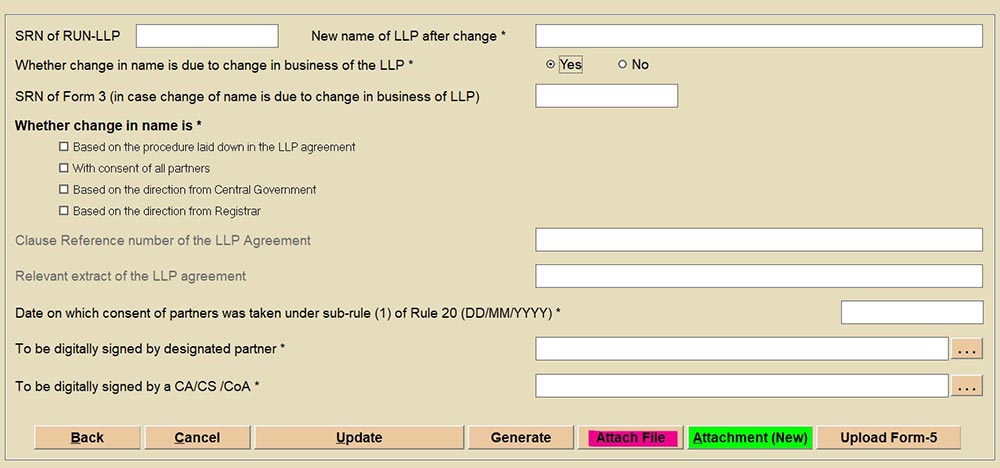
Step 13. Update the form and add attachments in the “Attachment (New)” option. Also, you can save auto-generated attachments from the “Attach File” Option.
Step 14. Once attachments are added, click on the Generate form option and select the relevant ID.
Step 15. The software will display a message as “Data added successfully” and leave the user on the MCA portal after saving the form there.
Step 16. Afterwards, kindly click on the Edit option on the saved form on the MCA portal, and proceed and submit.