An income tax return is a document submitted by individuals or companies to the tax department to declare their income, including salary, HRA, allowances, deductions, and total turnover. There are seven types of tax return forms available on the portal, each applicable to a different taxpayer category.
Taxpayers can use either the government utility or third-party software to file their ITRs. Below, we have outlined the basic steps for filing an ITR for AY 2026-27 and FY 2025-26 using one of the most popular tools, Gen IT software.
What is Gen IT?
Gen IT software is developed by the SAG Infotech Company and helps taxpayers in India with tax-related tasks. It is very popular among accountants, tax experts, and businesses to make their income tax return (ITR) filing easier and automatically calculates according to new tax regulations.
How to E-file ITR with Gen IT Software
Here you will learn how to file your Income Tax Return through Gen IT software:-
Step 1: Prepare Client Master
- Go to Client Manager

- Then, Create a New Client
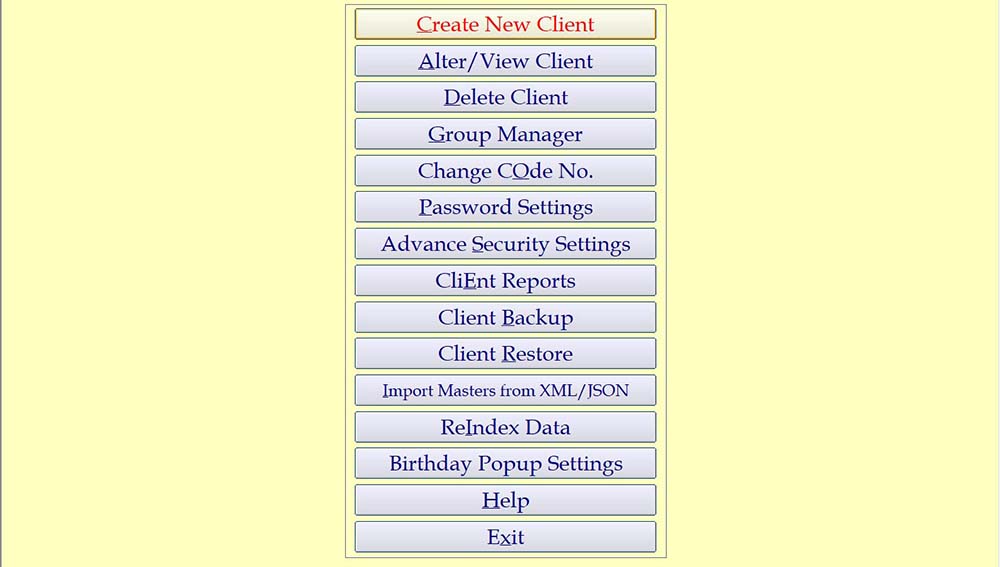
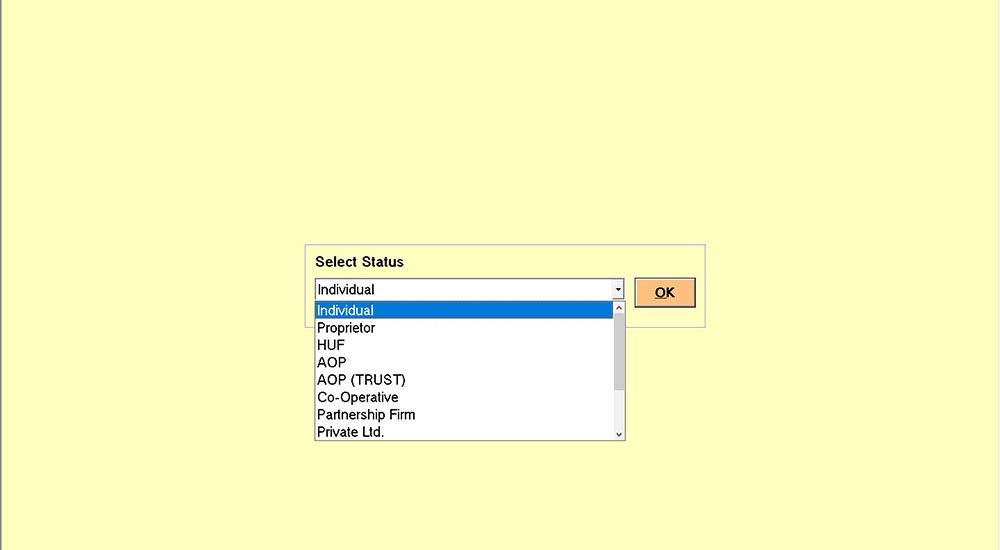
- Select Status
- Give a unique Code No., PAN and DATE OF BIRTH as per PAN DATABASE
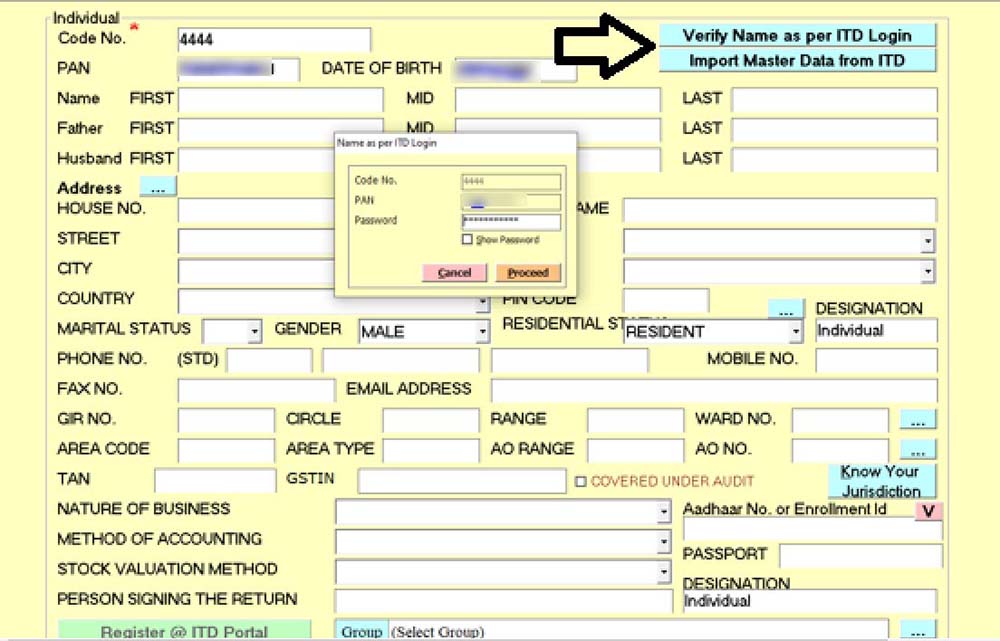
- Verify Name as per ITD Login and then Auto Fill the same.
- Import Master Data from ITD and save it.
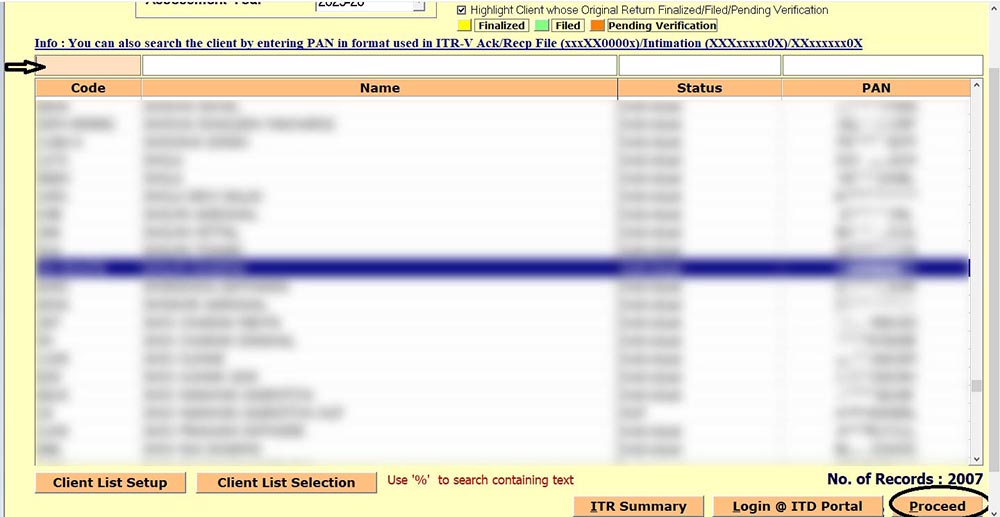
- Exit >> Income Tax >> Computation >> Find Your Client
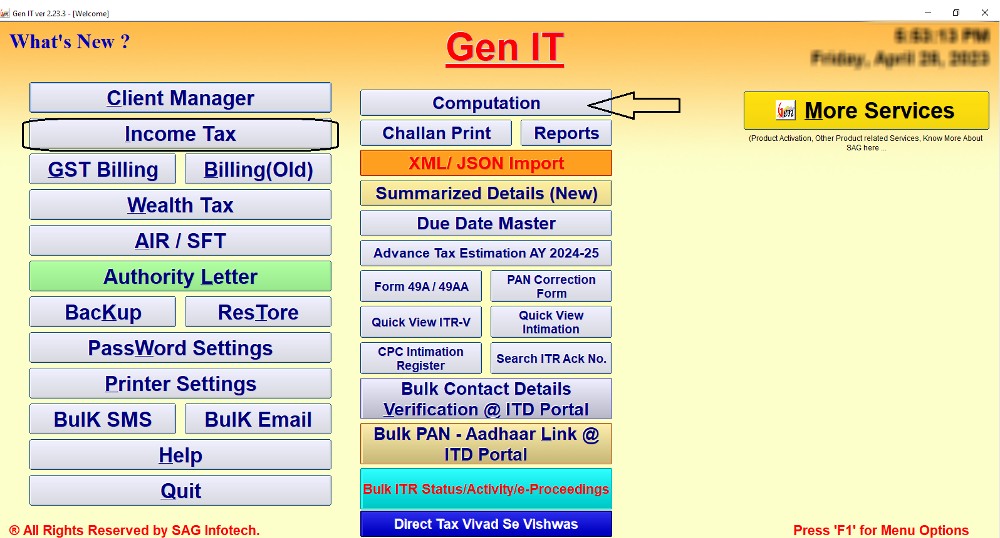
- Open your client and proceed.
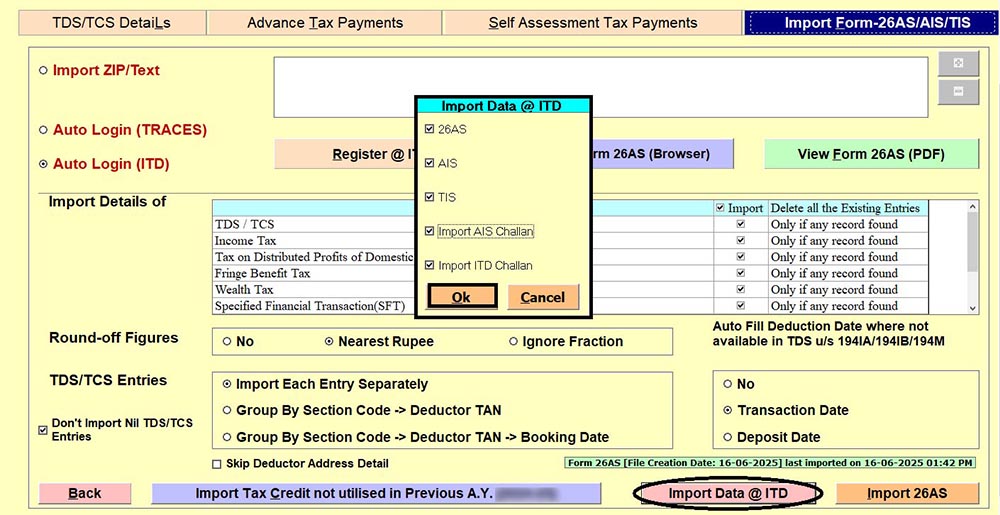
Step 2: Import AIS/TIS
- Click on Tax Details/ 26AS then Import Form-26AS/ AIS/ TIS
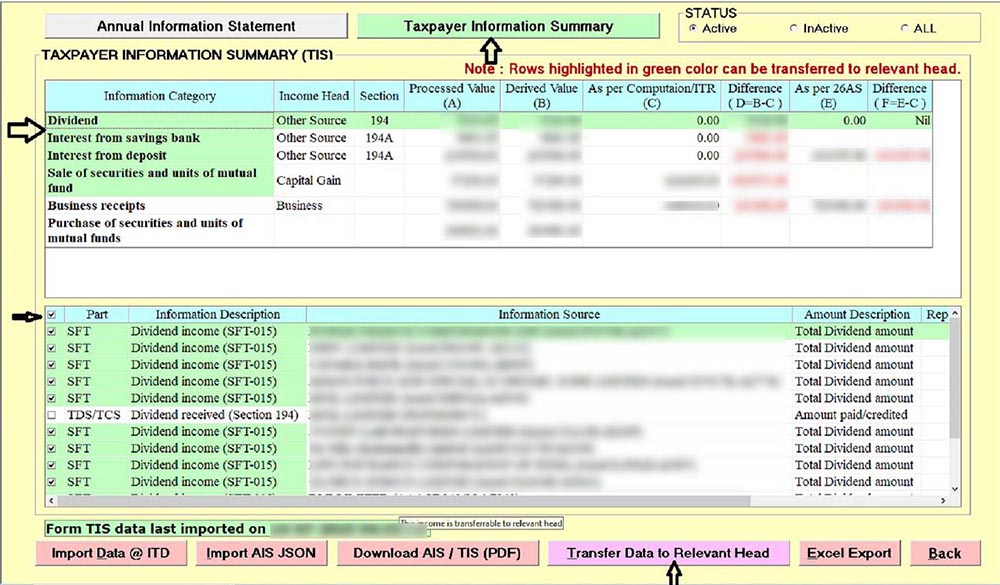
Step 3: Transfer the Data of AIS/TIS into the relevant heads of income
- After importing AIS/TIS/26AS, go back to the main page and open AIS/ TIS

- Click on Taxpayer Information Summary
- Then click on each information category and make a check mark on the part given under such information category
- Thereafter, click on Transfer Data to Relevant Head.
- That’s how Data shown in AIS/ TIS can be automatically transferred to the relevant head and place, which are shown under the Green Colour.
Step 4: Further, Income not shown in AIS or TIS is also to be shown in the relevant Heads of Income given in the Main page of the software.
- a. Income from Salary Head.
- b. Income from House Property.
- c. Income from Profit and Loss from Business or Profession.
- d. Income from Capital Gain. (With Excel Import of capital gain on Shares)
- e. Income from Other Sources.
- (a) To fill in all details of salary, click on the Salary TAB
- (b) To fill in all details of House Property, click on the House Property TAB
- (c) To fill in all details of the Business, click on the Business TAB
- (d) To fill in all details of Capital Gain, click on the Capital Gain TAB
- (e) To fill in all details of Other Sources, click on Other/Exempt/NSC/KVP TAB
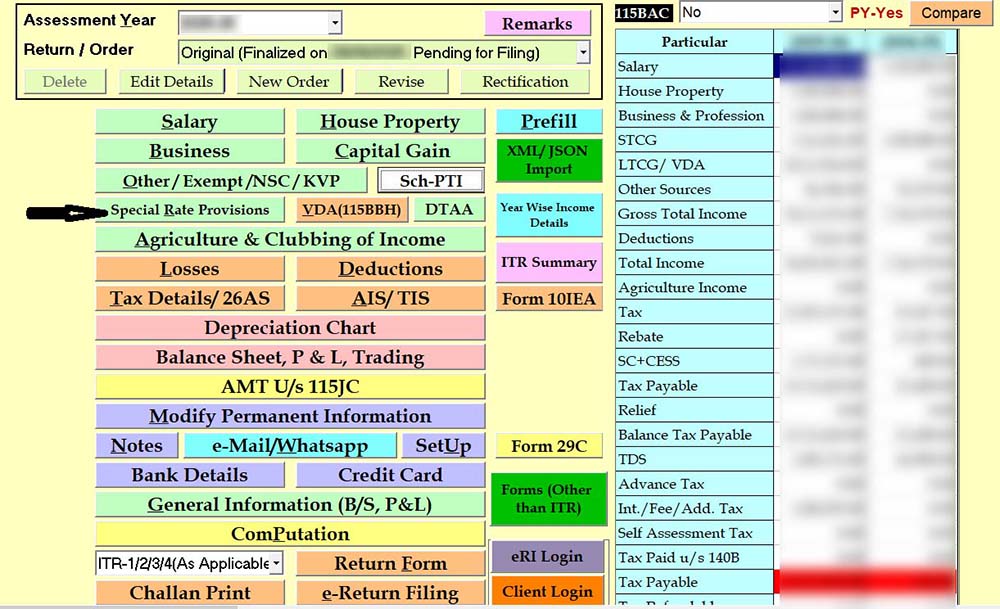
Step 5: After filing in the complete income under the above-mentioned Heads of Income, if Special Tax rates are applicable, then check Special Rates Provisions and fill in the Data here if applicable.
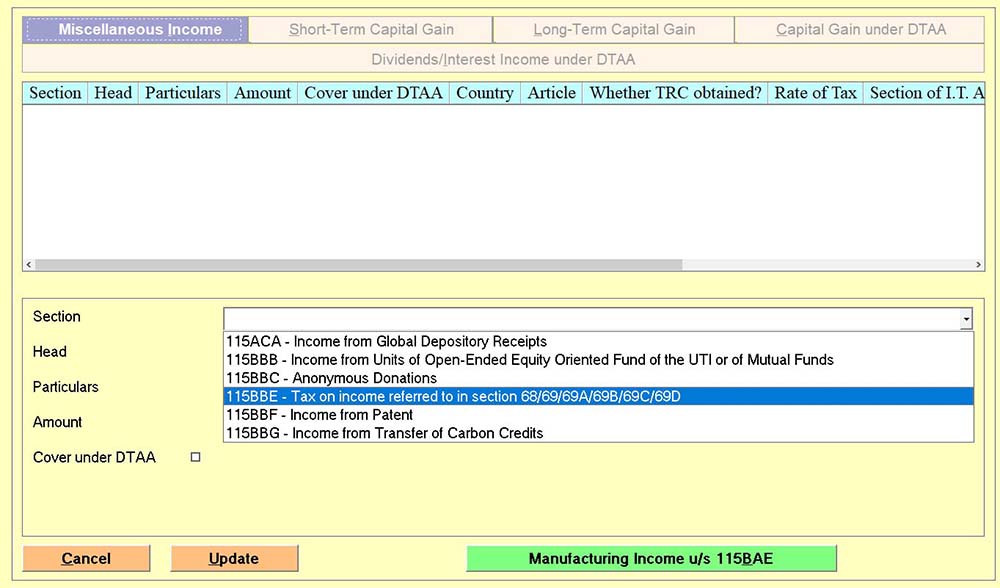
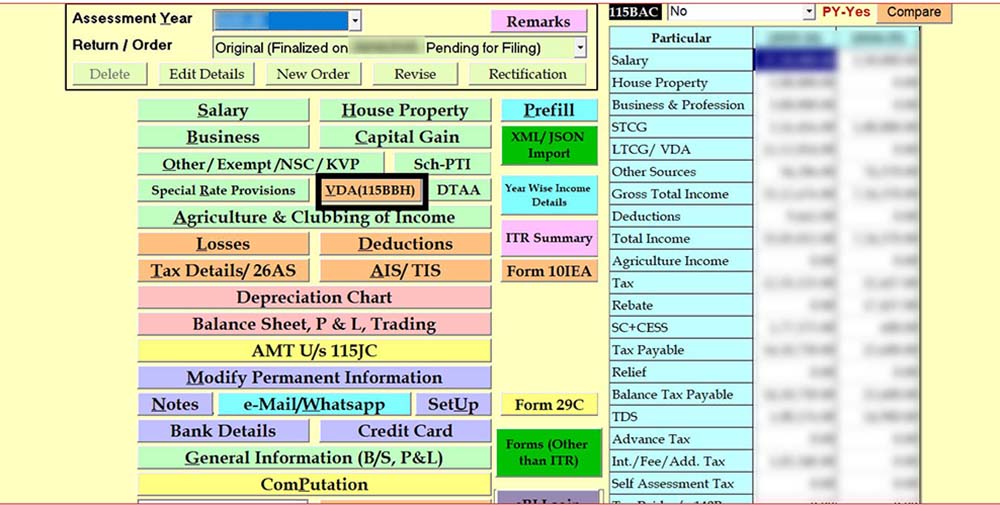
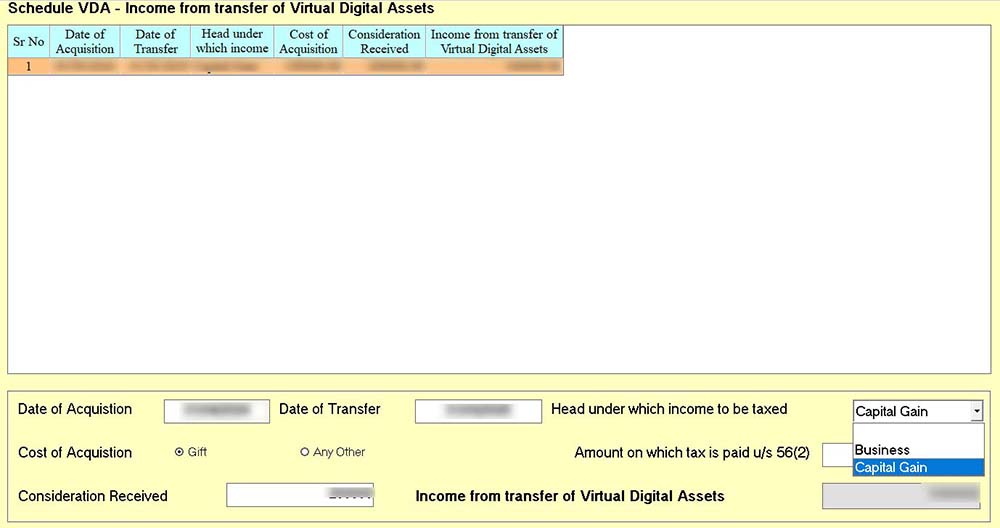
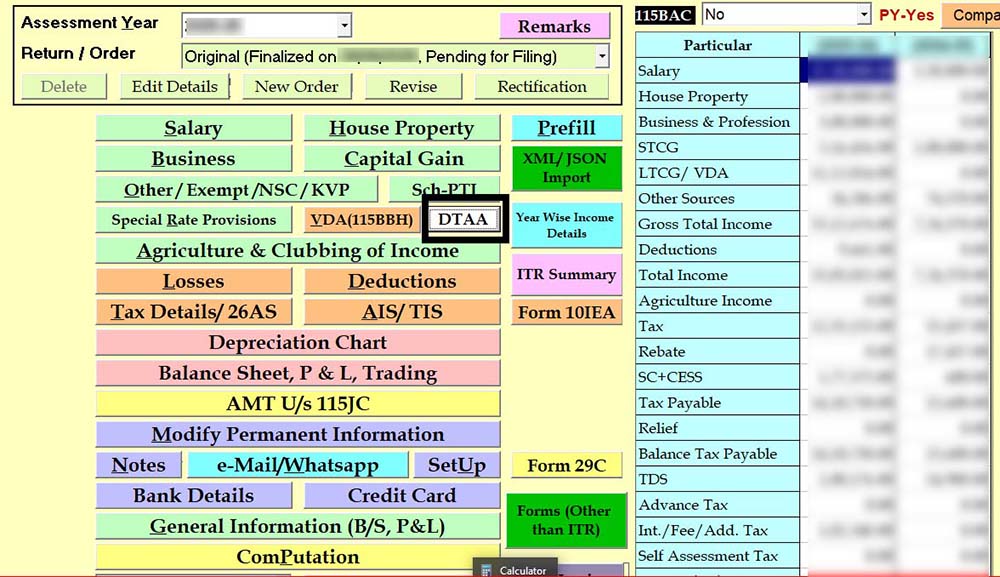
Step 6: In case of income from Virtual Digital Asset (VDA) like Crypto, etc., then such income is taxable under TAB given under the name of VDA (115BBH).
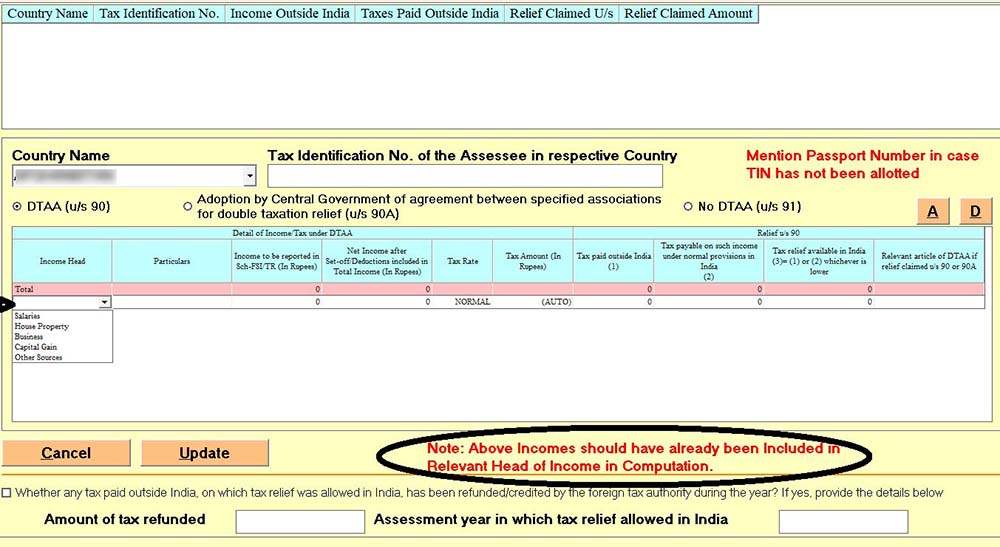
Step 7: To claim DTAA Relief under sections 90 and 91 of the Income Tax Act:-
- In case of a Resident person who earns income from outside India and is required to take relief under sections 90 and 91, then details of such type of income should be entered into the DTAA Tab.
- Income on which such DTAA Relief (u/s 90, 91) is required should already be included in other Relevant heads of income and reference to such head should be given while entering the Data into such TAB.
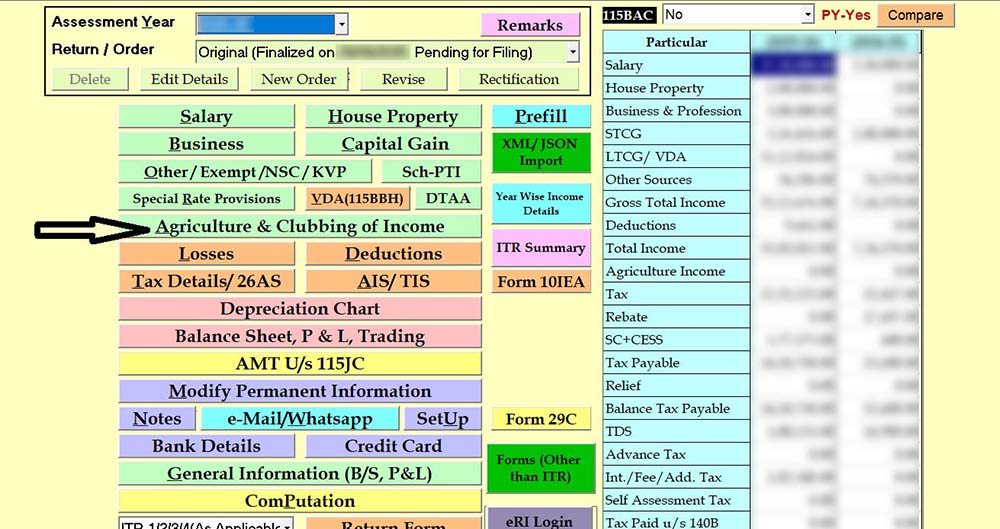
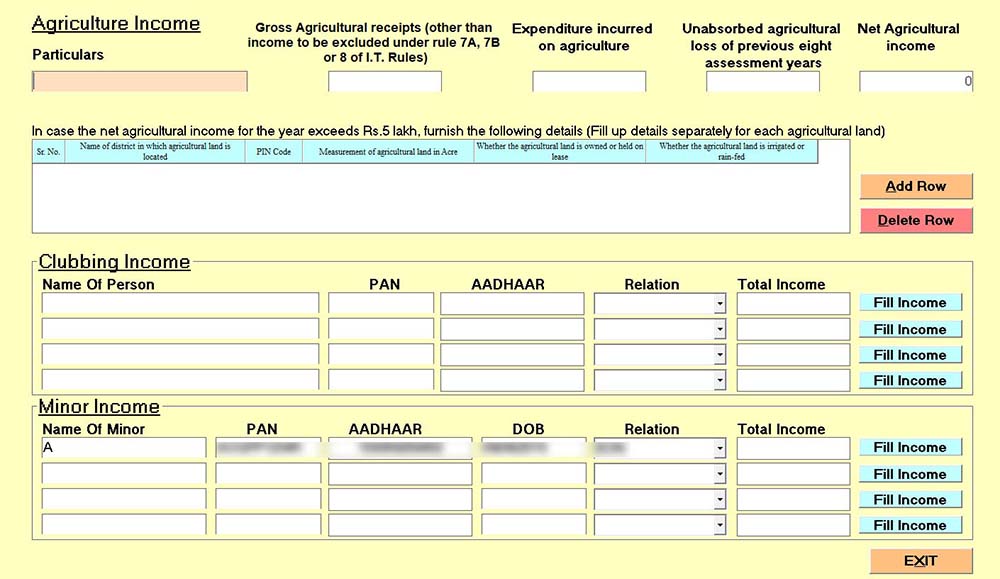
Step 8: For Agriculture & Clubbing of Income, a separate TAB is given, and the relevant sections are provided
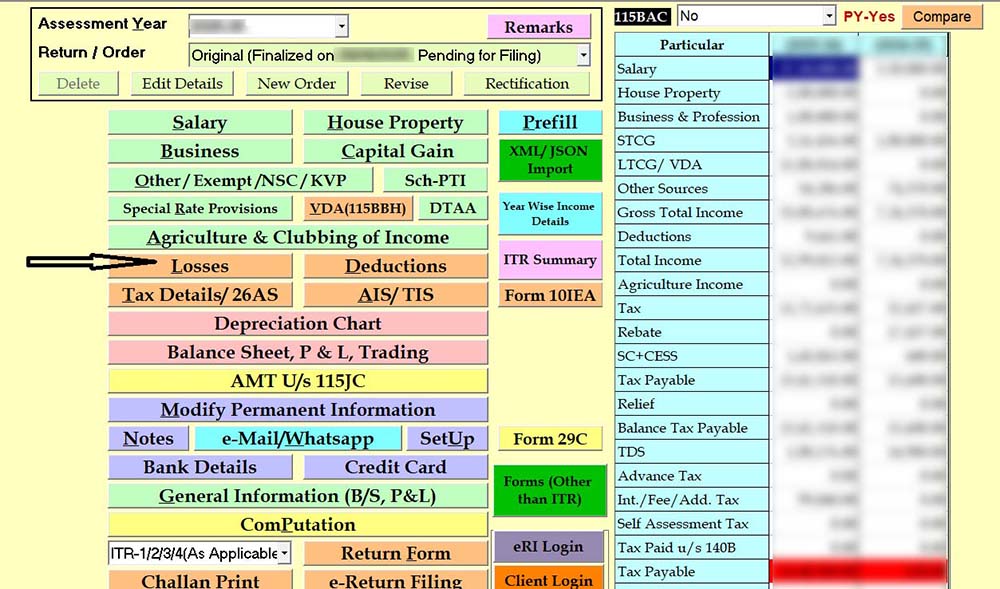
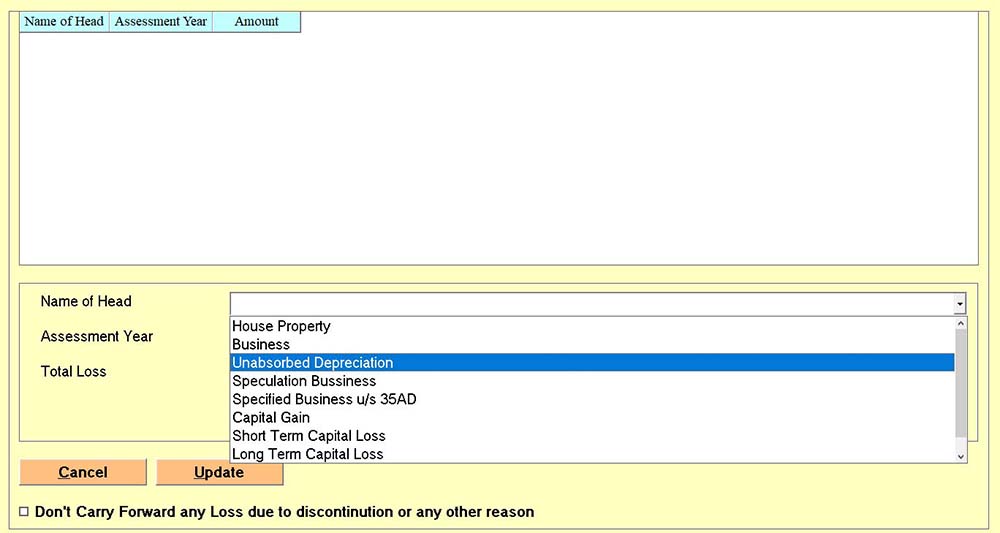
Step 9: To enter details of the Losses Tab, provide the name of the Losses.
- Enter the details here, and the software will automatically set it off as per the Income Tax Provisions.
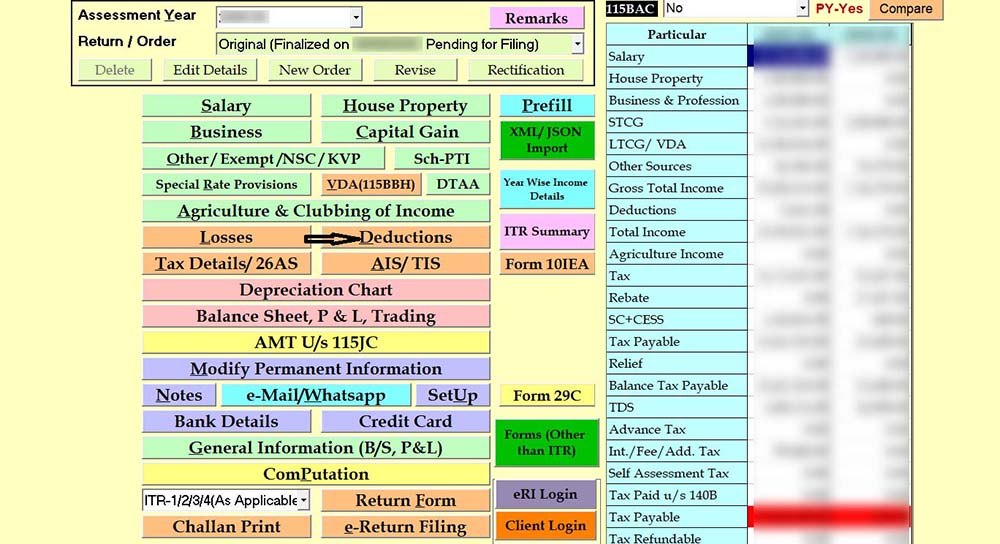
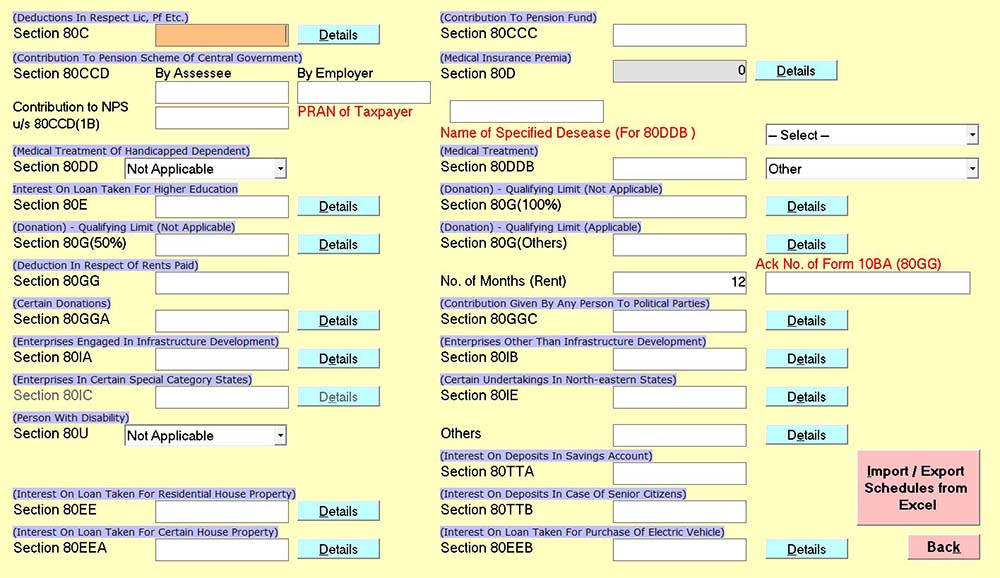
Step 10: For Deductions, a separate Tab is given where one can claim deductions under Chapter VI-A of the Income Tax Act.
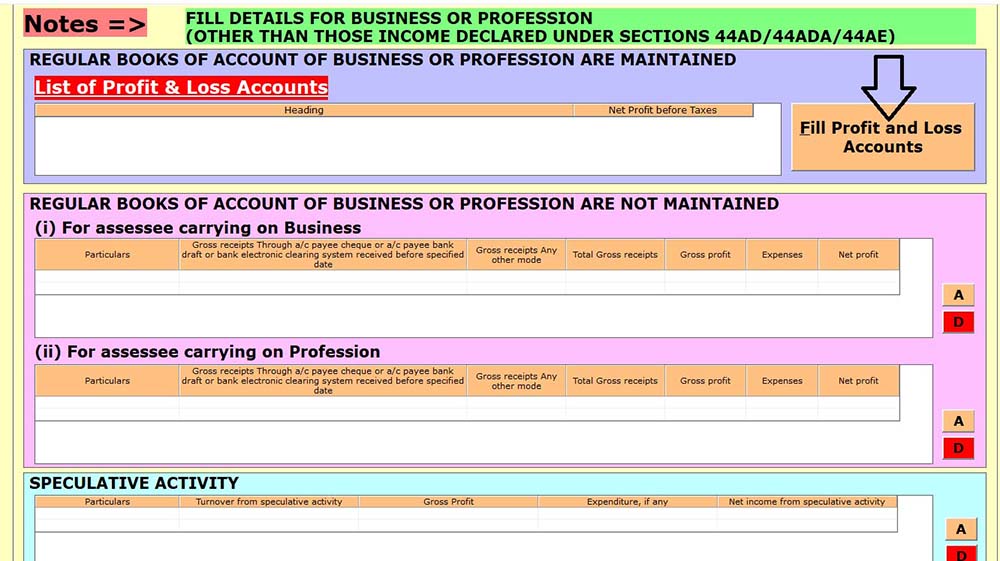
Step 11: In case of Business Income, prepare the Depreciation Chart, Balance Sheet, P & L, Trading Accounts; a separate tab is provided.

- Asset-wise entries can be added as shown in the following pictures
- To add a depreciable asset, click on Add and fill in the details
- If such an asset is acquired in earlier years, then add it in the first table, namely Details of Assets (Opening); otherwise, in the second table, namely Details of Assets (Addition during the year).
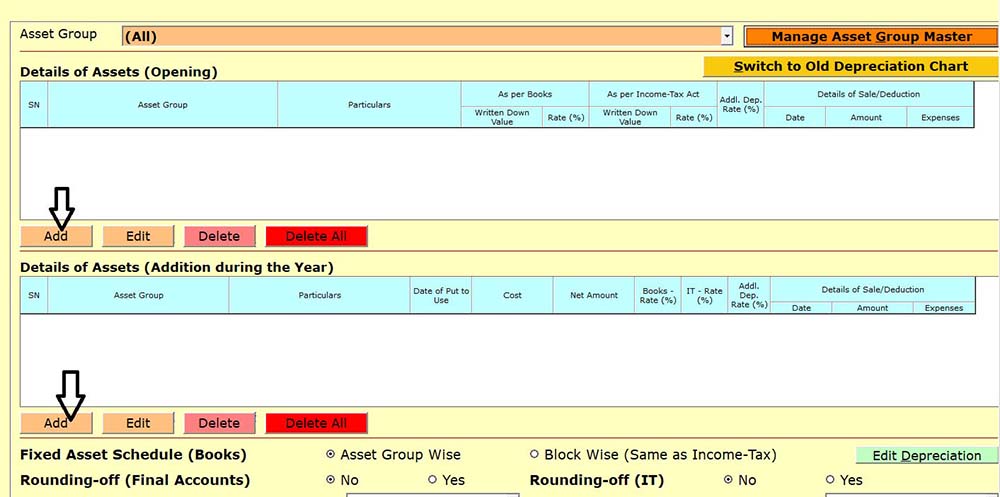
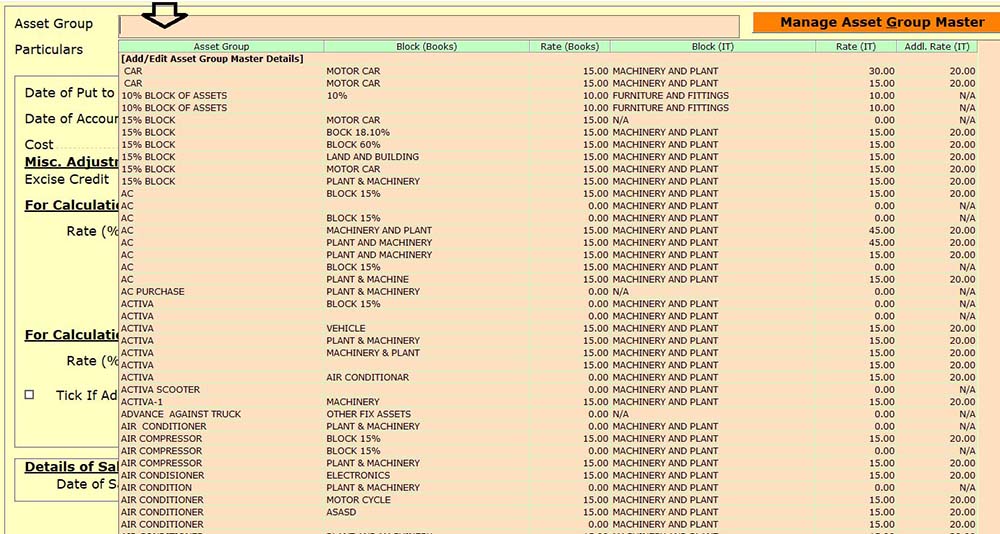
- Select the Group
- Fill in the relevant data and update

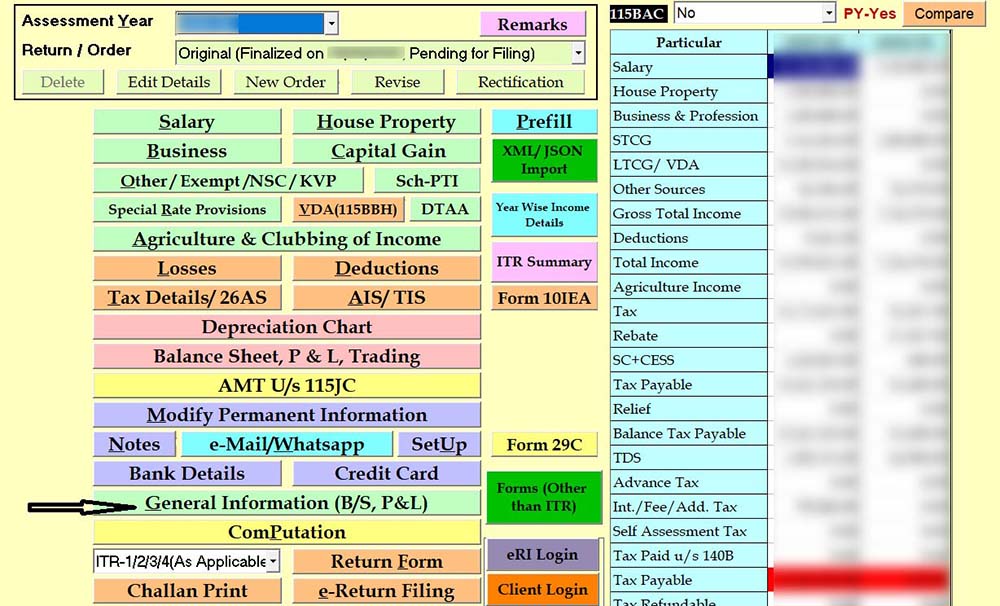
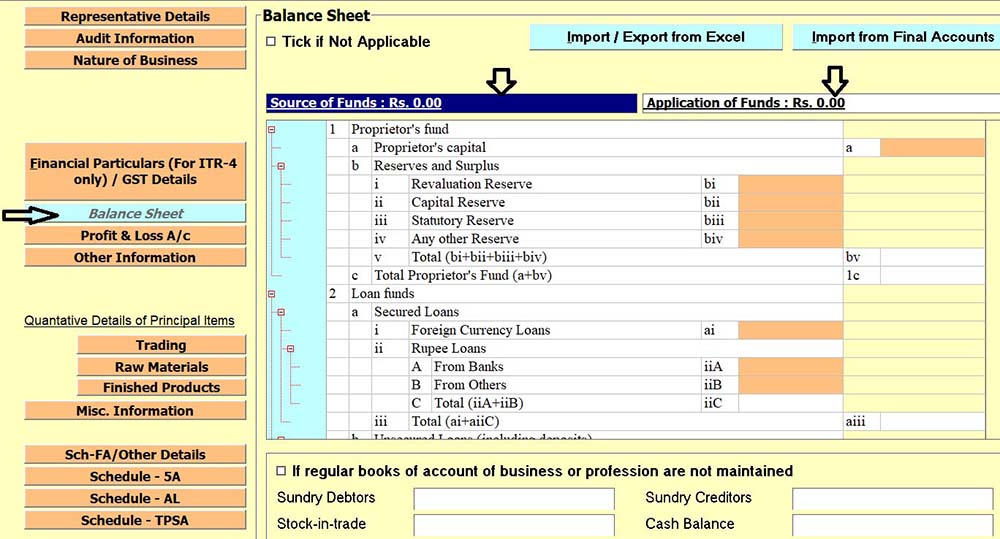
Step 12: File Balance Sheet and Profit & Loss Statement in the General Information (B/S, P&L) Tab.
- Click on Balance Sheet and fill in the Data here, and remember that the Source of Funds and Application of Funds should match.
- Click on Profit & Loss A/c and fill in the Data here
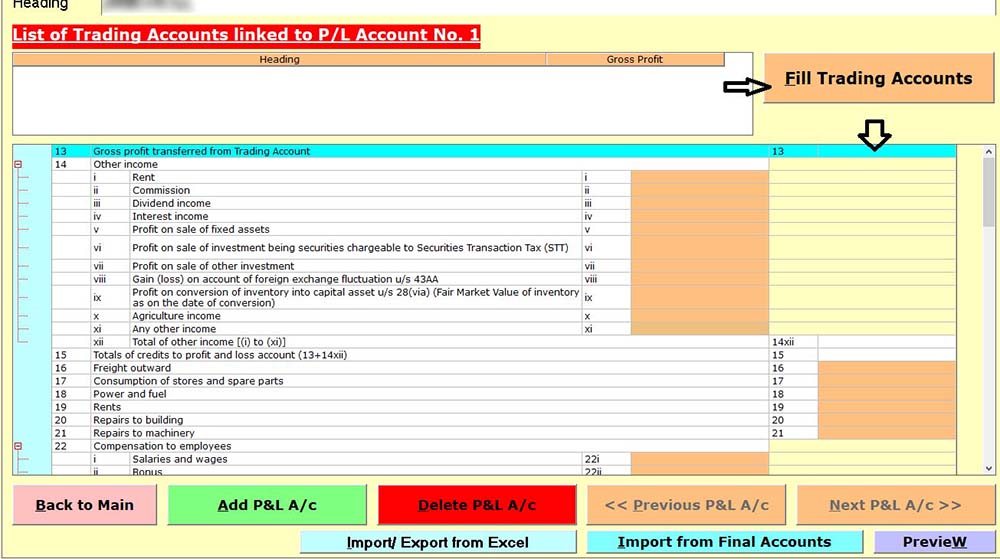
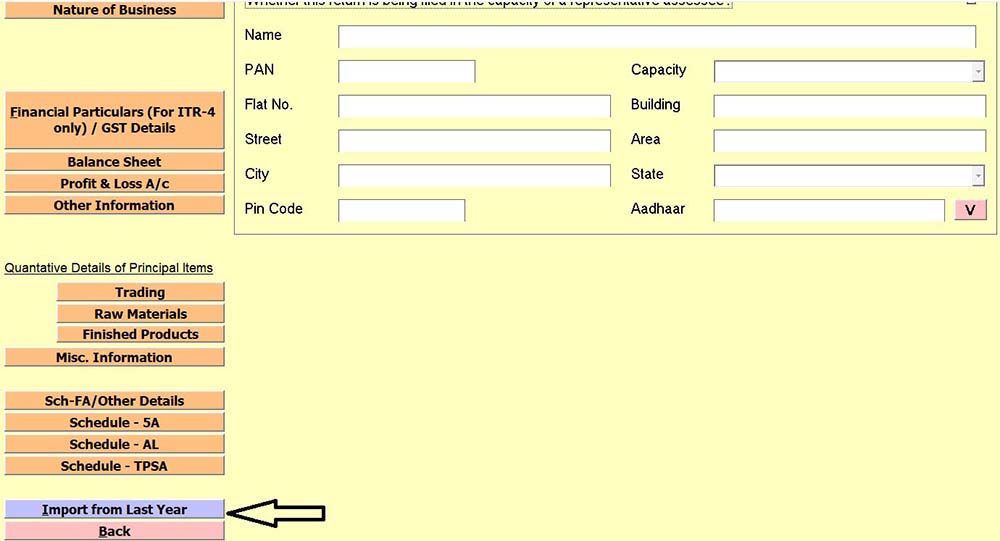
- Gen IT software also provides you with an option to import data from the previous year into the Profit and Loss Statement and Balance Sheet if you want to enter data according to the previous year.
- Finally, check the computation and the tax payable.
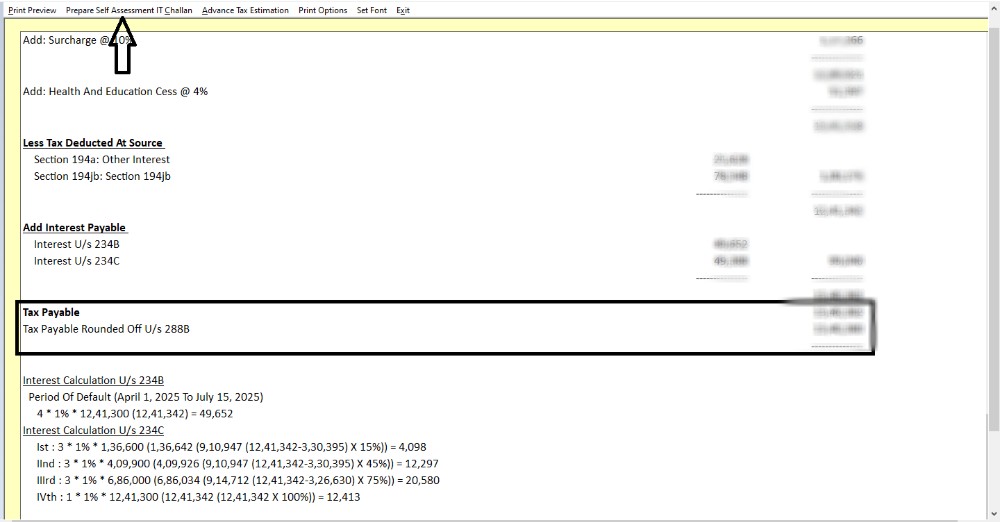
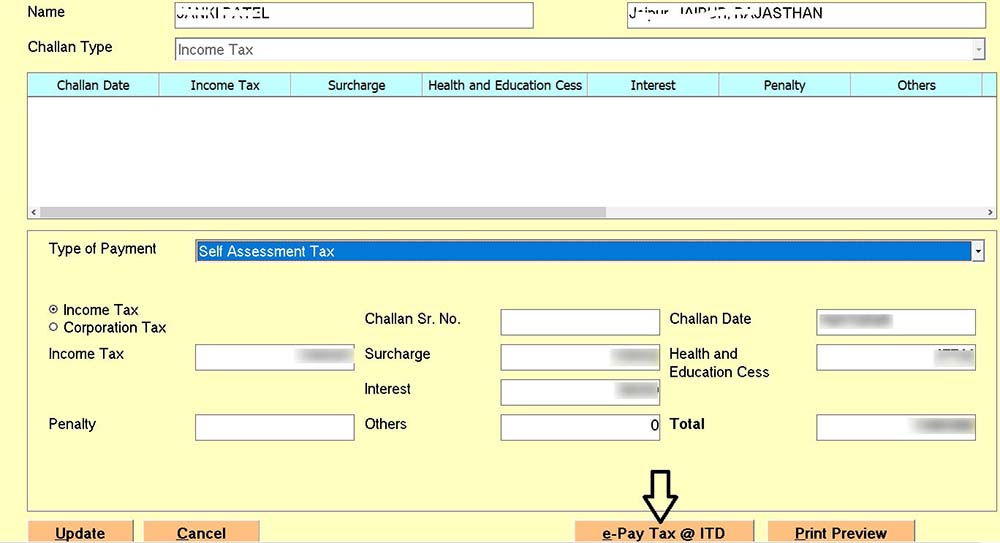
Step 13: Click on Prepare Self-Assessment IT Challan and pay it; thereafter challan details are automatically entered.
Step 14: e-Return Filing
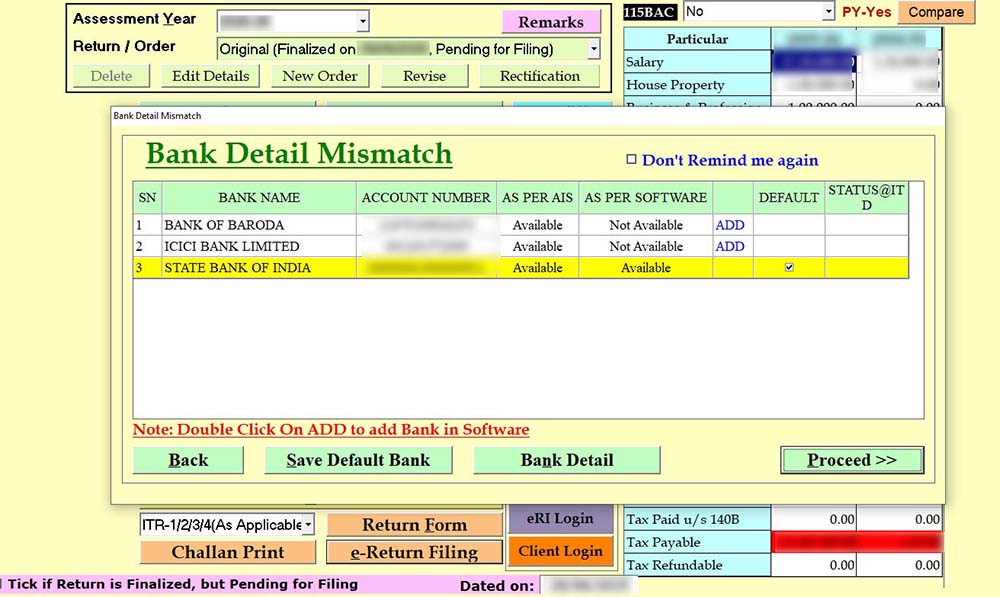
- Before filing, check the bank details provided by the system for confirmation, and if it finds it ok, then proceed; otherwise, make changes.
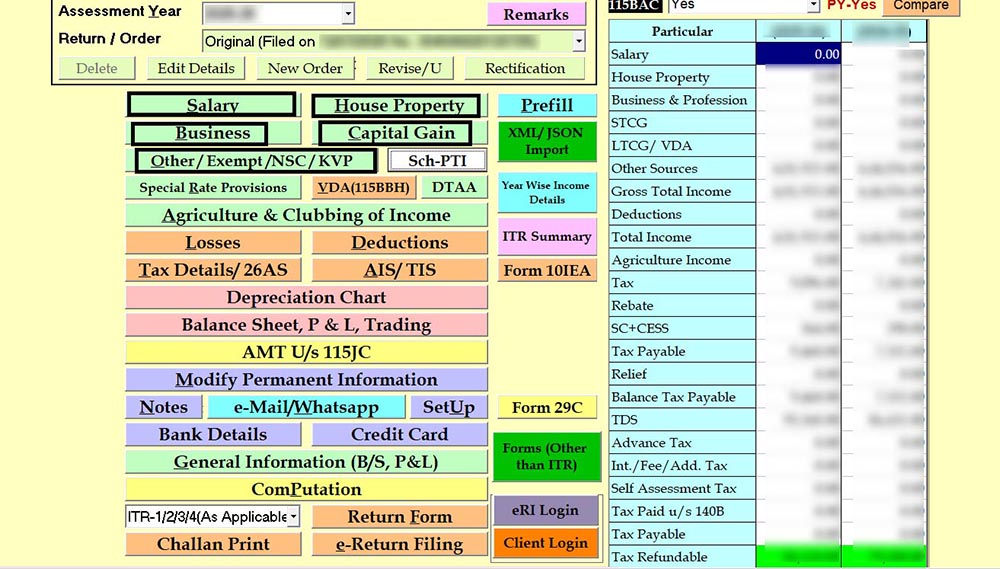
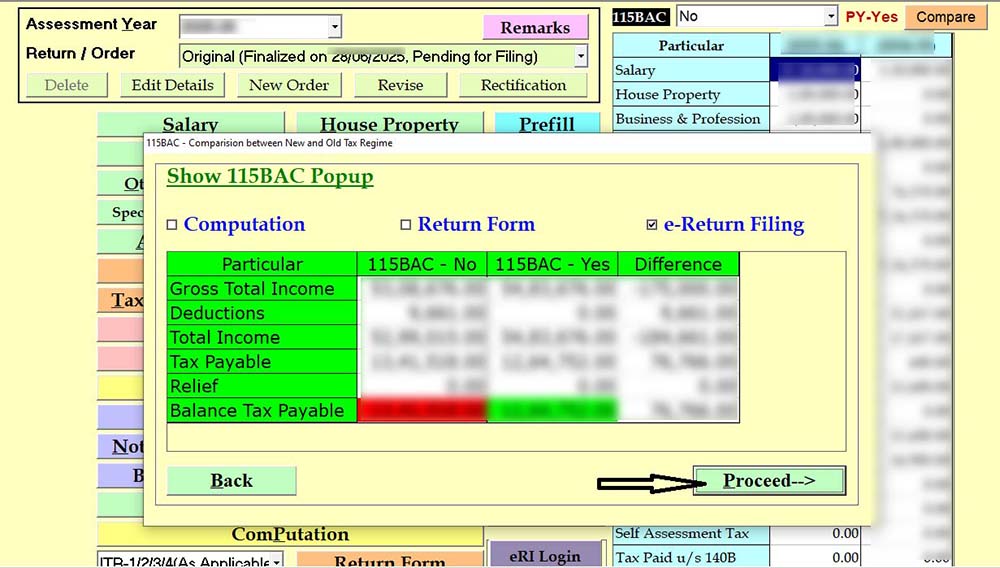
- Then it provides a Comparison between 115BAC – Yes and 115BAC – No. Check it and proceed.
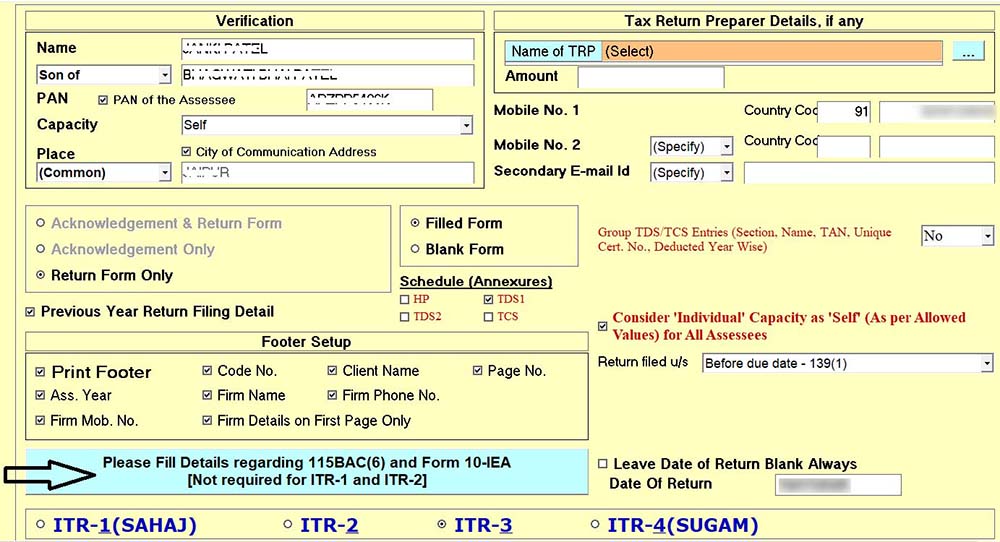
- Then fill in the details for Form 10-IEA as per applicability.
- The applicable ITR Form is selected by Gen IT Software itself.
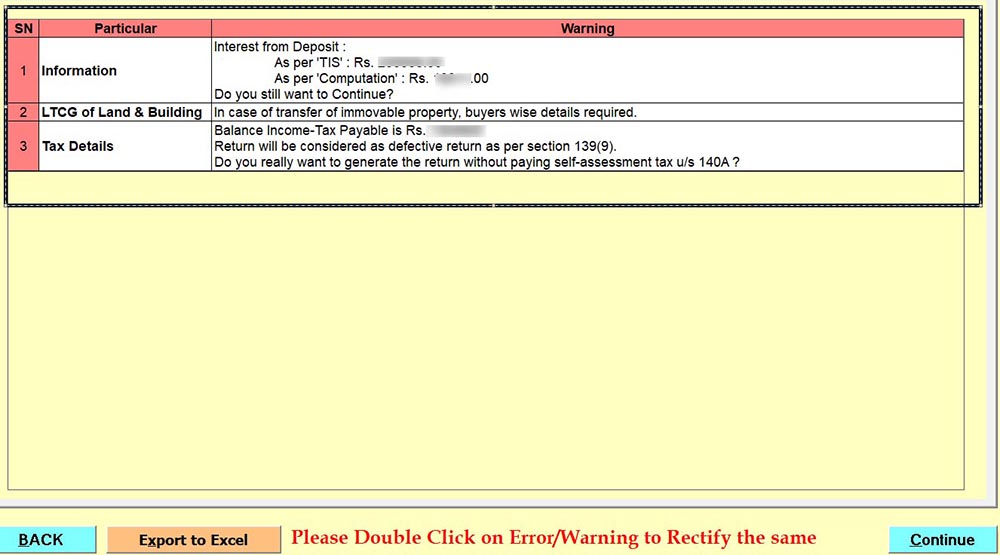
- Check the warning messages provided by Gen Income Tax Software and continue.
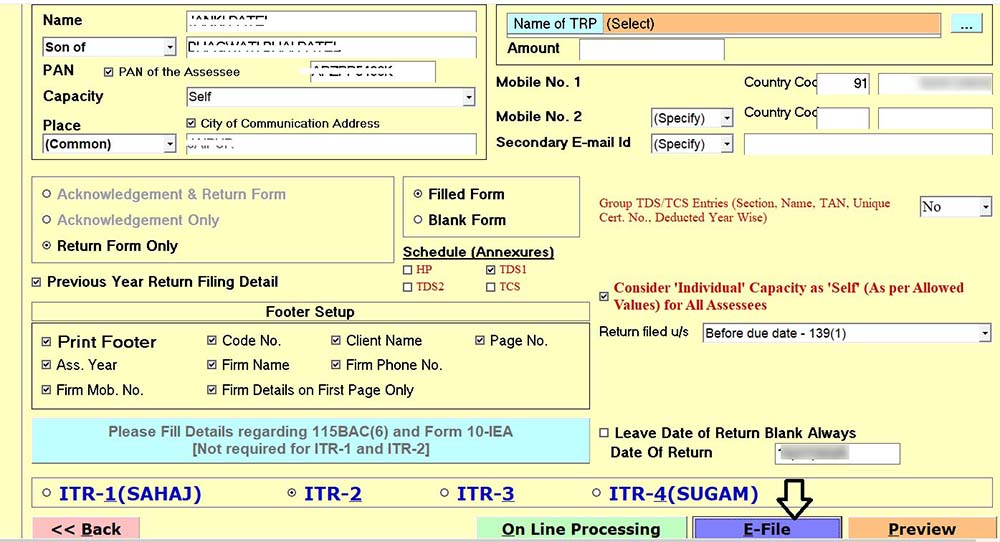
- Now save your JSON file to your desired location, and then E-File.

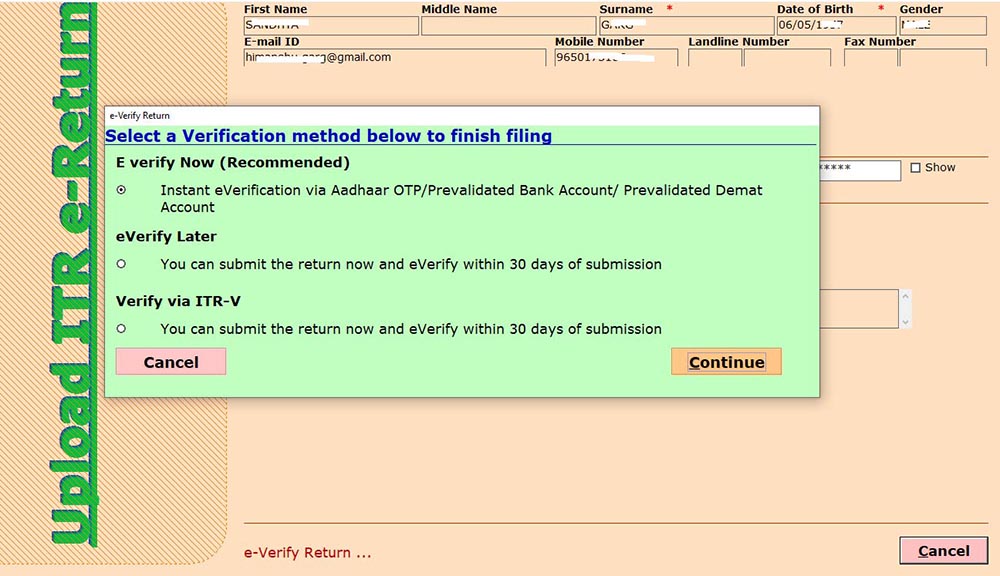
- Finally, submit and opt for the E-verification method as per your convenience.
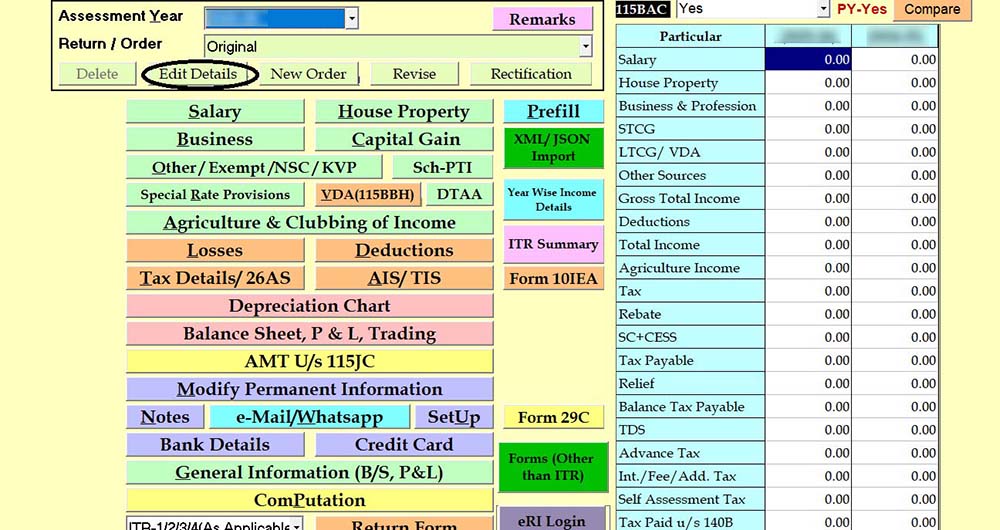
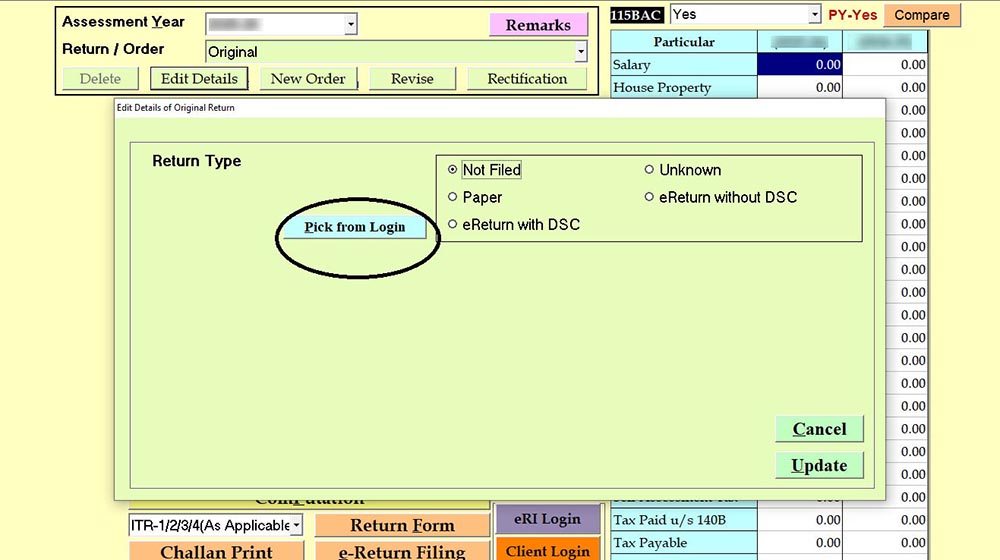
- After submission or E-Verification through Gen-IT Software, your status of ITR Filing will automatically get updated; otherwise, you can update it manually also, as given below-
- Open Edit Details >> Pick From Login >>