Gen GST software is a class-leading software for filing complete GST returns with all the major forms such as GSTR 1, GSTR 3B, GSTR 9/9C, and many more. The software can also apply for an available input tax credit on behalf of assessees and is able to offer assistance in every step of GST compliance.
Here in this post, we will help in the complete installation of Gen GST software to make taxpayers and clients understand the process in a simple way. We have also attached every screenshot for an overview and to ease the entire installation process.
Easy Steps to Install Gen GST Software on PC/Desktop
Step1
- You will get the Gen GST Software Setup in your mail
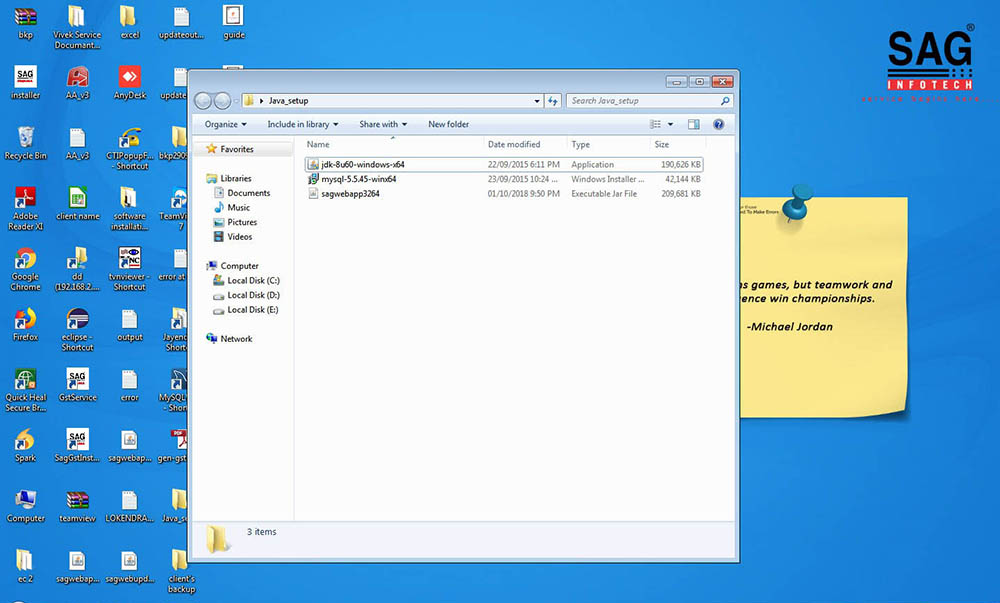
- Extract the file you downloaded and you will get a folder containing the files given below.
- First, you need to install Java Development Kit “jdk-8u73-windows-i586“.
- Go through the basic installation steps.
Step 2
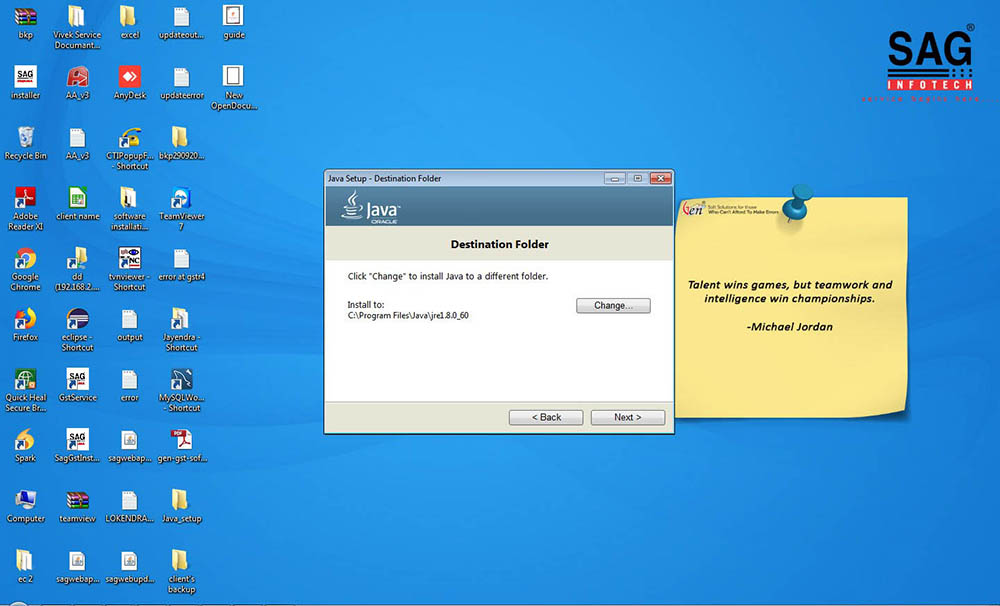
- In 2nd step, you need to change the path for installation for the JDK file as this is necessary for the Windows permission.
- Change the installation path to any other drive than Drive “C”, for ex. Drive “D” or “E”.
- Click on ‘Ok’ and follow the simple installation steps

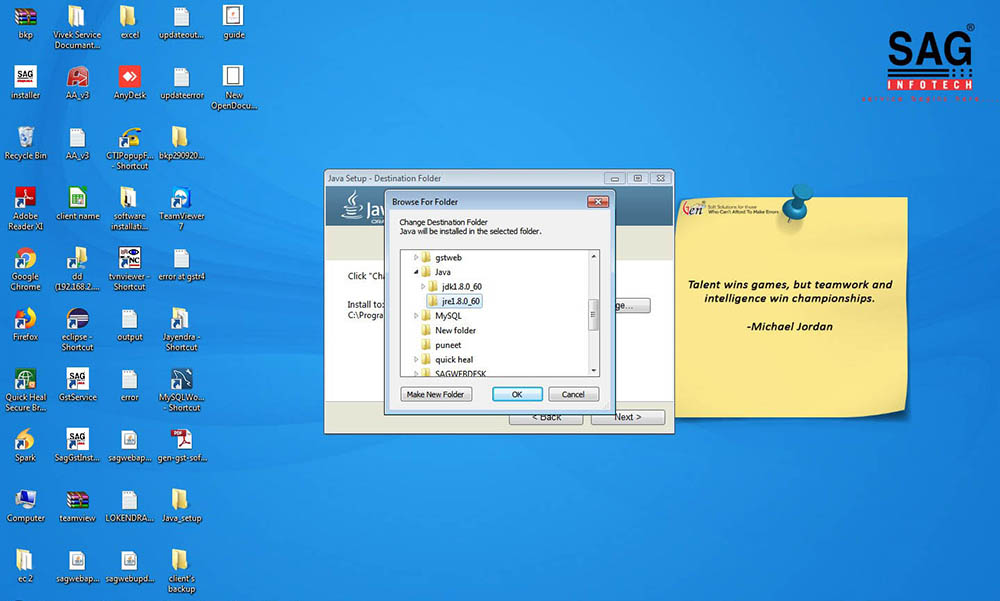
Step 3
- In 3rd step, you need to change the path for JAR installation.
- You need to choose the same path you chose for the JDK installation.
- Create a new folder named the same as ‘jdk’ folder. All you need to do is replace the ‘jdk’ with ‘jre’. For ex. If jdk folder is named “jdk1.8.0_60” you will create a new folder named “jre1.8.0_60”.
- Now Click on ‘Ok’ and follow the installation steps.
- After installation is complete click on the “Close” button.
Step 4
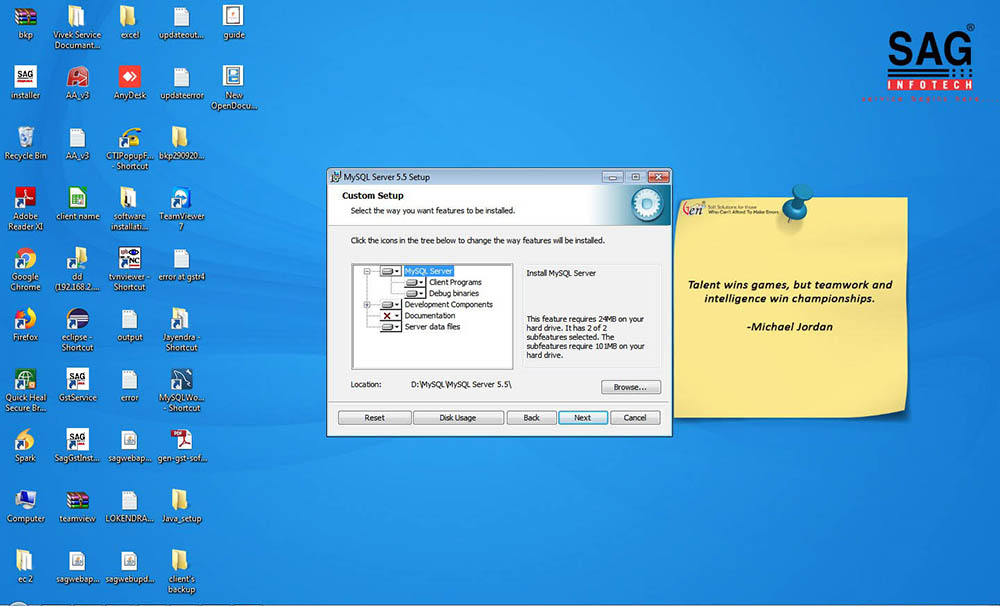
- Now we will install MySQL for the software database, For that go to the extracted folder and install the file named with “MySQL-5.5”.
- In the “setup type” screen of the installation, you need to choose “Custom Option” and change the path for MySQL Server to the same drive where you installed the JDK files.
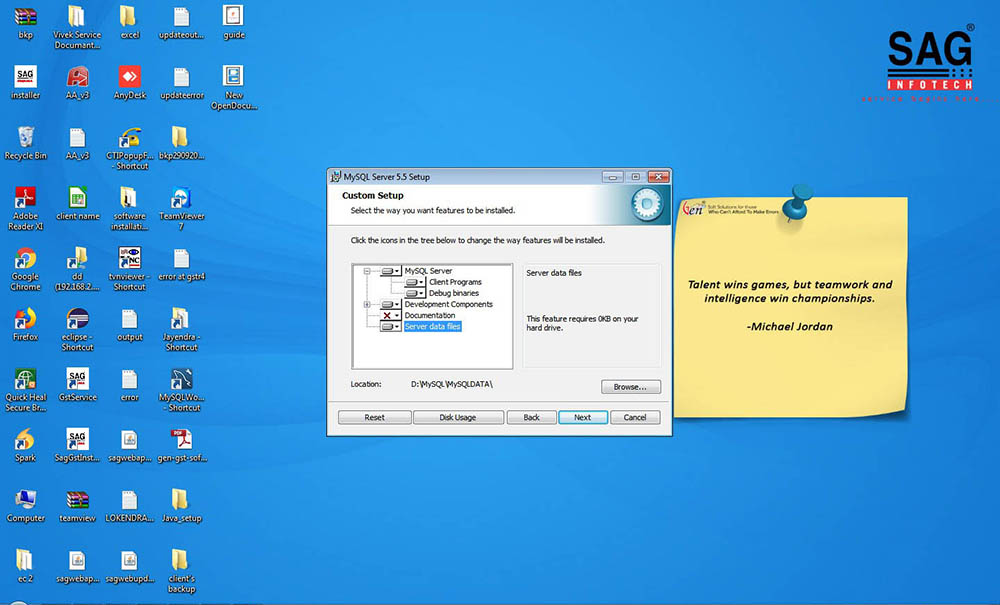
- For the “Server Data Files” option you also need to change the path, Create a new folder in the MySQL folder named “MySQLDATA” and choose it as a path for “Server Data Files”. (SCRN 6).
- Now click on ‘Next’ and proceed to installation. While clicking on “Finish” Don’t forget to tick the check box saying ‘Launch the MySQL Instance Configuration Wizard’.
Step 5
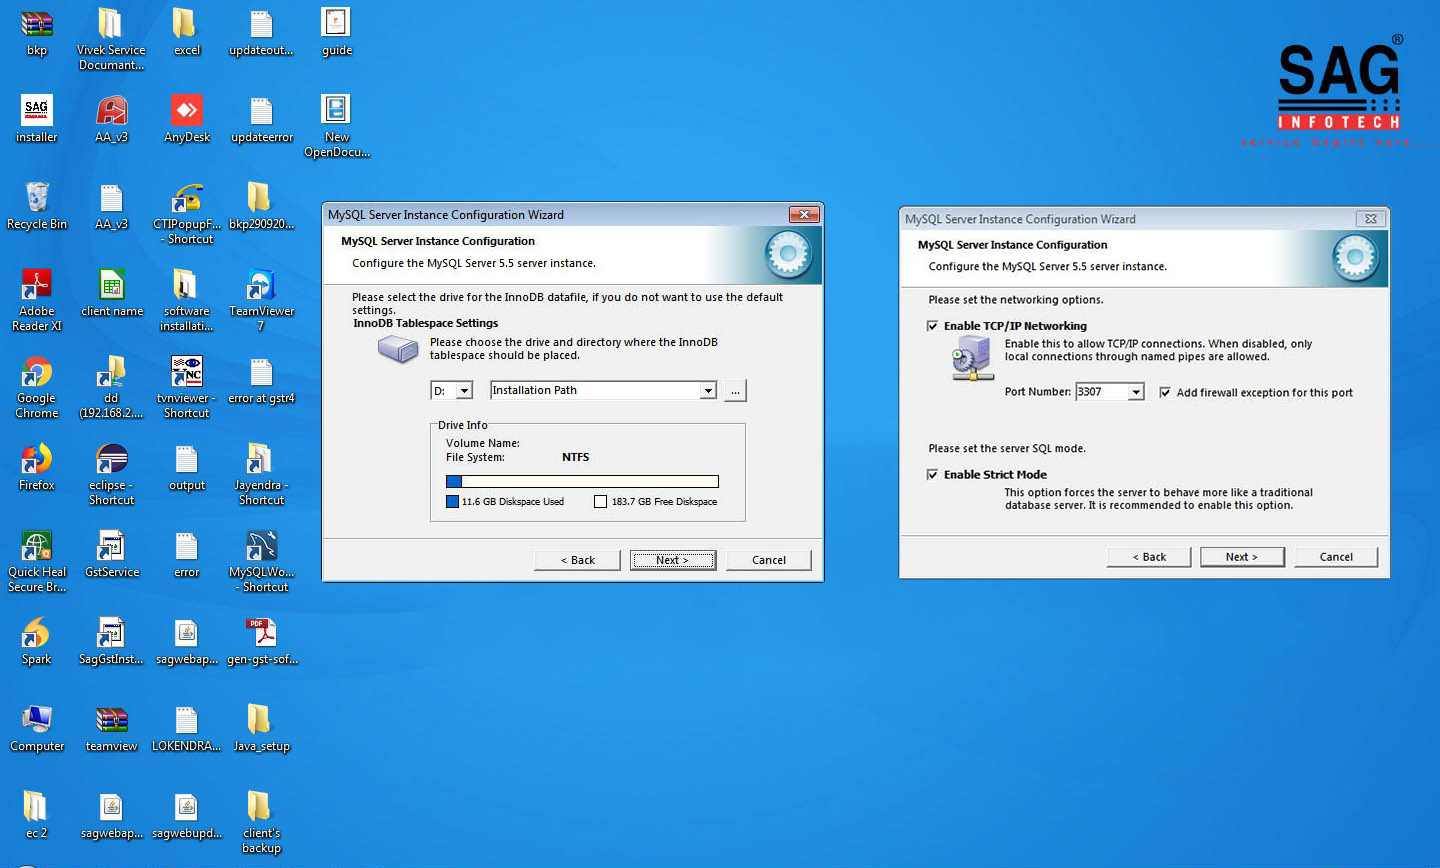
- Now we will continue the MySQL Instance Configuration Wizard. At first, you have to select “Detailed Configurations”. After that click on Next and select “Developer Machine” Next select “Multifunctional Database” and click on Next.
- Now select “Decision Support (DSS)/OLAP” and click on Next. In the next screen, you have to change the port number, By default, it will be “3306” you have to change it to “3307” and tick the box next to it saying ‘Add Firewall Exception for this Post’.
Read Also: Benefits of Newly Launched Gen GST Software Version 2.0
Step 6
- Proceed with installation and leave all check boxes marked as default.
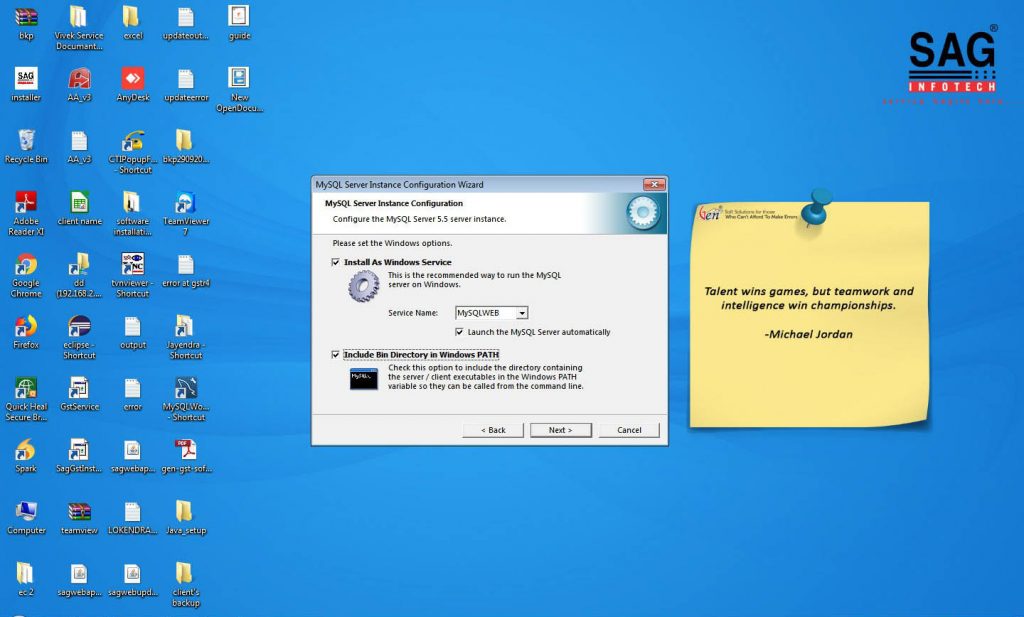
- In MySQL change the MySQL Service Name from the default name “MySQL” to “MYSQLWEB” as shown in the Screenshot.
- Tick the option “Include Bin Directory in Windows PATH” and click on ‘Next’.
- In the next window enter the password as “root” and tick the box which says “Enable root access”.
- Now click on ‘Next’ and in the next window click on ‘Execute’ and wait for it to finish.


Step 7
- Now again head to Setup Folder and run “sagwebapp”. It should show the message “Service Started Successfully”. When you click on ‘Ok’ it will open a new window.
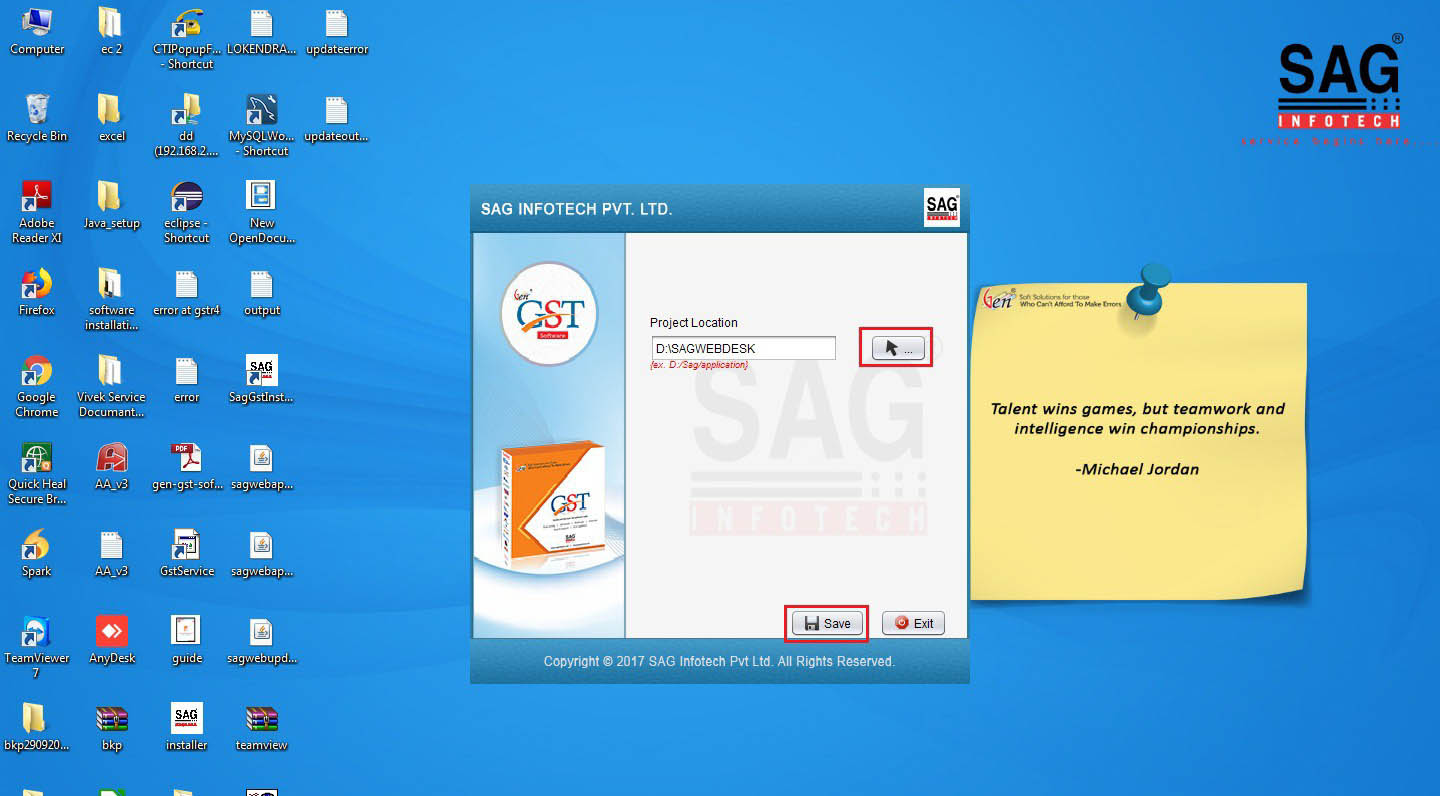
- Next, click on the “Install” button. It will open a new window, which shows a path of software installation from your PC. You need to change this path. You will choose the path of the same drive where you have installed the Java & MySQL, There you have to create a folder with the name “SAGWEBDESK”.
- Next, click on “Save” and Install it
Step 8
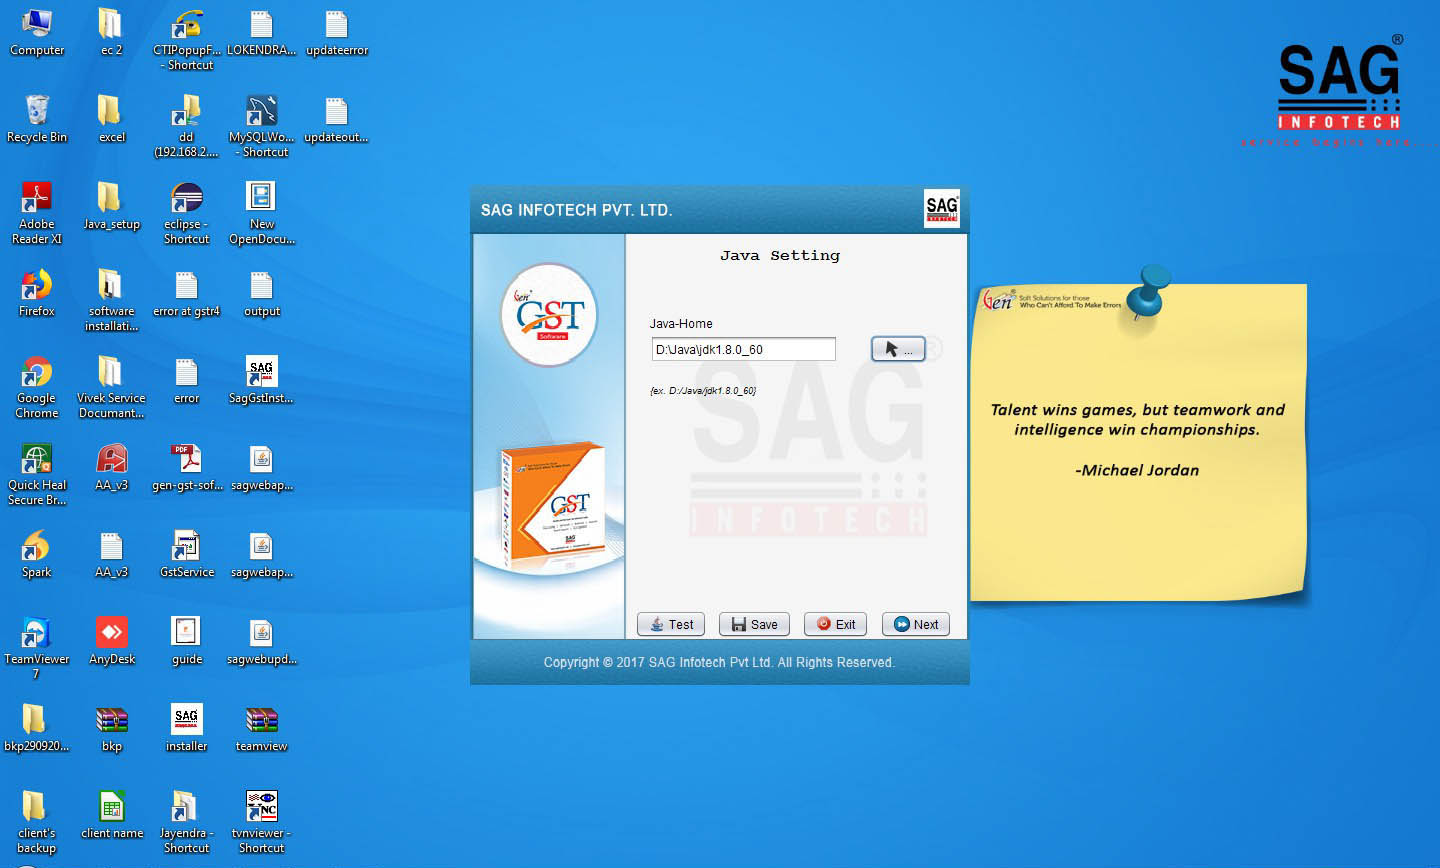
- In the next step, it asks for a file for “Java-Home”, Here you must choose the path of JDK (Same folder where you installed the JDK file in the Java Folder). When you select the folder it should look like “D:\Java\jdk1.8.0_60” depending on the drive you chose to install Java. You can also validate it by clicking on the “Test” button. Click on Save & then Next.
- Now it will install the project, After completion click on Finish
Step 9
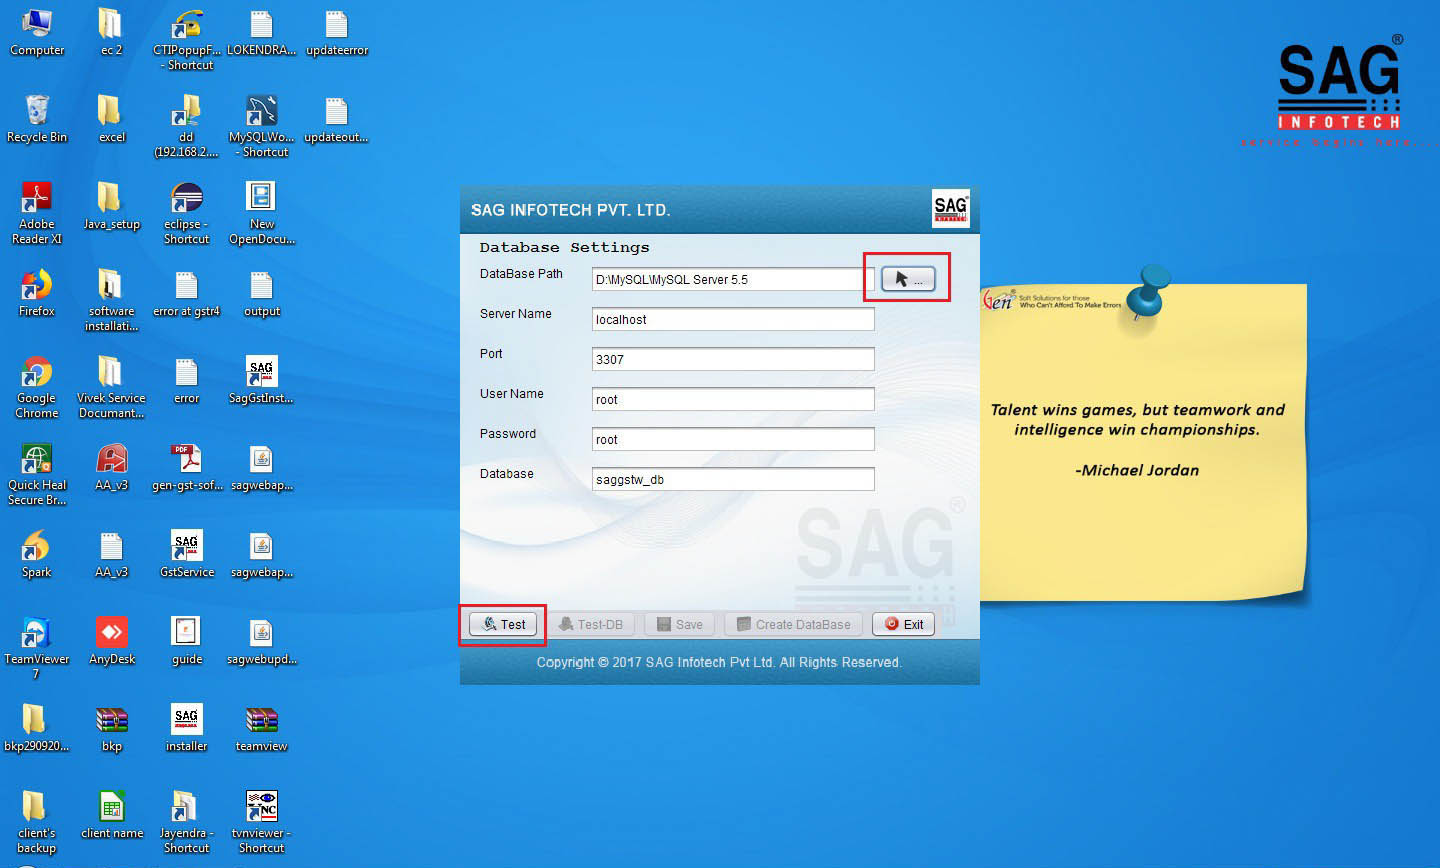
- In the next window, it will ask for Database Setting.
- First select a path for MySQL, For which you have to choose the MySQL folder in your drive. For ex. If you chose the drive ‘E’ for installation then your path will be “E:\MySQL\MySQL Server 5.5”.
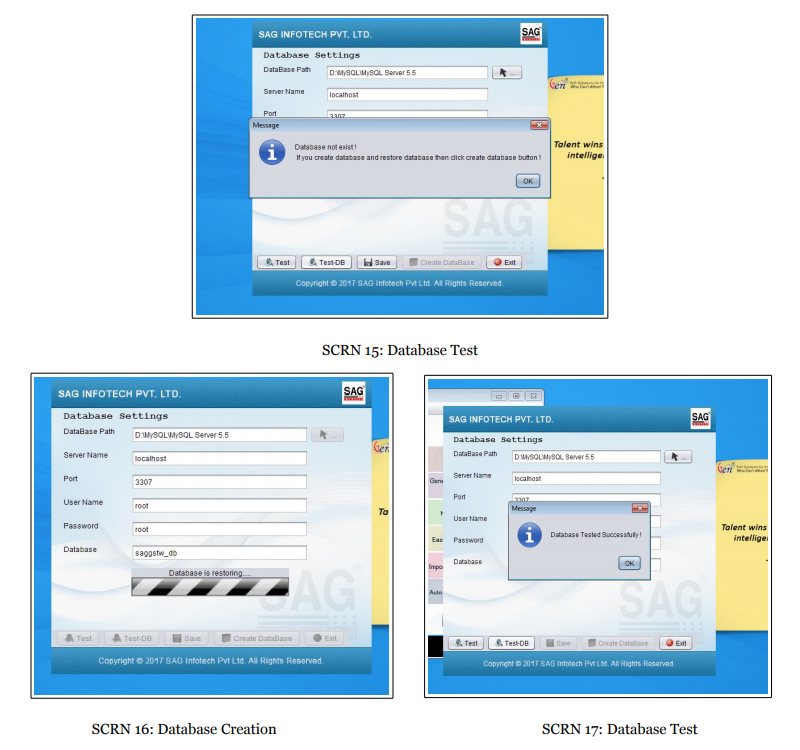
- You can test the Database configuration by clicking on “Test”.
- Now click on “Test-DB”. It will show a message, “Database does not exist” as your Database is not created yet. Now you have to create a Database, For that click on the “Create Database” option, It will show the message “Database is restoring”. and after that click on “Test-DB” Now it will show “Database Tested Successfully”.
- The Setup is complete, now close all the windows.
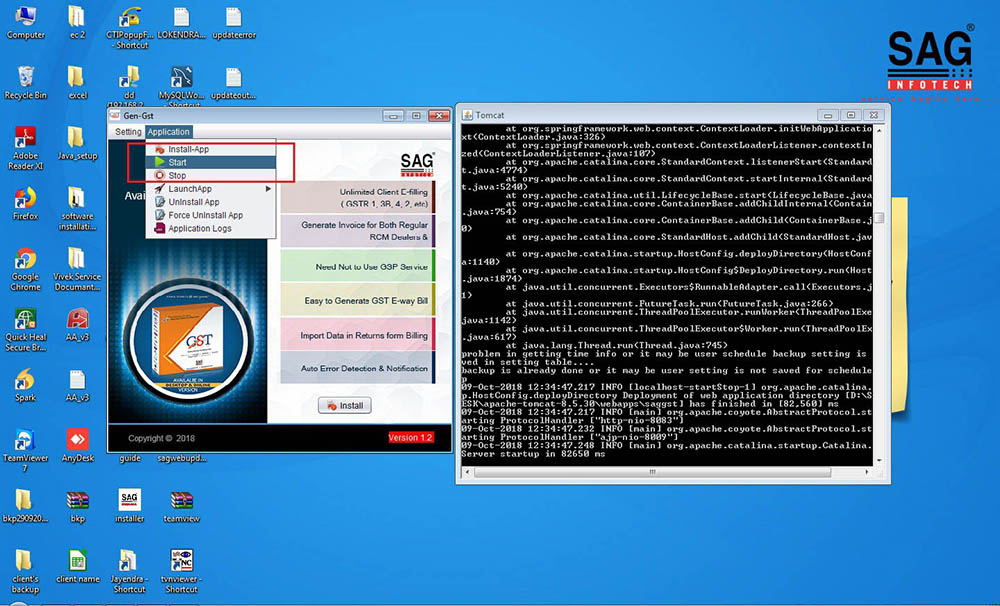
Step 10
- To run GST Software go to Gen-GST > Application > Start. It will open a window named Tomcat.
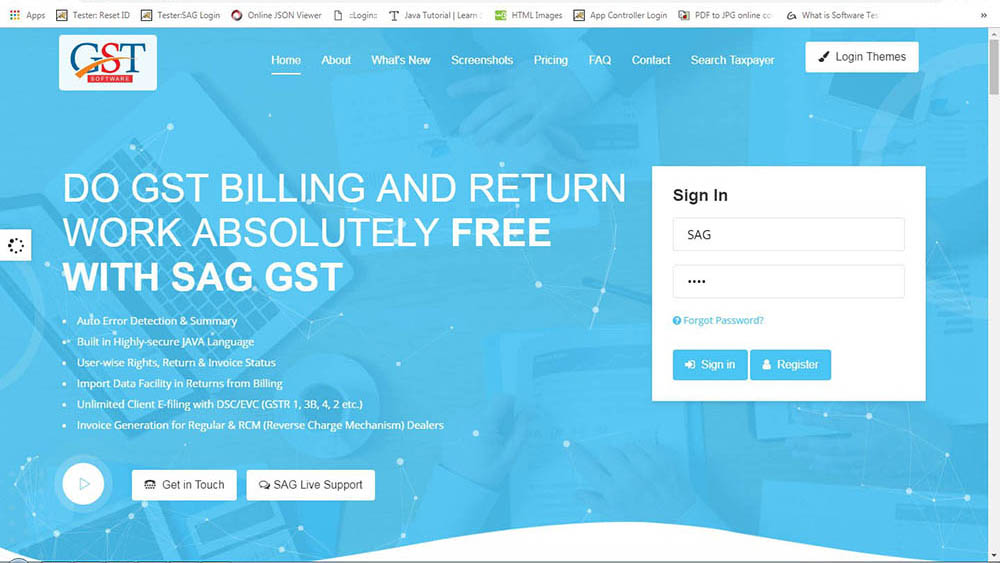
- Now go check Gen GST Application in the taskbar and right-click on Gen GST Software. If it shows the application status running in your window, you need to click on the ‘GenWebGST’ option on the Desktop.
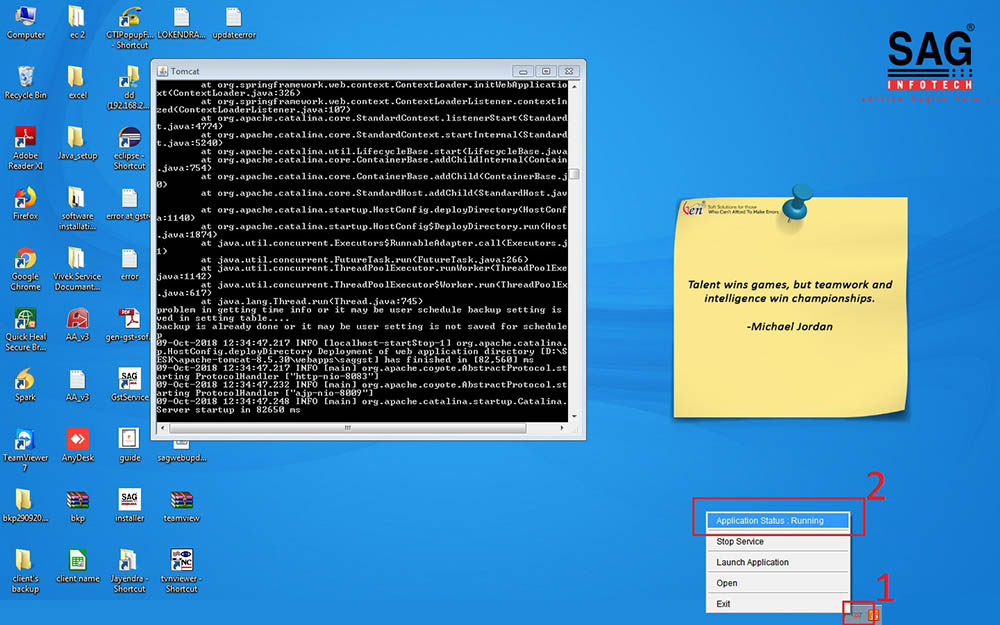
- It will start the GEN GST Software in your system.
- By default Username is “sag” and the Password is “1234”.