Simple Definition of File Validation Utility (FVU)?
File Validation Utility, also known as the FVU facility, will allow you to validate your e-TDS/TCS return file. NSDL provides this utility as part of its services. The FVU verifies return files generated by deductors in accordance with prescribed formats.
Using this utility, you can easily submit an error-free e-TDS/TCS return file. This service is available on the Tax Information Department’s website and after downloading Gen TDS software. The facility allows you to validate e-TDS/TCS return files from Financial Year 2005-06.
Why Select Gen TDS Software for FVU File Generation?
Taxpayers who fall under a particular category are required to file TDS and TCS returns. According to the norms & regulations of TRACES and CPC, India, Gen TDS provides the most simple and user-friendly interface for filing TDS and TCS returns online.
Gen TDS software also generates pre-determined TDS amounts, prepares returns, and calculates interest and penalty fees (if necessary), as well as late filing fees (if applicable). There is an official tax information network website for the government of India that lists this software as an authorized TDS software.
There are multiple features are available in this software like importing and exporting data, filing all TDS forms such as 24Q, 26Q, 27Q, and 27EQ, online correction of TDS statements etc
Procedure to Generate & Download FUV File Via Gen TDS Software
Step 1:- First Install the Gen TDS Return Filing Software on your desktop and laptop after that click on the TDS tab section.
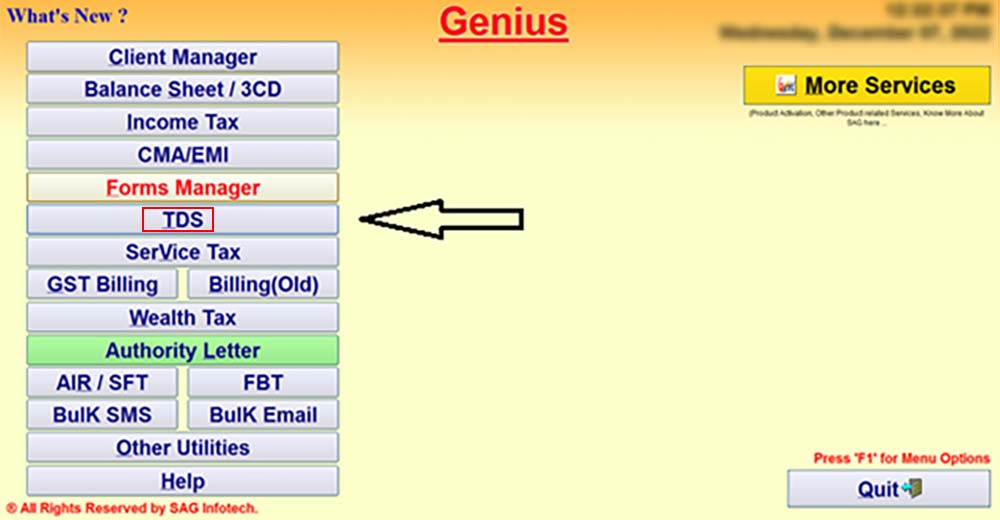
Step 2:- Now click on continue as shown in the below screenshot.

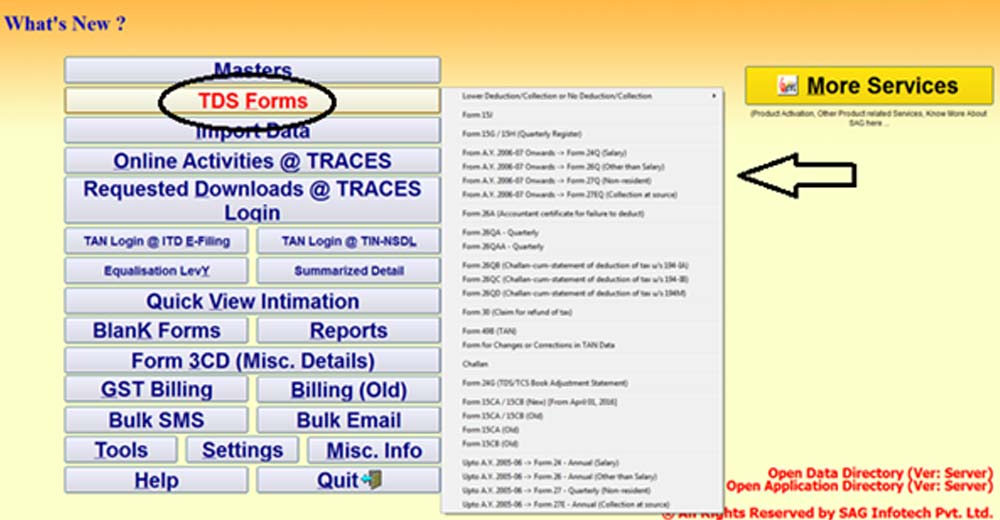
Step 3:- After that select, the TDS Forms options and Select the Form for Which You Want to File the Return.
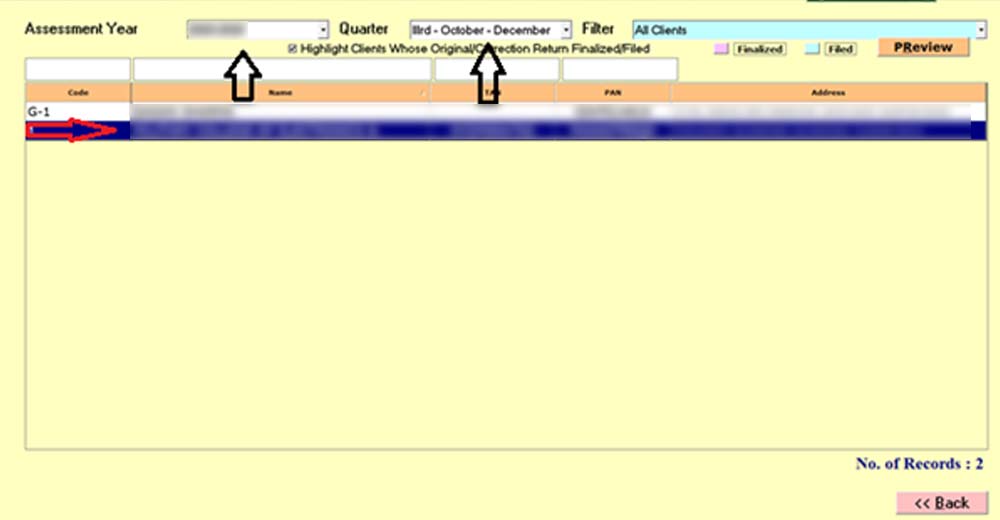
Step 4:- After that Select the Client, Assessment Year and the Quarter for Which You Want to File the Return.
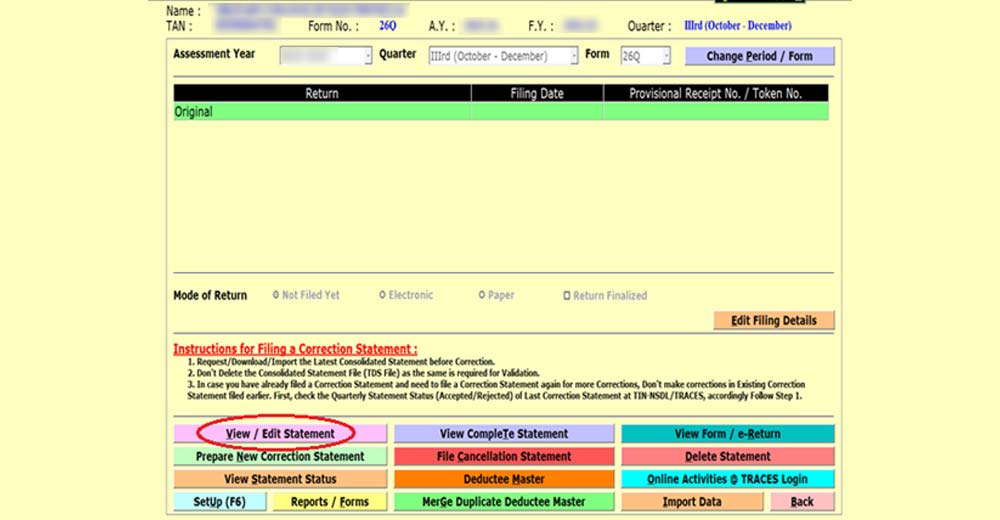
Step 5:- Click on View/Edit Statement.
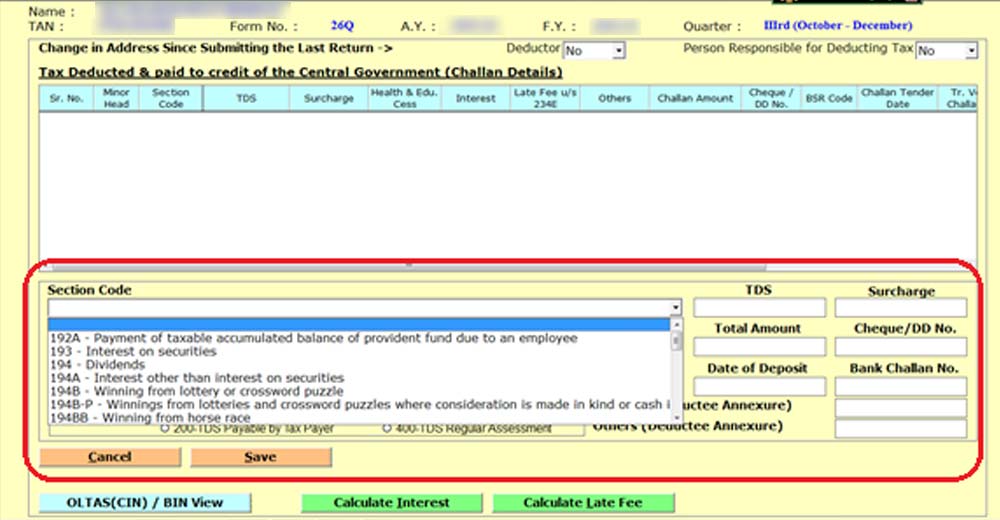
Step 6:- After That Select the Section in Which You Have to Make the Payment and Fill in the Challan Details Like Bsr Code, Challan Date, Amount Etc.
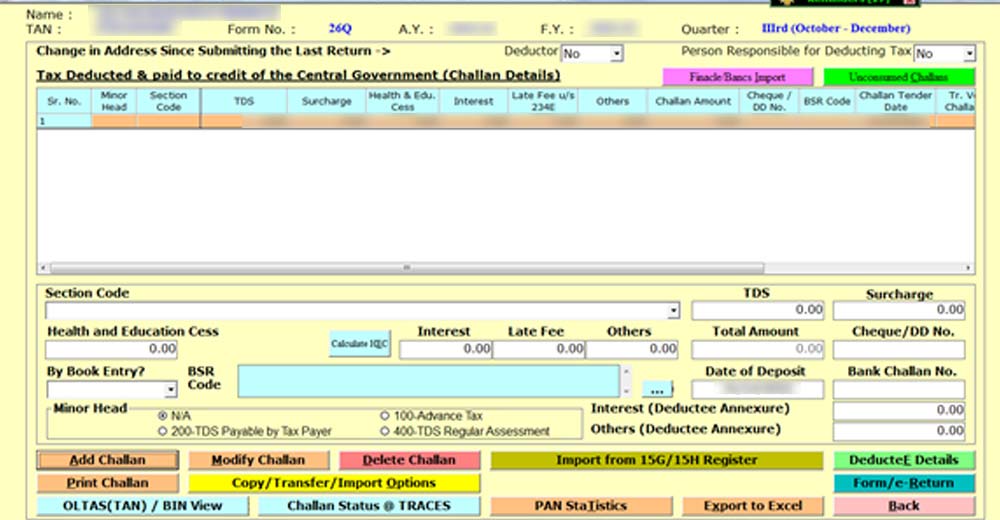
Step 7:- Click on the save button to add your challan details. The details of the challan can be seen in the upper row.
Step 8:- After Double Clicking the Challan You Can Add the Deductee Details Here Like the Name of the Deductee, Payment Date, Date of Deduction Etc.
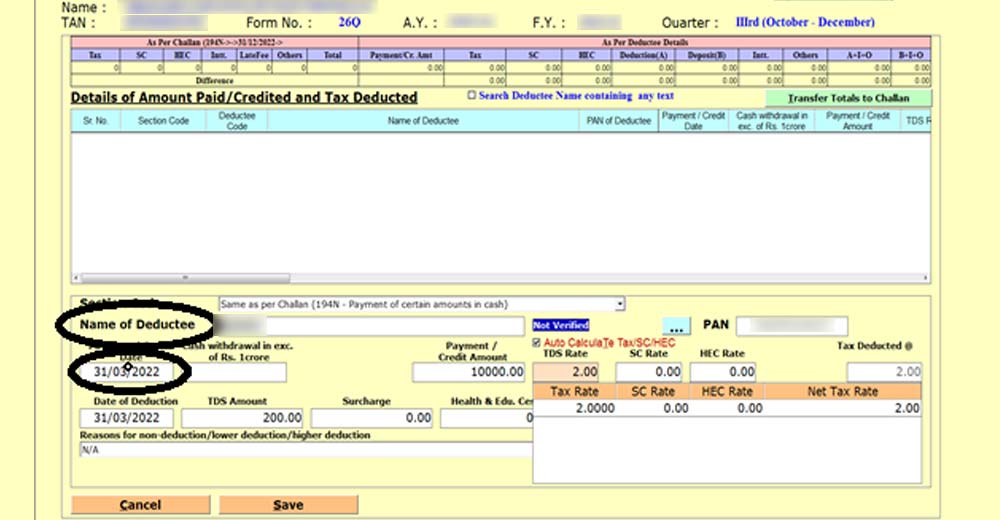
Step 9:- After Adding Deductee Details Click on Save Button and Then Click on Form/e-Return.
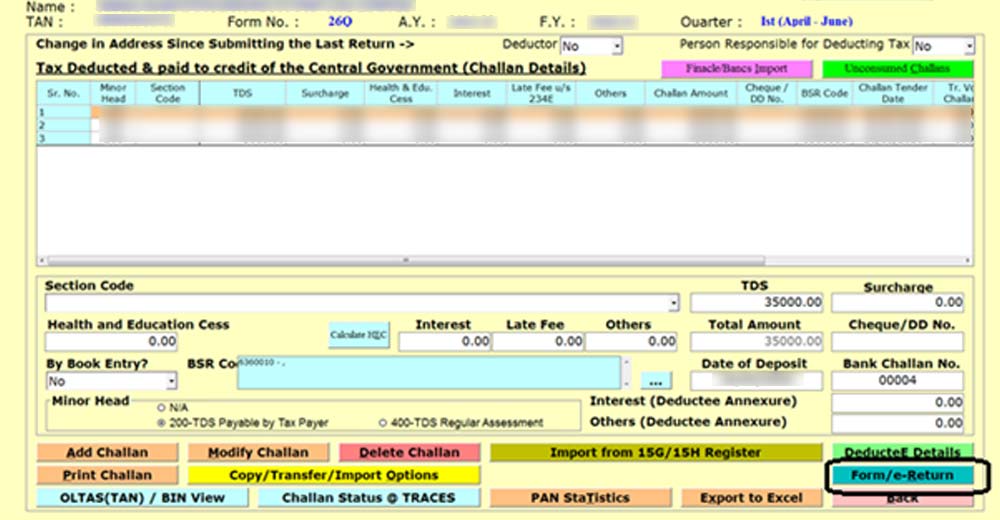
Step 10:- After Clicking on Form/e-Return Click on Generate E-Return as Shown in the Image Below.
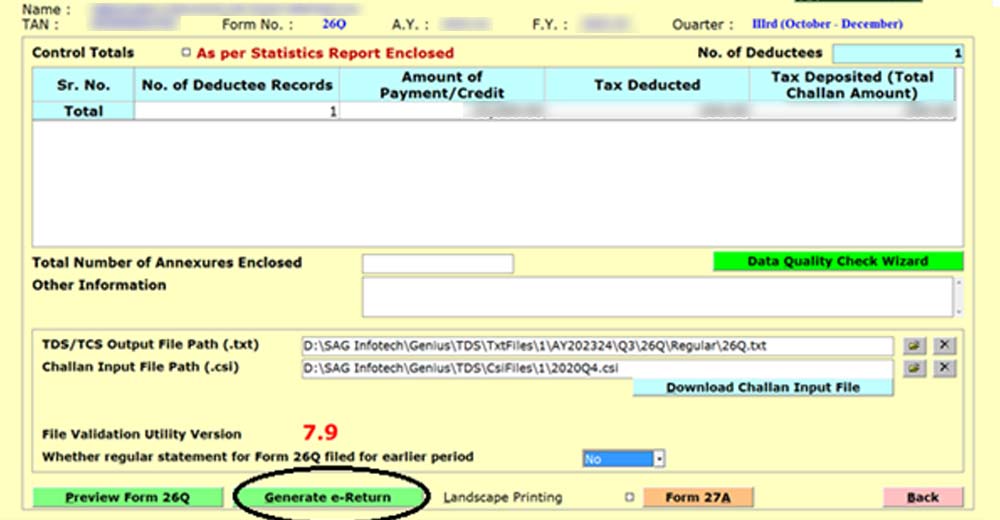
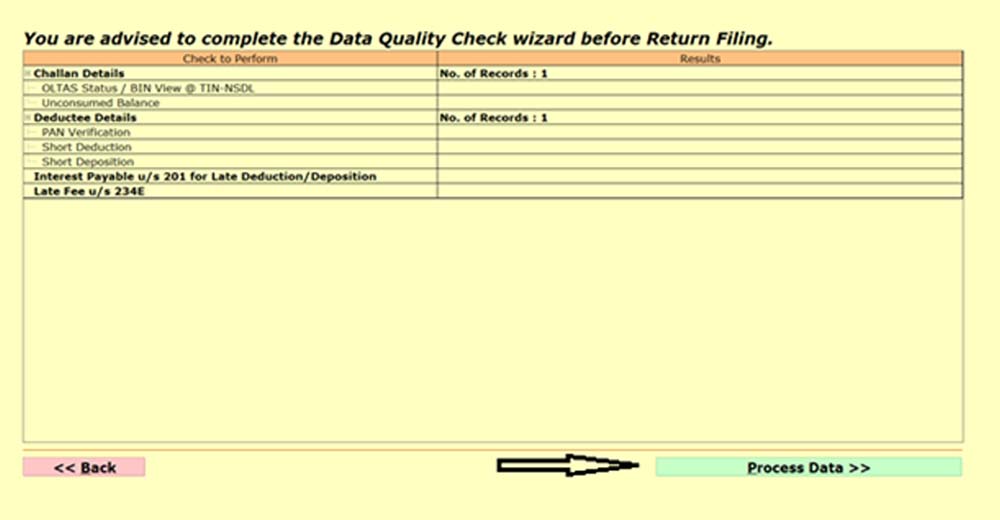
Step 11:- After That Click on Process Data.
Step 12:- Once the Process of Data Get Completed as Shown in the Image Click on the Back Button.
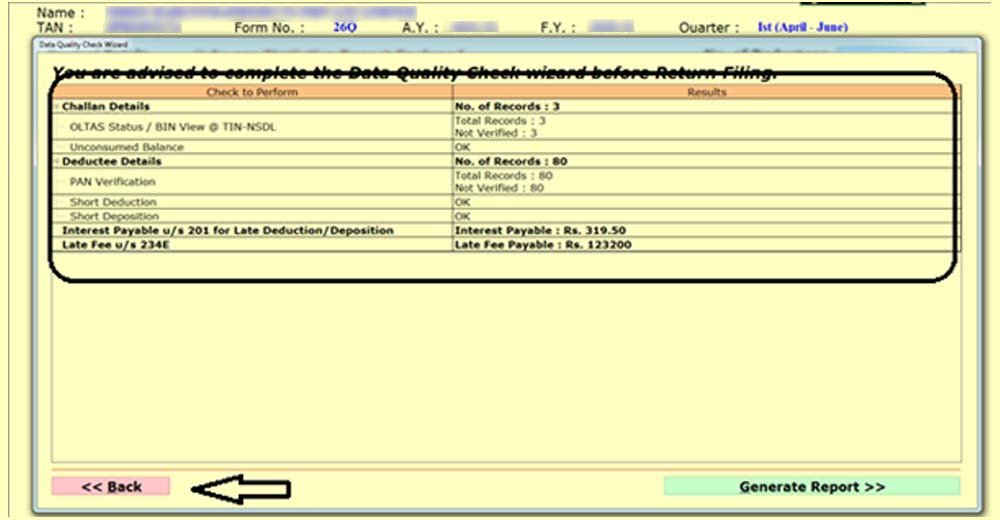
Step 13:- In the next step Click on Proceed Button as Shown in the Image Below.
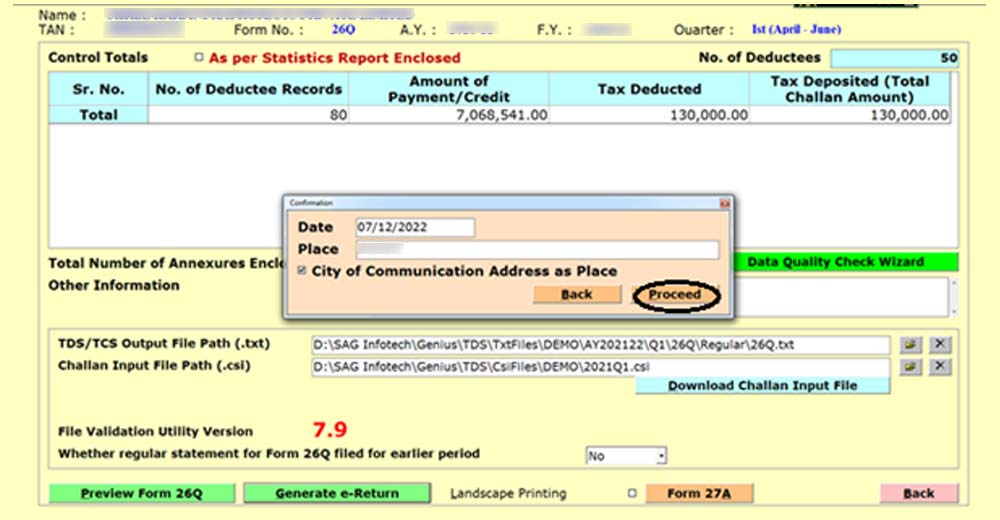
Step 14:- Now your FVU File is Generated Successfully.
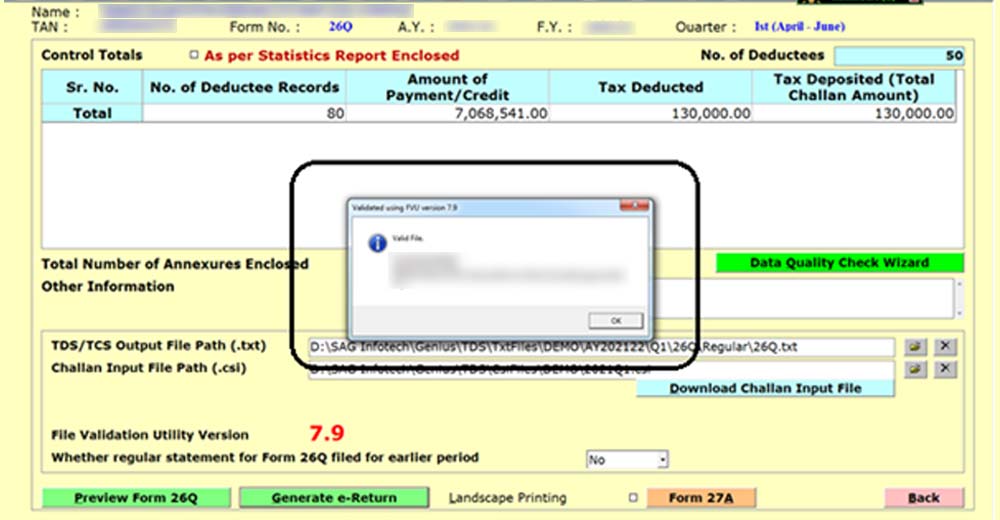









fvu file