SAG Infotech Pvt. Ltd. recently introduced Gen GST Registration Utility which has given the liberty to the users for becoming a member of the GST network with minimum complexity. The Gen GST registration utility is embedded within the user interface and one can easily find the link to download it as it is absolutely free. This utility helps the taxpayers with GST migration along with GST registration on the Indian government GST network. The utility helps to automatically store one’s filled-up data on the page which can be restored afterwards, and the session doesn’t expire, unlike other government portals. The utility is user-friendly and can help a tax-paying firm in a very helpful and assistive manner.
SAG Infotech also released a downloadable free setup of Gen GST software along with various advanced features of filing and billing work. The software has two parts that are desktop version and the cloud version. The company also offers a free version on the cloud for one GST identification number.
Recently, VAT dealers in India successfully migrated and registered on the GST portal and the Government extended the enrollment deadline to April 30th. Now, the provision for the migration and registration of service tax assessees to GST will be provided through the Gen GST Registration Utility.
Special Features of Gen GST Registration Utility
- Migration Utility – The feature is to migrate all the existing taxpayers into the GST network hassle-free.
- Simple User Interface – The UI has been kept very assistive and helpful to enrol the taxpayer easily.
- Secured Database – All the information will be automatically saved on the pages, to avoid any crashes.
- No Session Expiration – The page filling can be done with easy time, as the session won’t expire, unlike other government portals.
The Working Procedure of Gen GST Registration Utility
Step 1:
- First Download the setup of Gen GST Utility
- After downloading the setup, extract the folder on your desktop
- Install the setup on your desktop
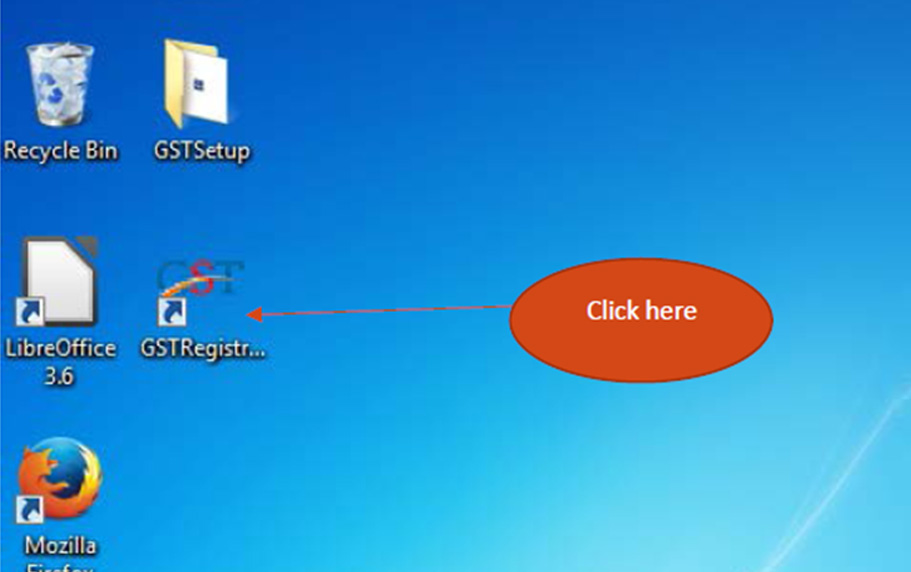
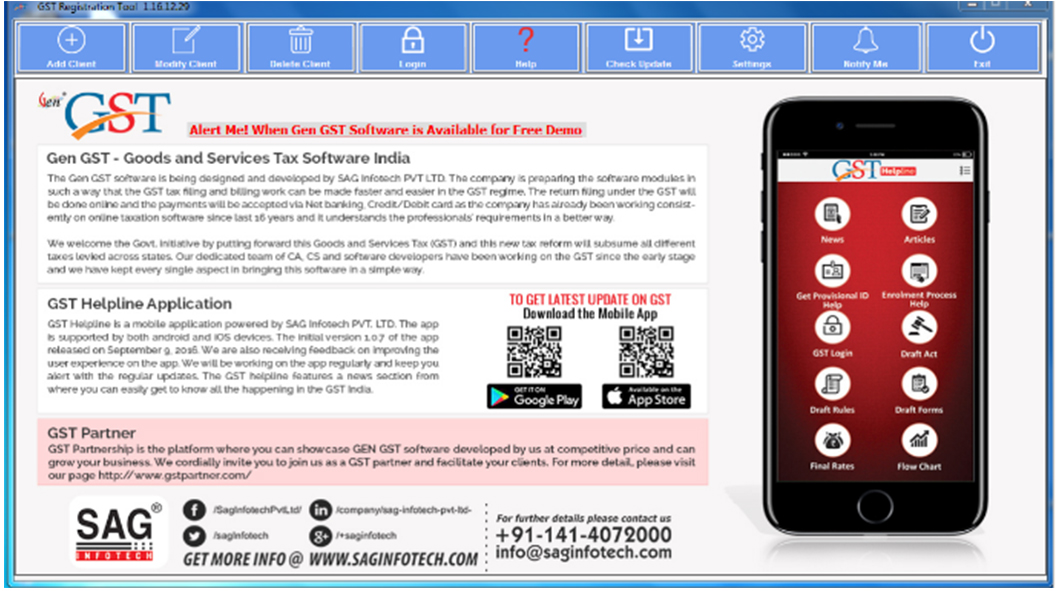
- After installation, a shortcut icon will be created on your desktop
- Click on the GST registration utility and start the application
Step 2:
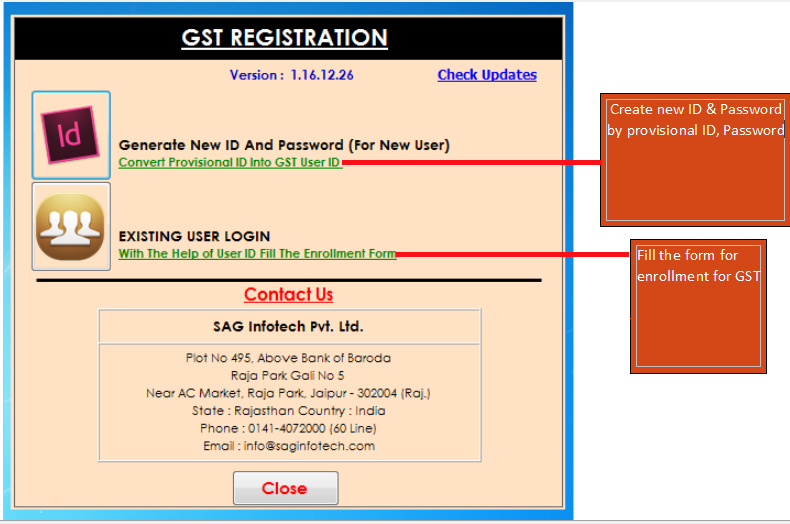
Create a new id and password by provisional id and password
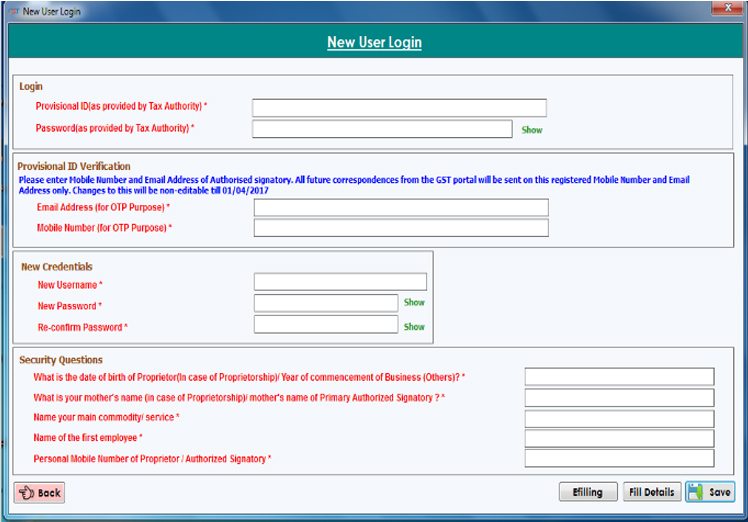
Step 3:
After creating a new id and password, this enrollment will display
Note:-
- Mandatory fields are marked with red colour
- Eight tabs will appear on top of the page-Business detail, Promoters/Partner/Authorized Signatory, Principal place of business, Goods and services, Bank of accounts and verification.

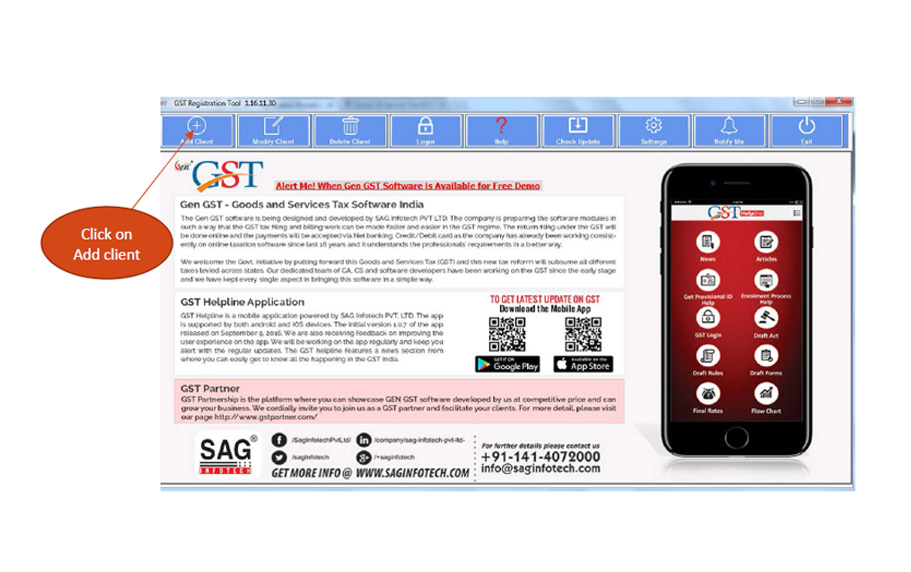
Step 4:- Click on Add client and create client
The following details are based on your existing data in the VAT system. You cannot edit these details.
- Legal name of the business (as per PAN)
- Legal name of the business(as per current tax act)
- PAN of the business
- State
- Ward/Circle/Sector
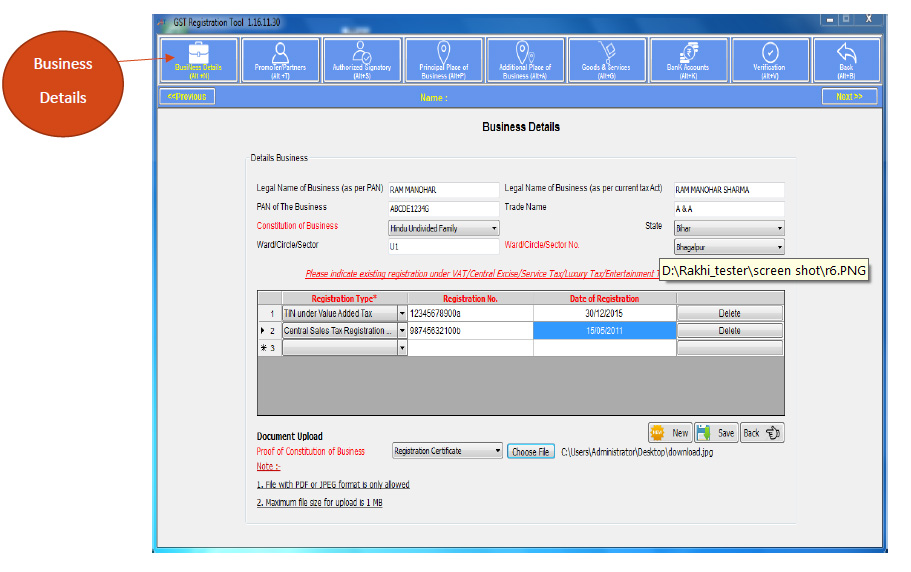
Note:-
- Fields like Registration number, Registration Type, and Date of registration are mandatory
- You need to Upload proof of “constitution of business”
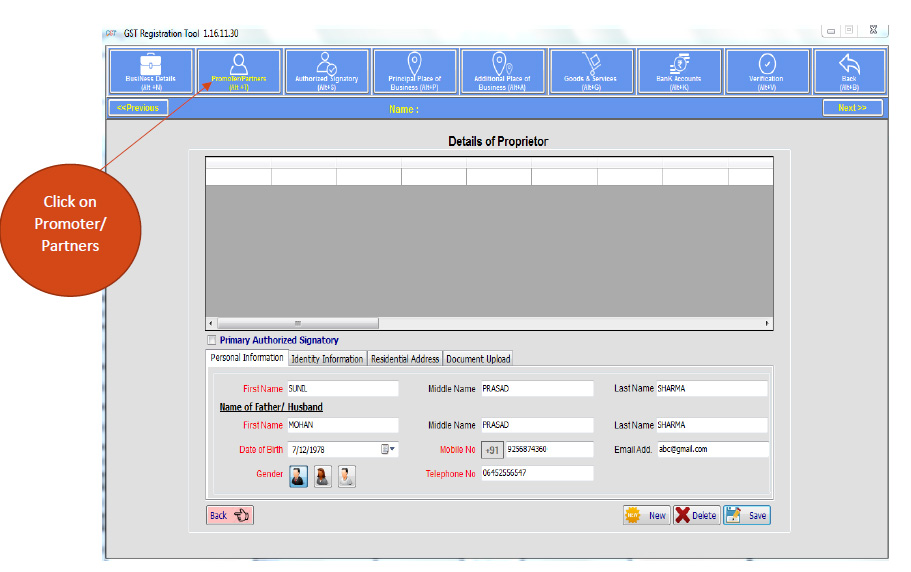
Step 6:- Details of Promoter/Partner
- Click on promoter/Partner
- The promoter/Partners collect the details of stakeholders in the business
- Enter the details carefully in all the respective fields
- Details in personal information-Complete name, the name of father/husband, contact details-mobile number, telephone number, email id, date of birth and gender are mandatory
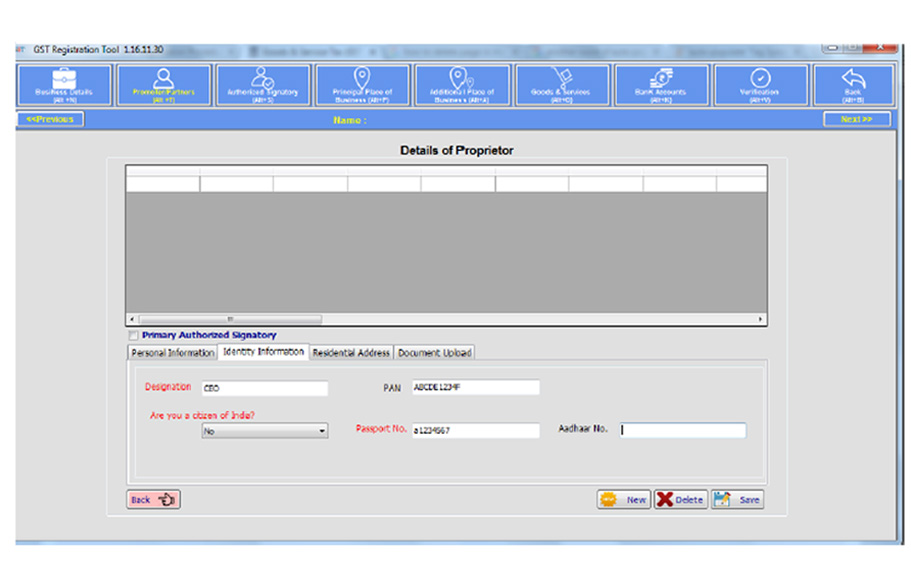
Enter Identity Information
- Designation
- PAN
- Are you a citizen of India?
- Passport No
- Aadhar No
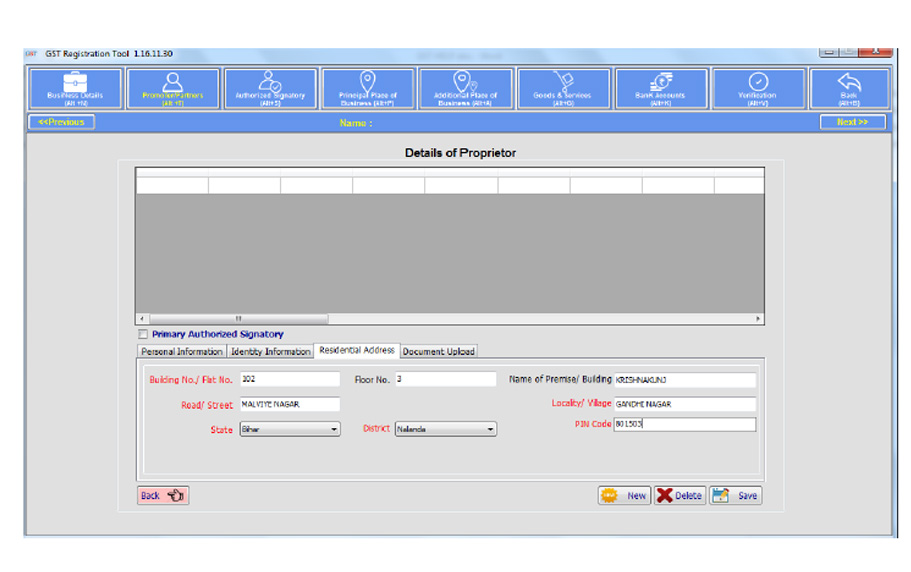
Enter Residential address
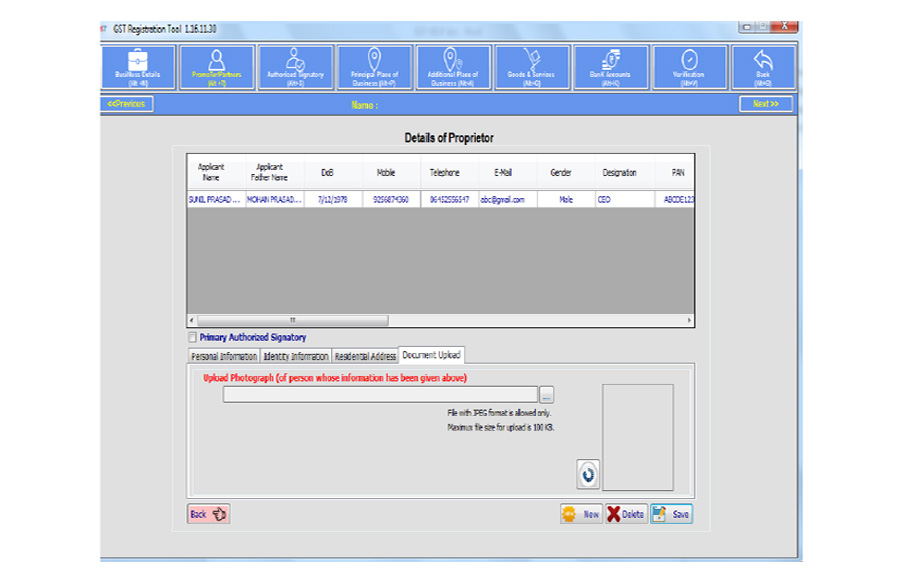
Enter Document Upload
- In the end, a photograph of the stakeholder has to be uploaded. The maximum file size is 100 kb
- To add more stakeholders, click on Add New Button
- Click on the save button
- The message will display ‘Data saved successfully’
Note:- In case the stakeholder is also the Authorized signatory then select the Authorized signatory option.
Step 7:- Authorized signatory
- Step by step filling in all the information.
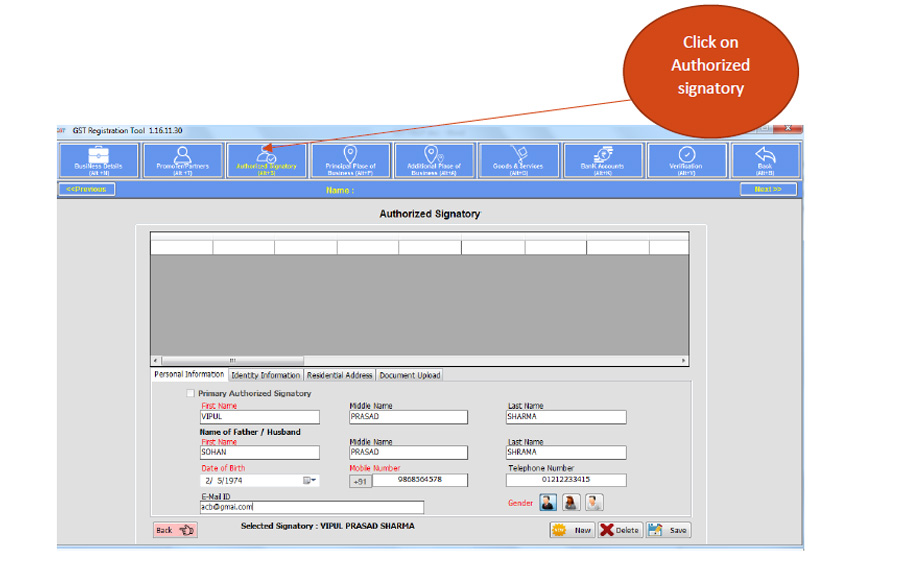
You have to fill in the information of the authorized signatory of the business.
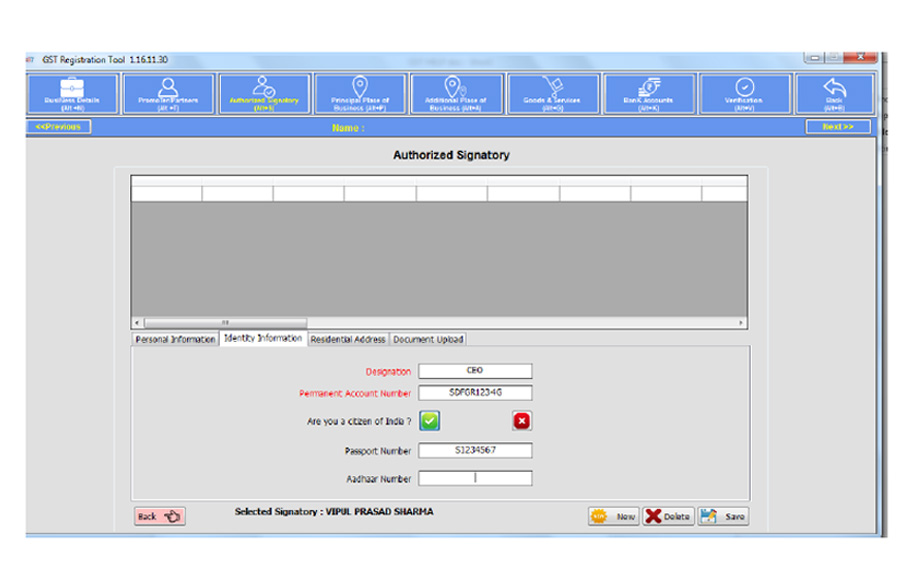
- Enter Identity information
- Like Designation and PAN are mandatory
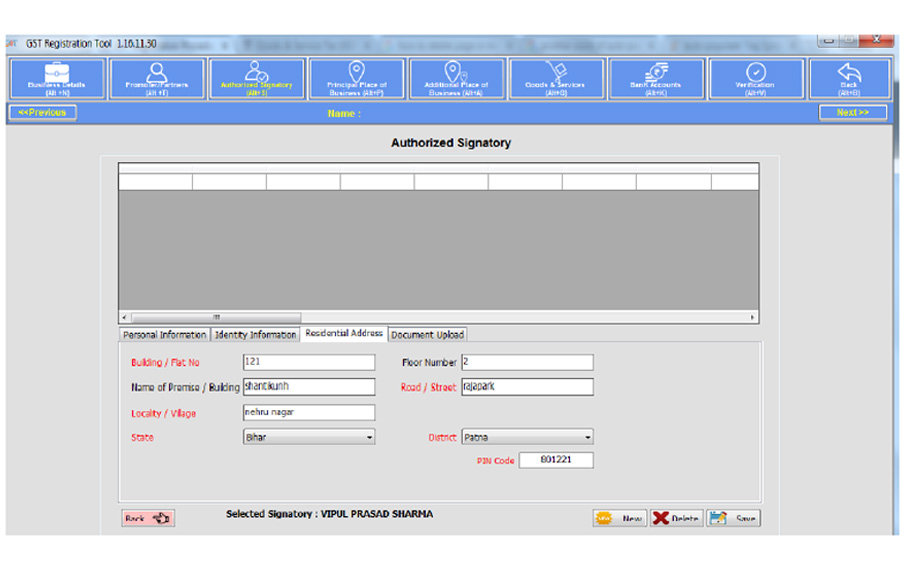
Enter Residential Address
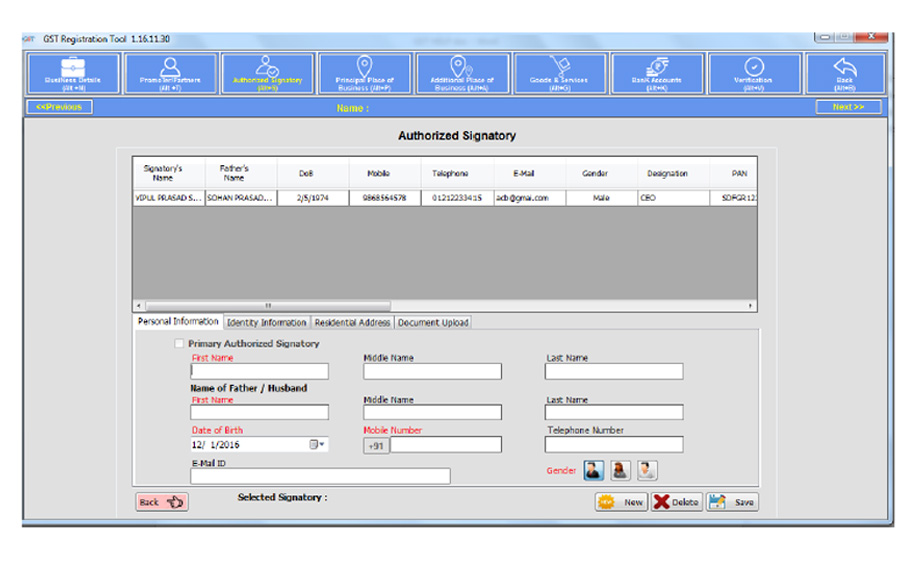
Enter Document Upload
- The Authorized signatory mandatory document has to be uploaded. The maximum file size is 100 kb
- Click on Add Button to add details of more authorized signatory
Step 8:- Principal Place of Business Here you have to fill in the information of the Principal Place of business
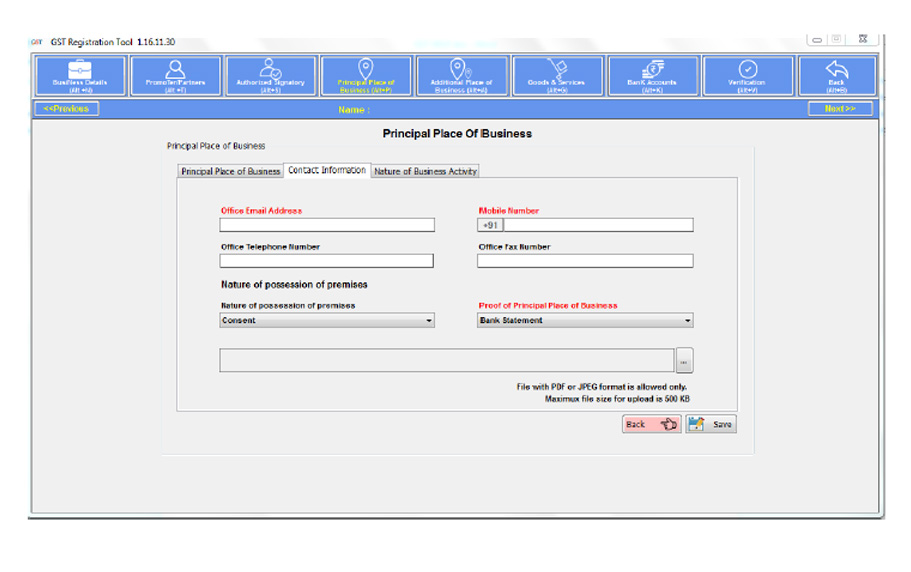
- Upload the proof of principal place as a mandatory document. The maximum file size is 1 kb
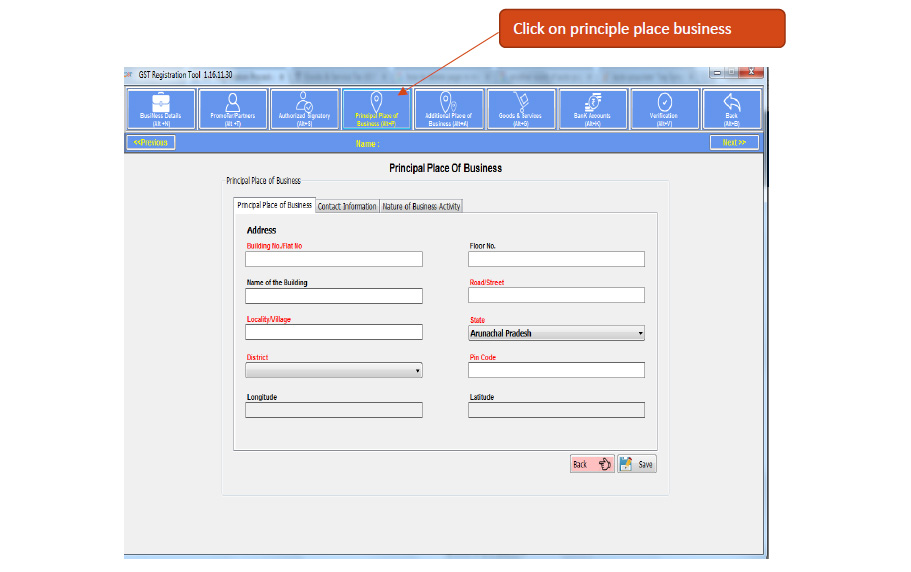
Enter Contact Details
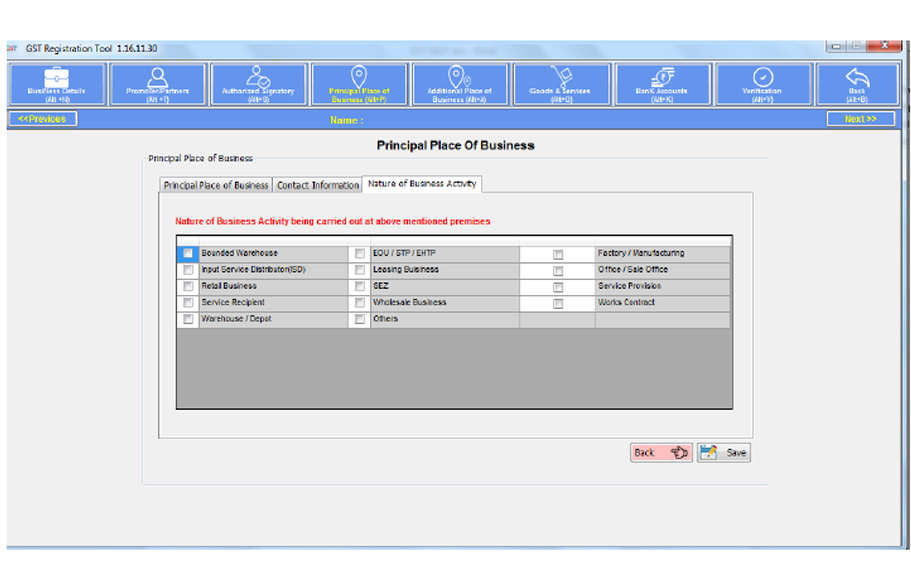
Enter the nature of the business activity
Step 9:- Additional Place of Business
- You need to fill in the information in this tab, in a Similar manner as you filled Principal Place Business
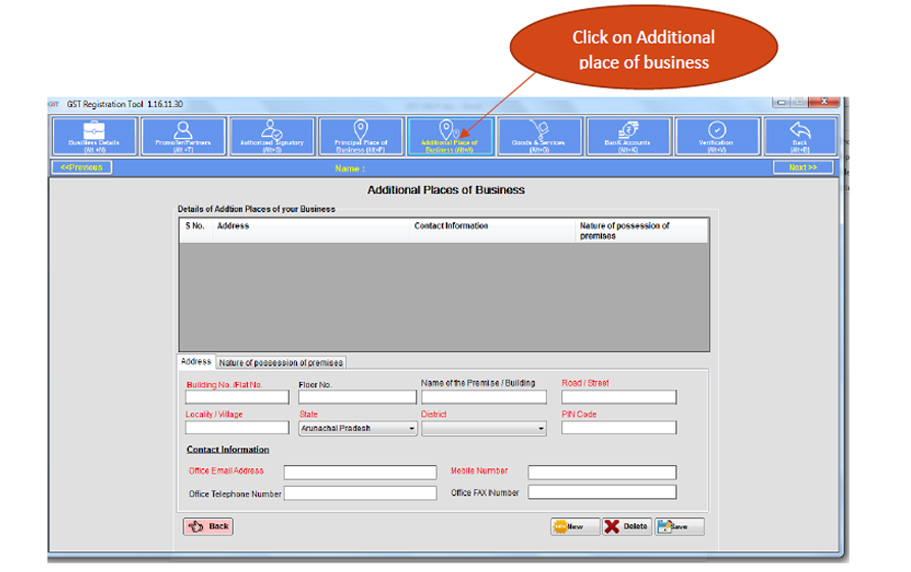
If the user wishes to add more place, click on Add New Button.
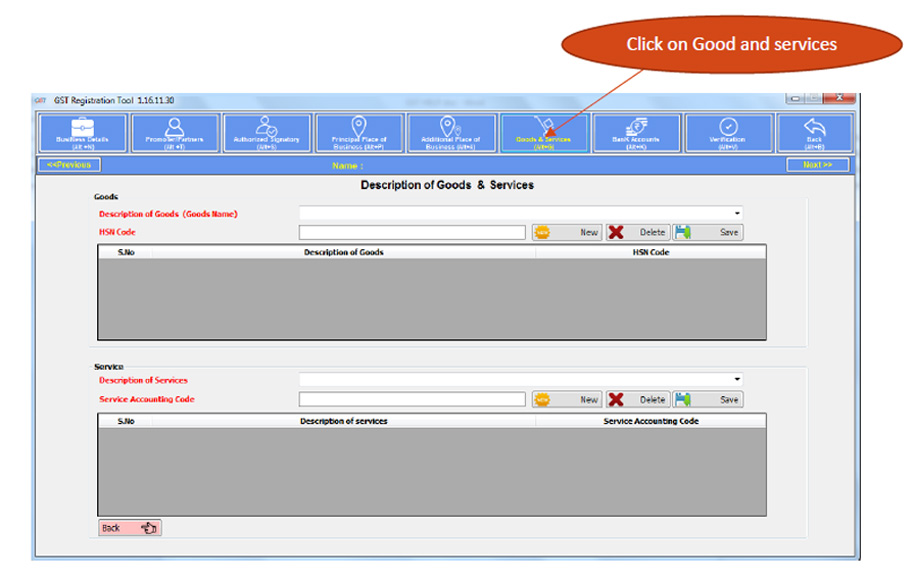
Step 10:- Details of Goods and Services
- This tab gives information about goods and services provided by your business
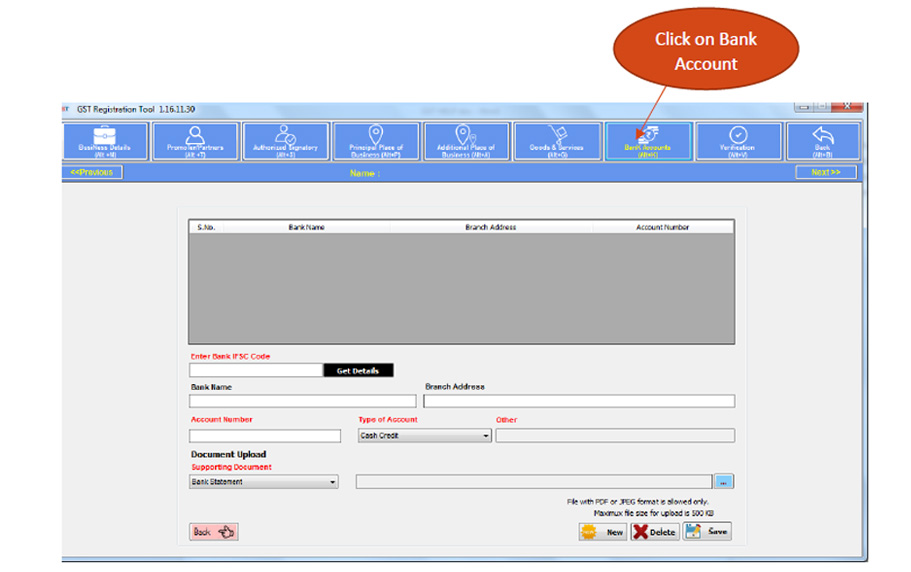
Step 11:- Details of Bank Account The details of Bank accounts mentioned by an applicant for conducting business need to be filled in here.
- It is compulsory to upload a supporting document. The maximum file size is 1kb
- You can add details of more accounts by clicking Add New Button
Step 12:- Verification
- This is the verification page for the authentication of details submitted in the enrollment form
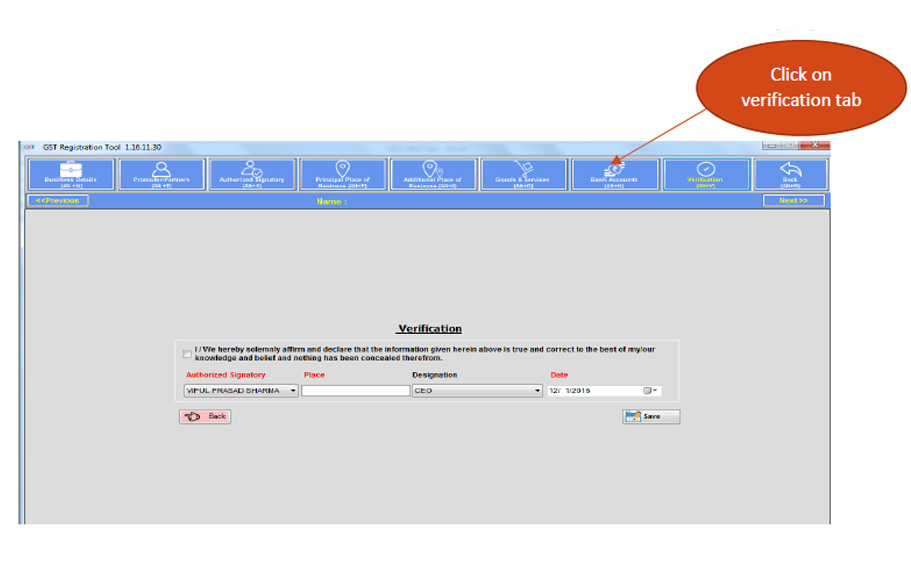
- Enter the Name of the Authorized signatory
- Place as your place of business
- Enter the designation of Authorized signatory
Step 13:- User can modify the client through Modify tab.
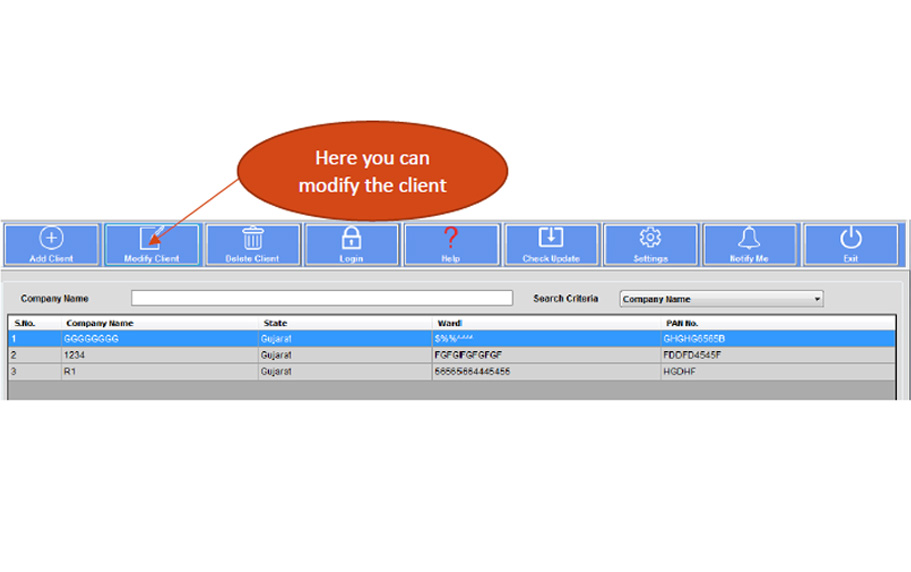
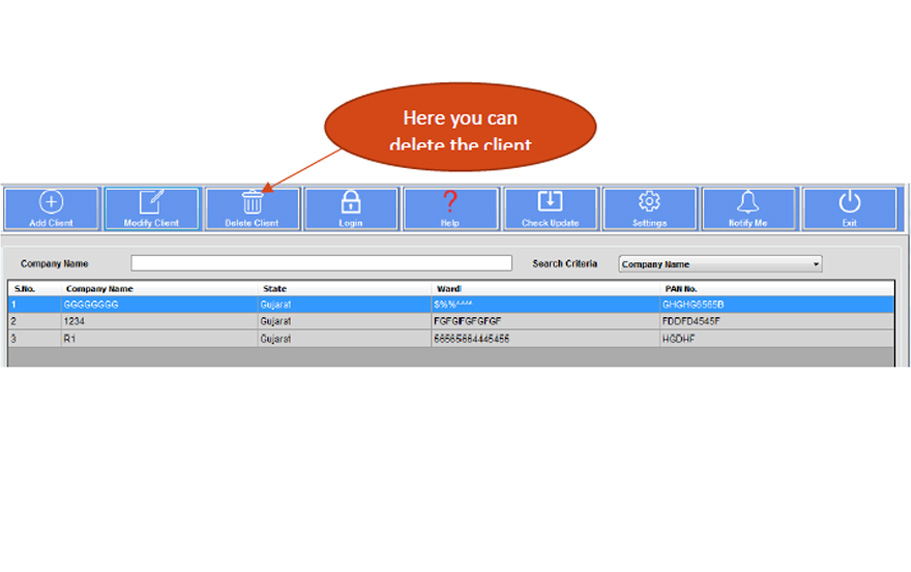
Step 14:- User can delete the client
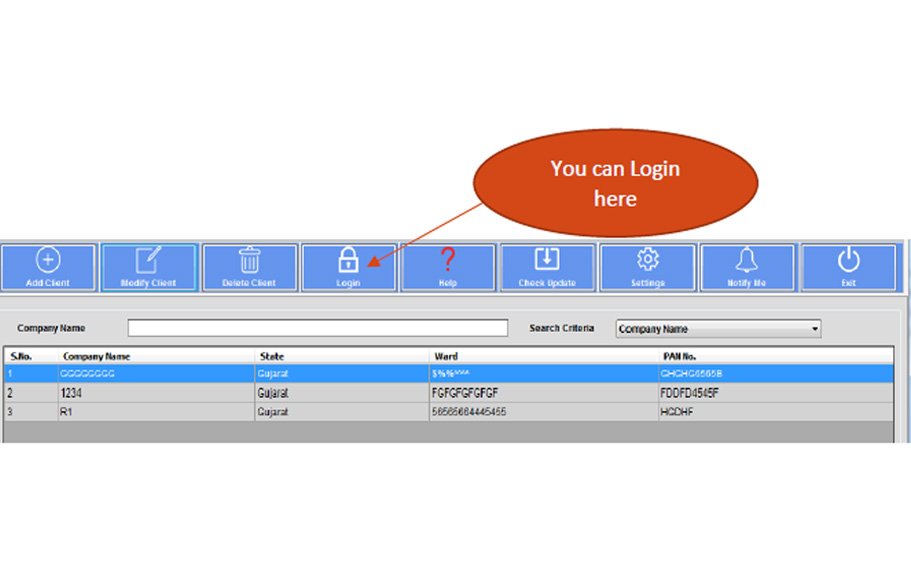
Step 15:- User can log in here.
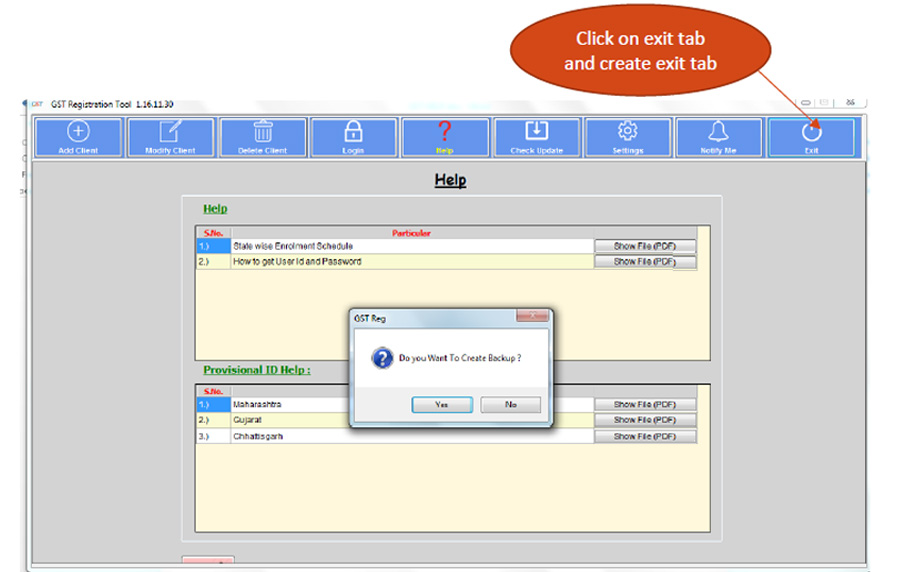
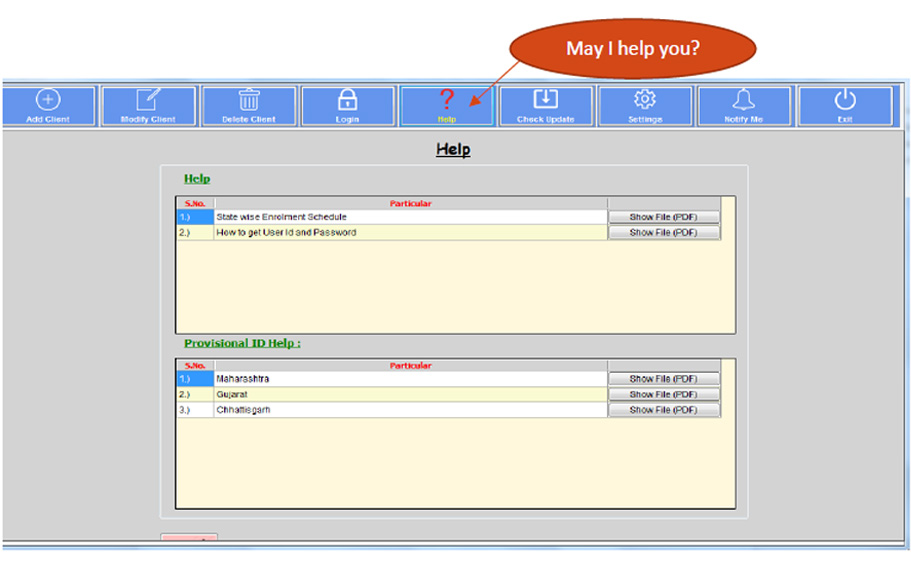
Step 16:- Help tab provide
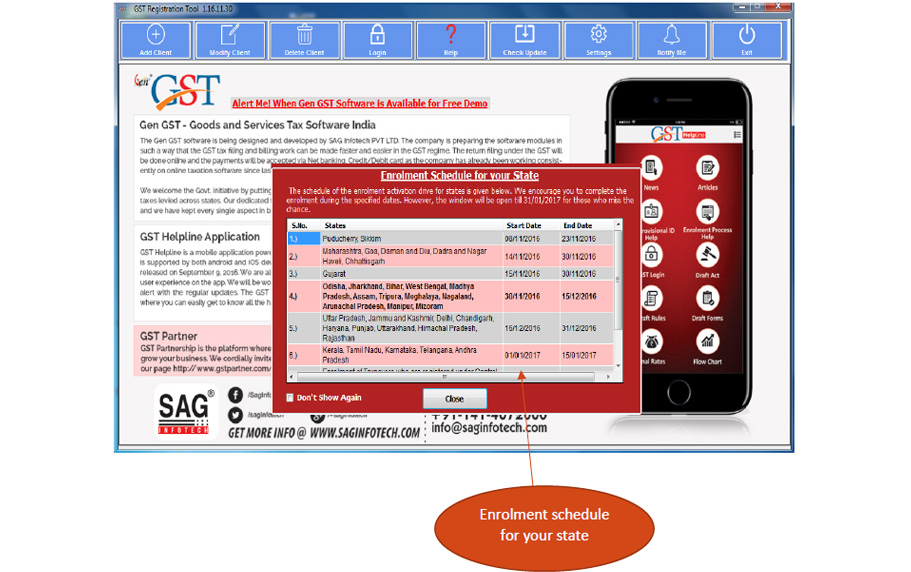
- State-wise enrollment schedule
- How to get a User ID and password
Step 17:- Here we check-update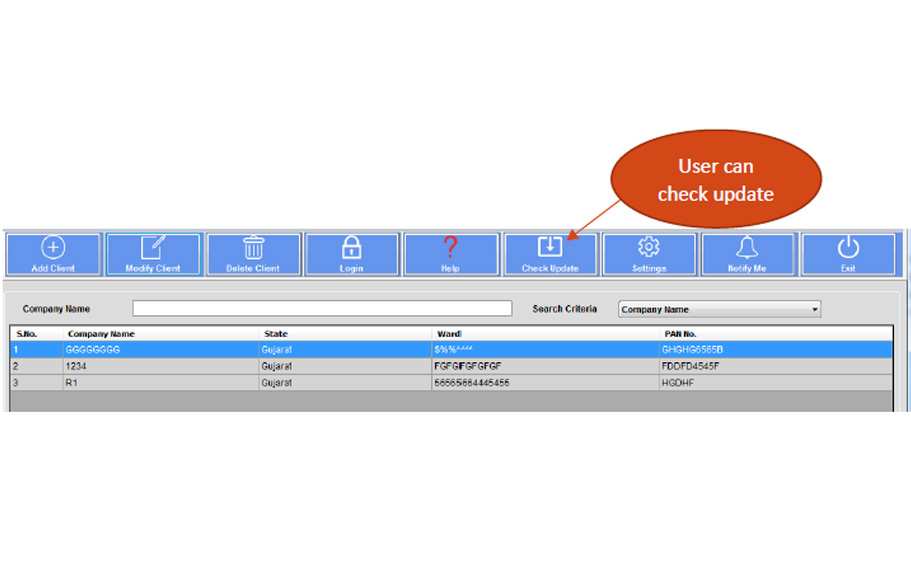
Step 18:- You have to change the setting here
Note:- You have to change the setting here Note:- If the user wants an Enrollment schedule for his state then click on the “setting” tab and checkmark “Show schedule whenever software starts”.
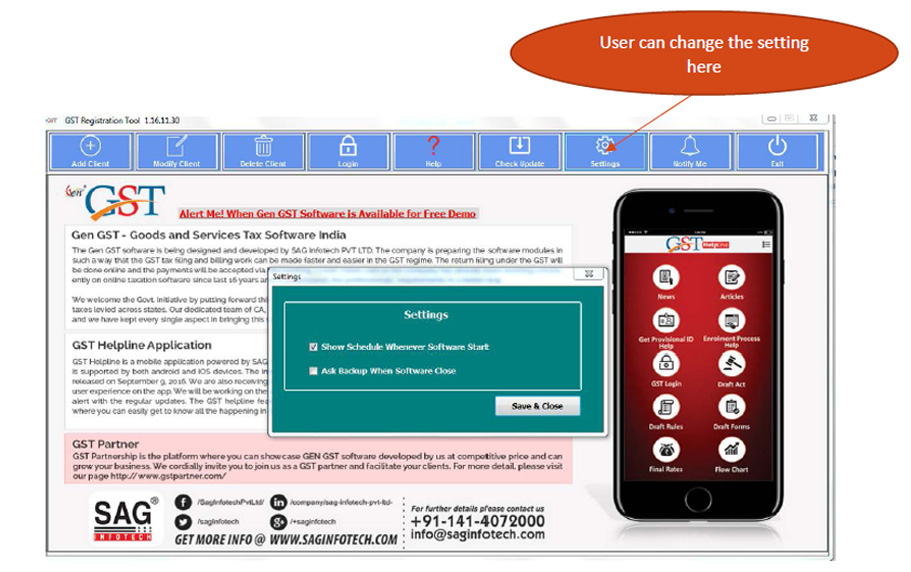
A popup window will display when the user starts the software
Step 19:- It is notified if the user has any Query regarding the software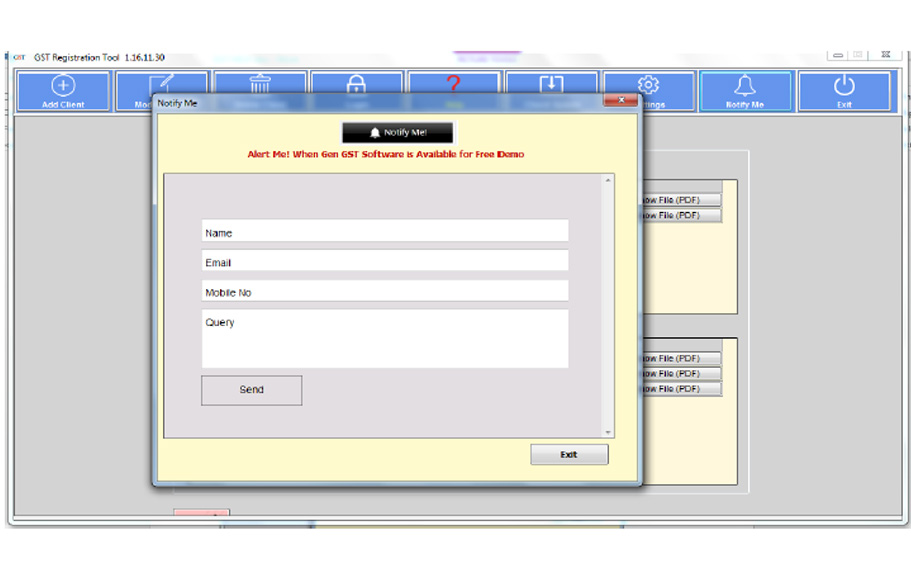
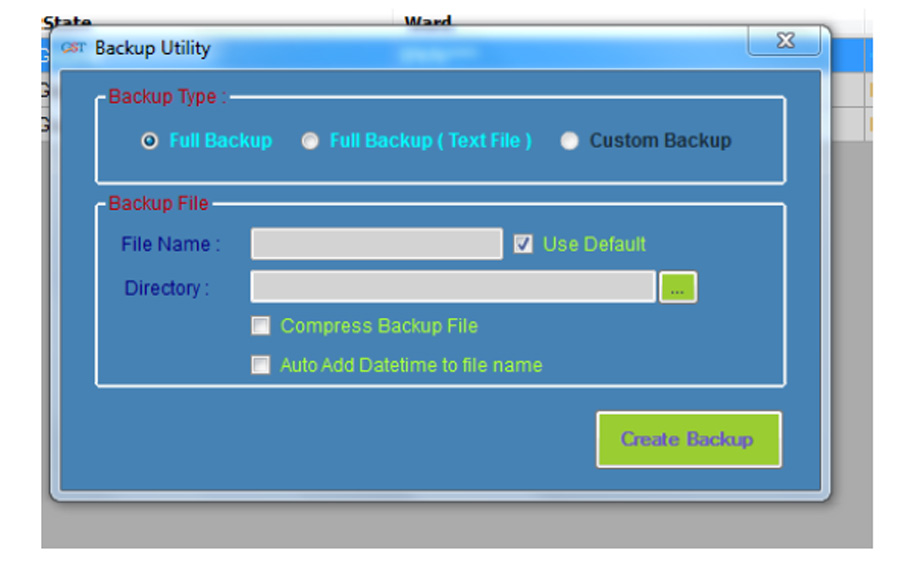
Step 20:– If the user wants to create backup before exiting the application.