An Explanation About E-invoice
E-invoices are digital documents that are exchanged between buyers and suppliers and validated by the tax portal of the government. An e-invoicing system is a digital process of preparing business-to-business (B2B) invoices and showing them through the Goods and Services Tax Network (GSTN). Business invoices are reported to the GST portal using a common format.
An e-invoice draft shared by the government in August 2019 was later changed by the GST Council to comply with its regulations. The standard format not only simplifies compliance but also ensures interoperability between the GST ecosystems because it’s followed across industries.
Time Duration for Generating the E-invoice
E-invoices may be generated at any time and within an undefined time frame. It is recommended to create an e-invoice after the invoice date but before filing the GSTR-1 form.
If the AATO is more than ₹10 crore, e-invoicing must be completed within 30 days from the date the invoice is issued
Advantages of Using the E-invoice
Here are some different benefits of e-invoicing:
- A one-time report on B2B invoices while they are generated, reducing the number of formats for reporting.
- E-invoicing systems can keep most GSTR-1 data ready for filing.
- E-Invoice data can also be used to generate e-way bills.
- Generally, there is no need to reconcile the GST returns filed with the books.
- A supplier’s invoices can be tracked in real-time, and input tax credits can be applied more quickly. Additionally, it will make it easier to verify input tax credits.
- More useful automation and management of the tax-filing procedure.
- Decrease in the number of fakes as the tax management will also have access to data in real-time.
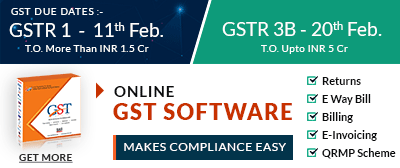
Why Should You Use Gen GST Software for E-invoicing?
SAG Infotech’s Gen GST Software works for returns filing, e-invoicing and e-billing purposes. The GST E-invoicing Software has lots of features, including IRN generation, manual input entry method, JSON validation check, cancellation of E-invoice, schema check etc. The software also has a facility to print your e-invoice using the print tab.
There are some additional features available in the software that handle all filings of GSTR-1, 3B, 4, 7, 8, 9, and 9A. Additionally, the company updated Gen GST software with new features such as the QRMP Scheme, E-invoice generation, and import/export capabilities. Software is also available on a cloud basis and is easily accessible anywhere by taxpayers. The company specialises in taxation and billing for CA and CS professionals
Step-by-Step Guide to Integrate E-invoice Via Gen GST Software:
Step 1: First, Install the Gen GST E-invoicing and Return Software on Your Laptop and PC.
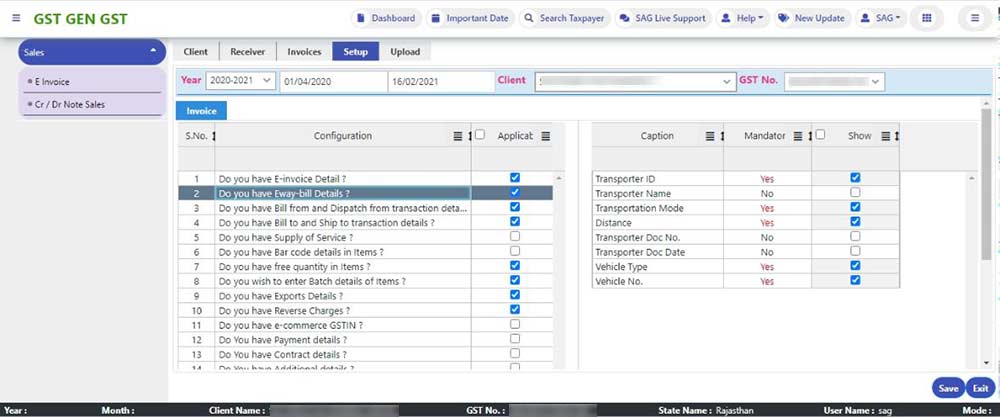
Step 2: After that, go to the ‘SETUP’ Tab.
Step 3: Here we have to select Configuration first, it automatically ticks the mandatory field, & there is the option of ticking the non-mandatory field. After that, click on the save button.
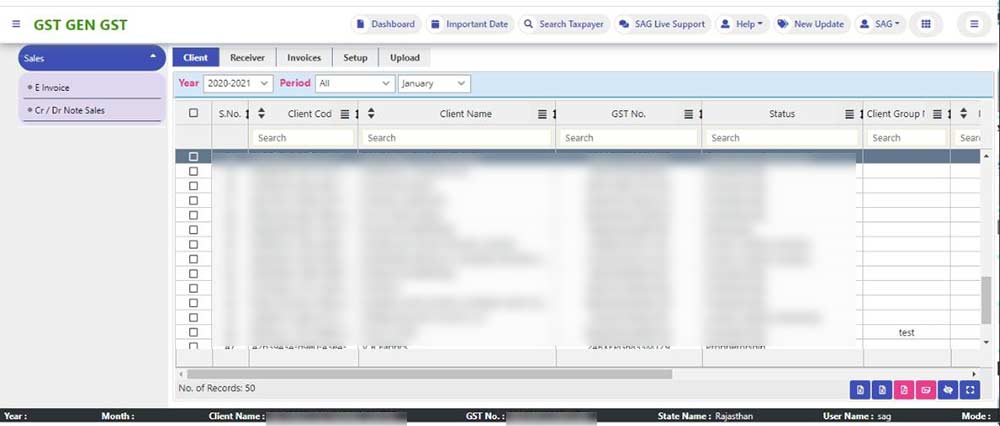
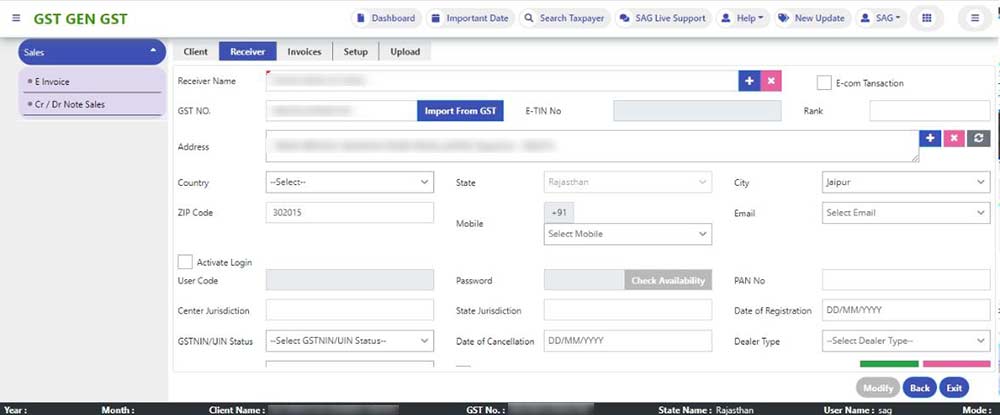
Step 4: After that, we can add them here Receiver by clicking on the Add button.
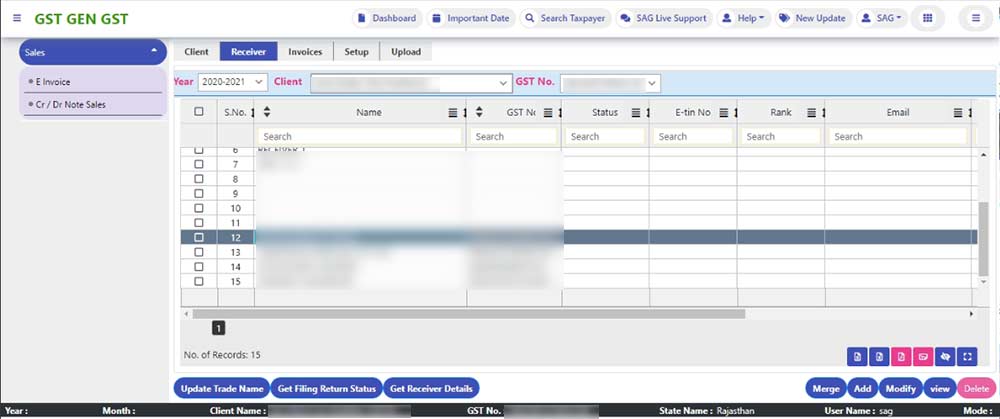
Step 5: Now we need to mention the GST no. & then click on import from GST. After that, we click on the save button.
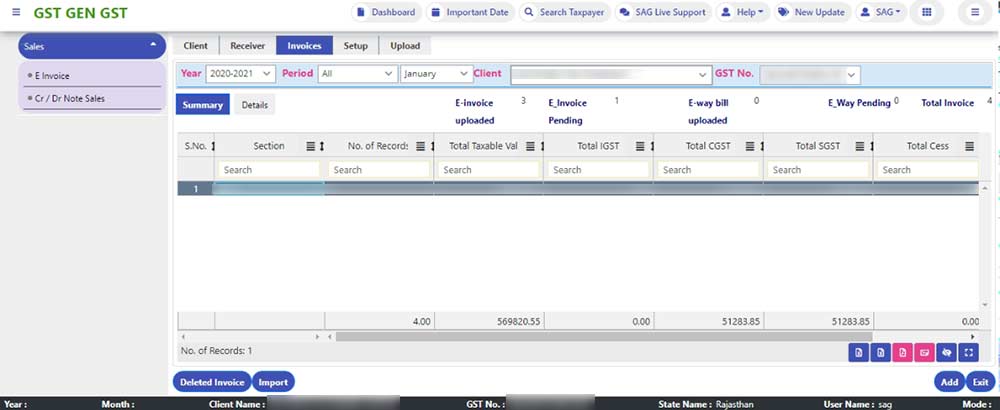
Step 6: Next, we go to Invoices, where it will show E-invoice uploaded/pending, E-waybill uploaded/pending & Total Invoices. After that, we click on the Import button.
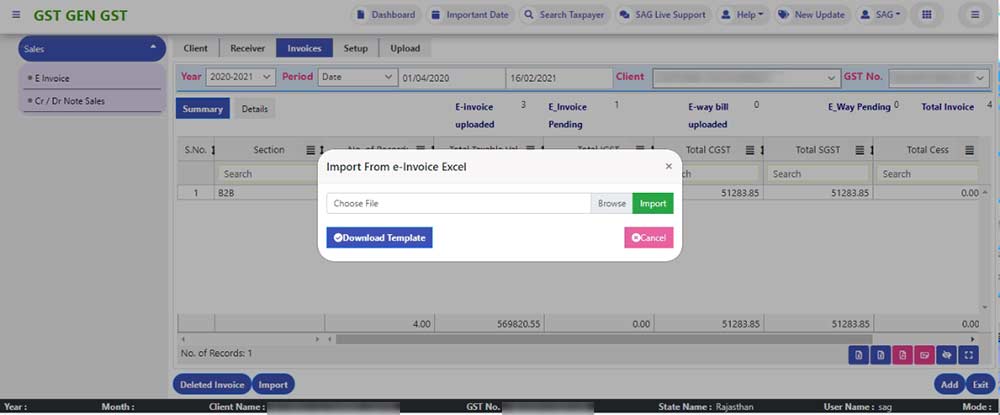
Step 7: Here, we need to choose an Excel file and then click on the Import button.
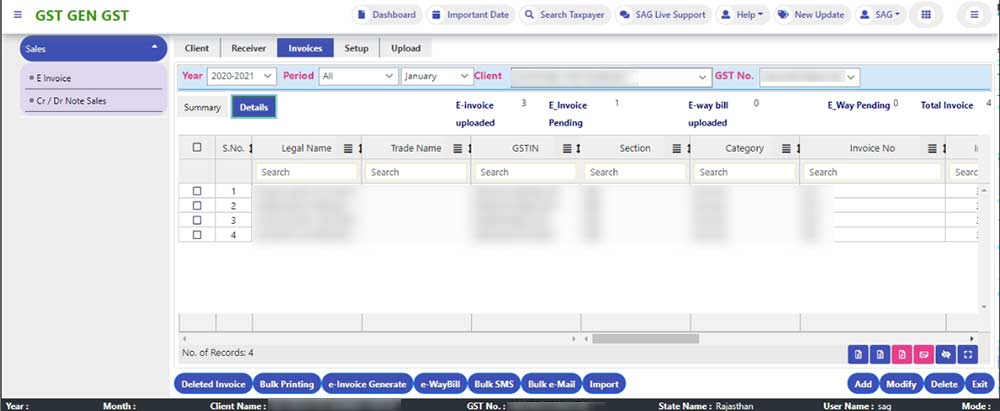
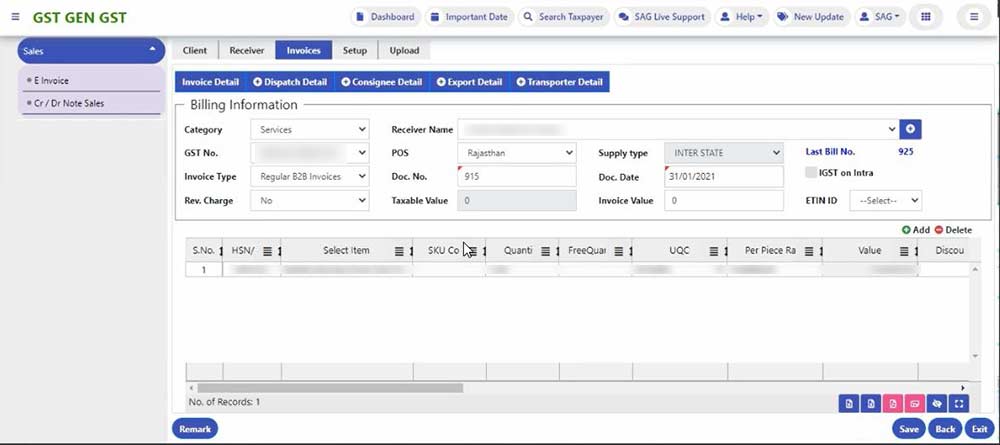
Step 8: For adding an Invoice, click on the ADD button. Here, we can enter the required details.
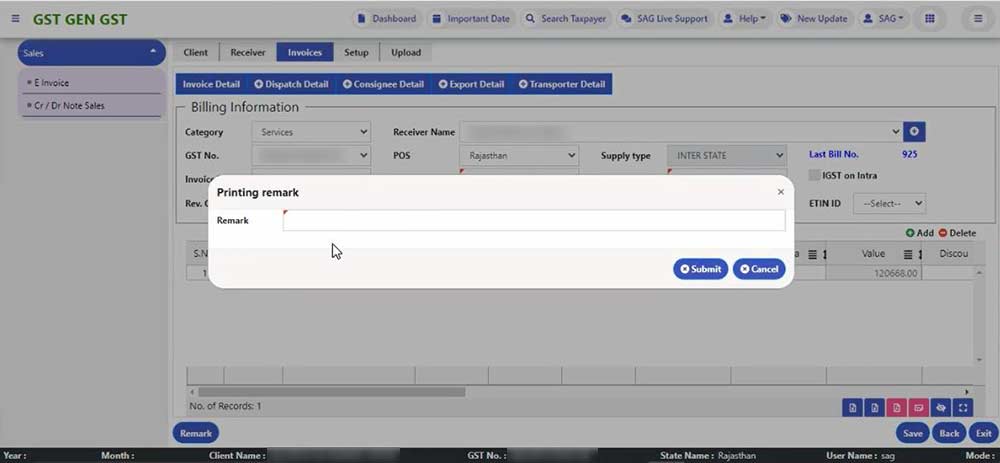
Step 9: Add a Remark after that click on the save button.
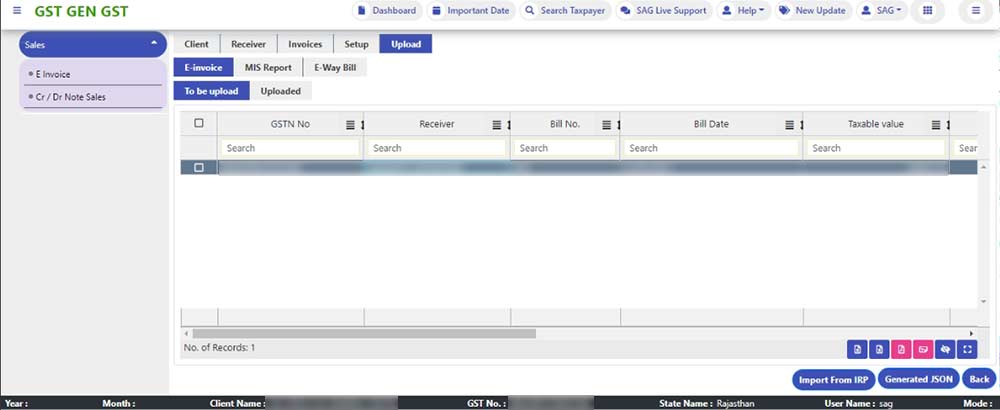
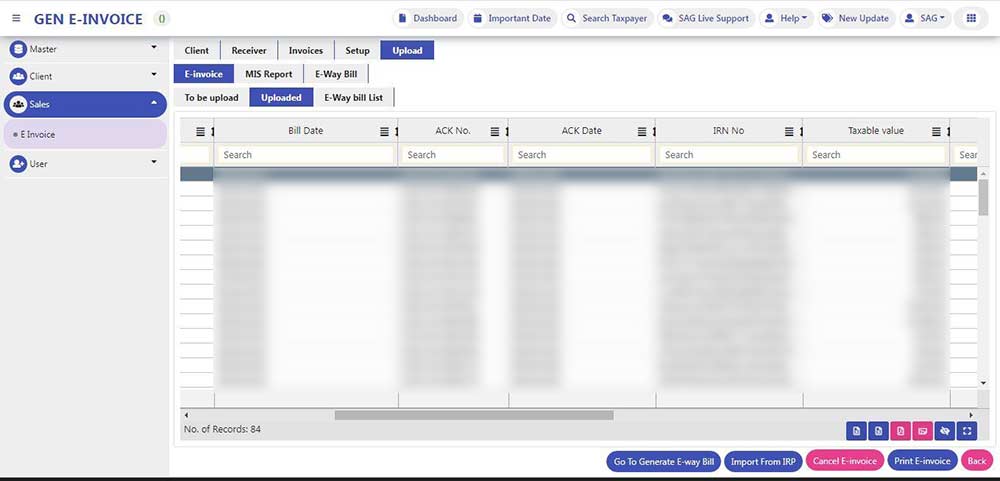
Step 10: After adding the Invoice, we need to upload the same to the E-invoice portal. Invoices that are not uploaded on the portal are showing under the “To Be Uploaded” tab, & Invoices that are already uploaded on the portal will be shown under the “Uploaded” tab. After that, we need to click on the Generate JSON file button.
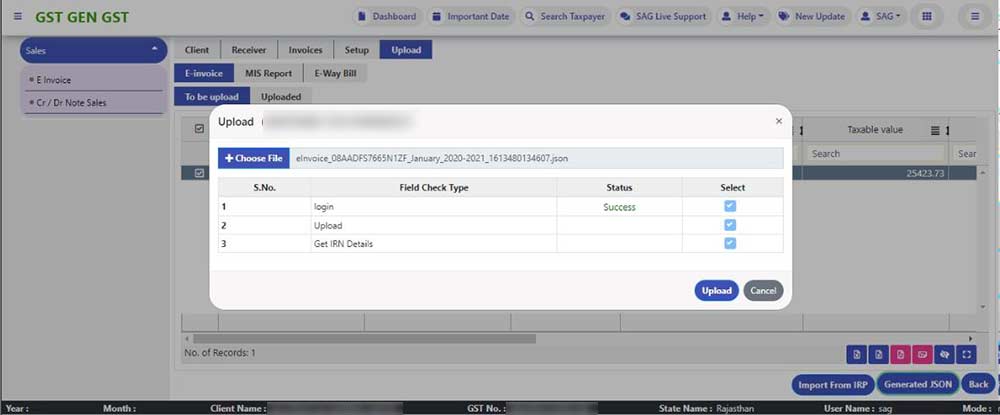
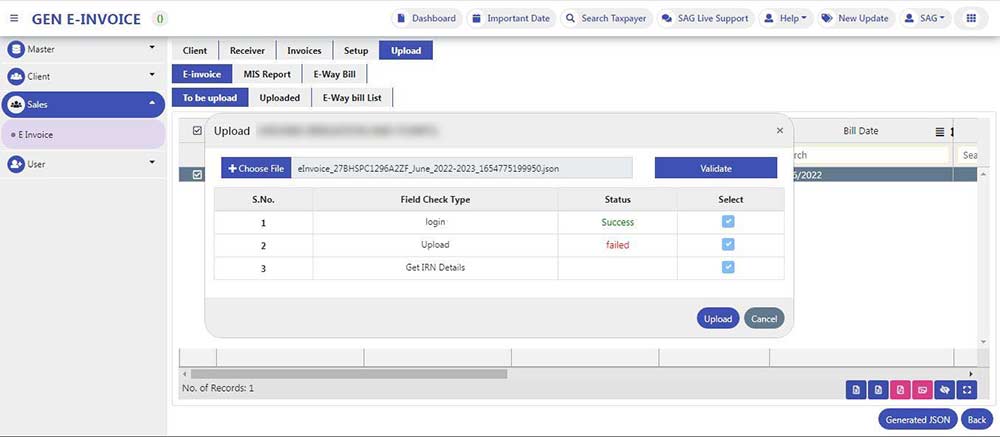
Step 11: After that, the following validation screen will appear, then just click on the Upload button to generate an E-Invoice on the portal.
Step 12: After uploading the JSON file on the E-Invoice portal, follow the IRN No. will appear on the screen.
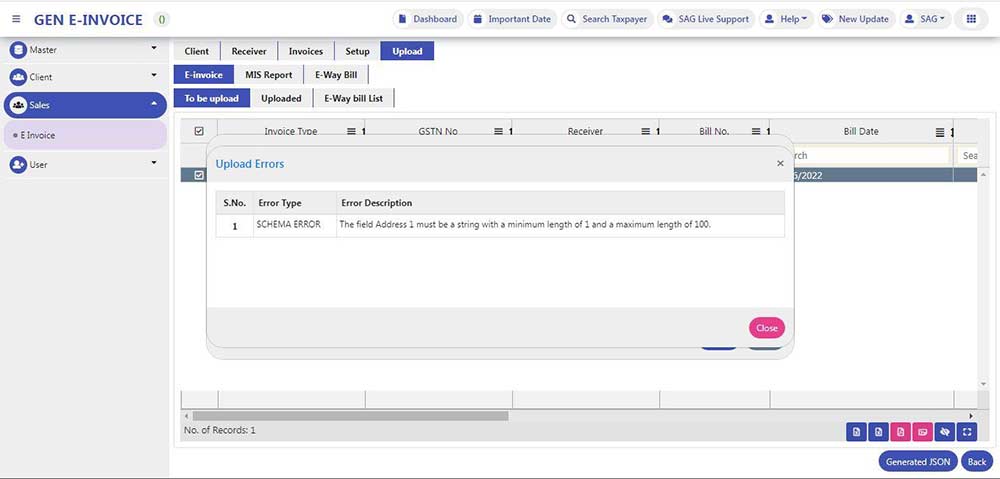
Step 13: In Case there is an error in the JSON file, then On Upload, a failed message will be shown.
Step 14: Click on Dismiss to view the schema error.
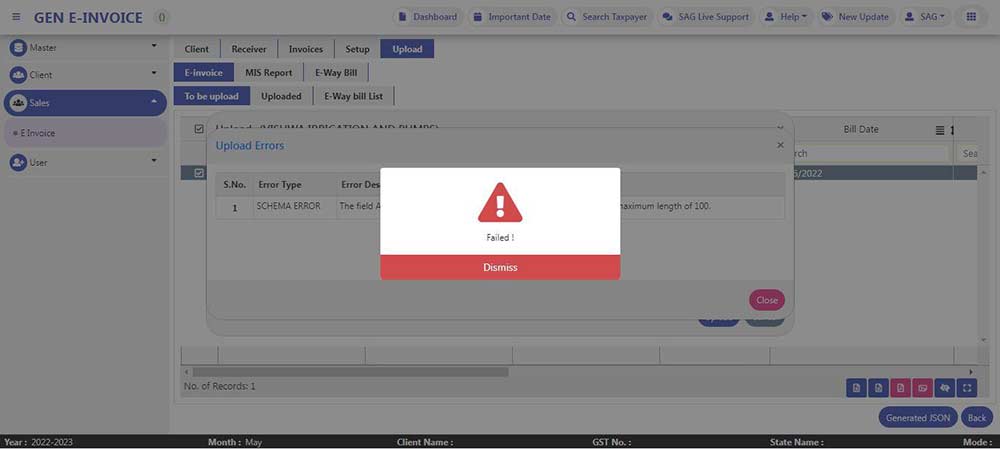
Step 15: A pop-up window will be opened to show Schema Errors. After that, click on the close button.